
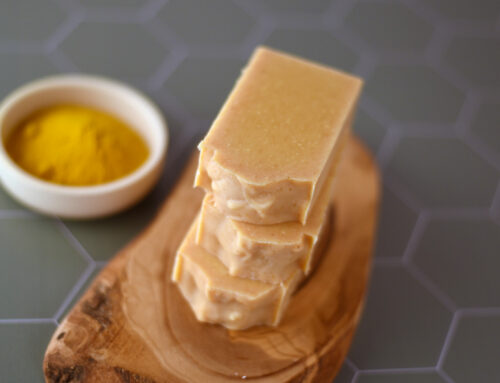
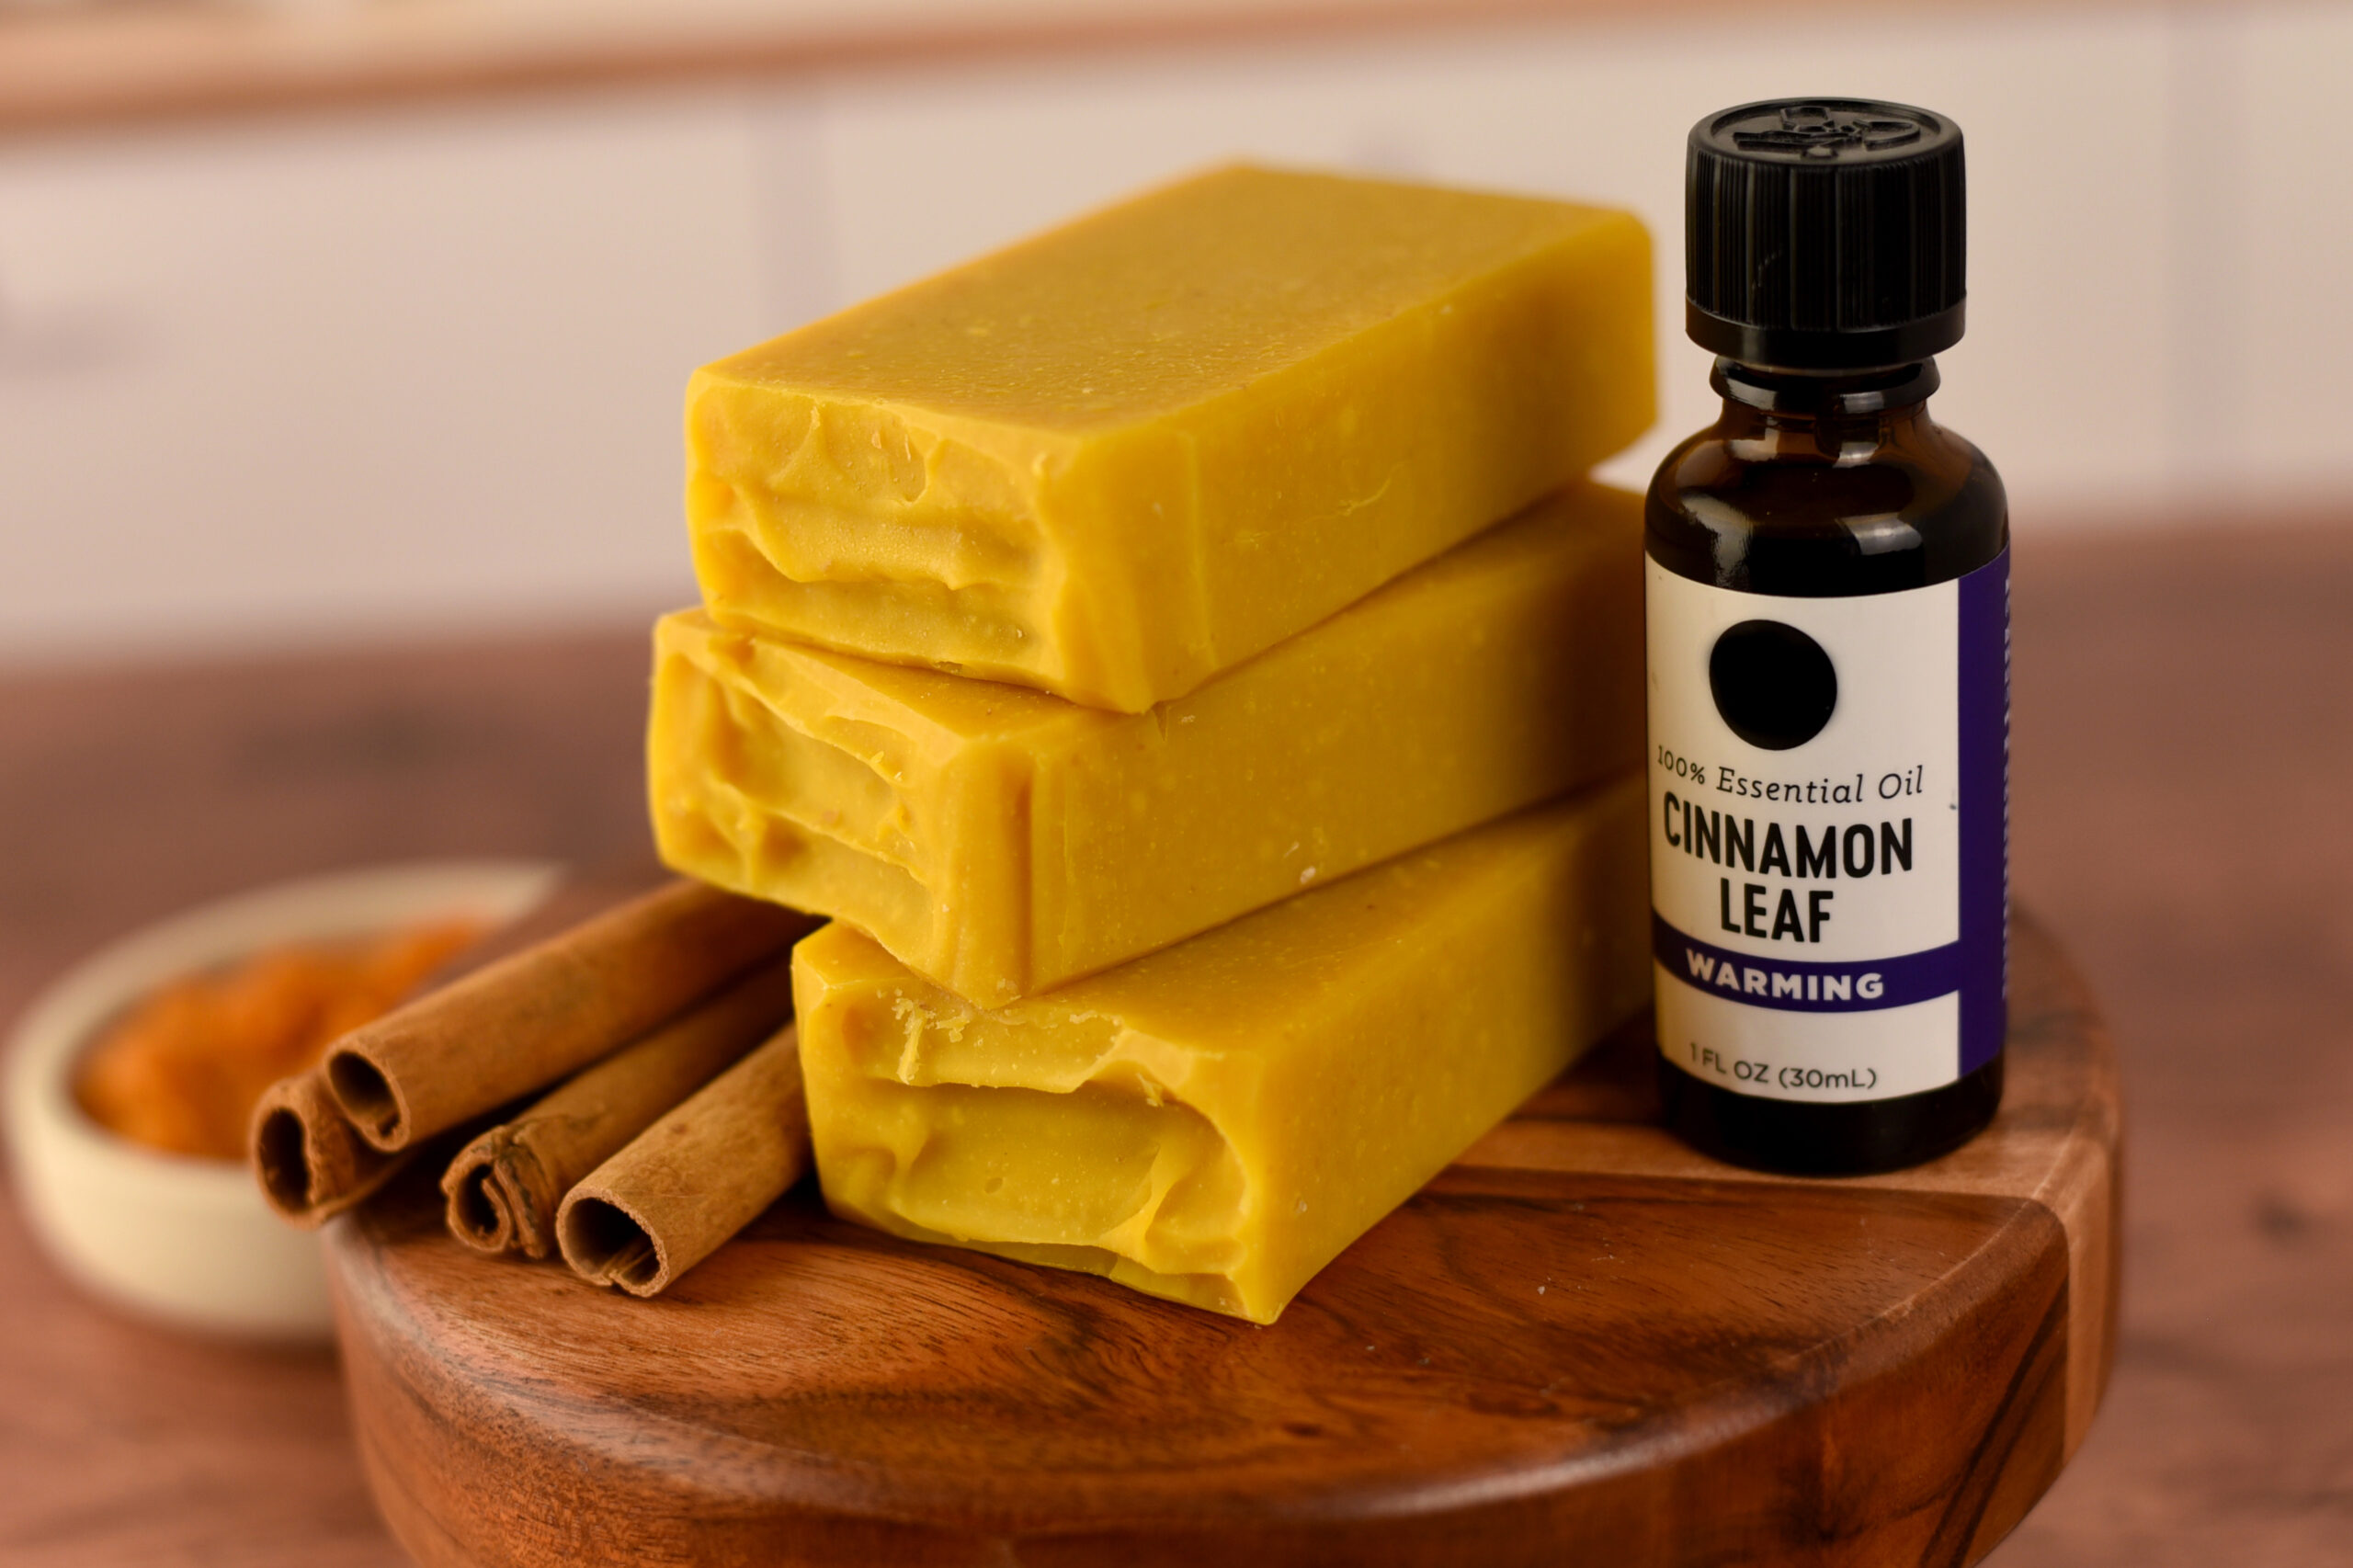
Ahhhhhh… Who doesn’t like to break in a new soapmaking mold? Join me, won’t you? Let’s do this.
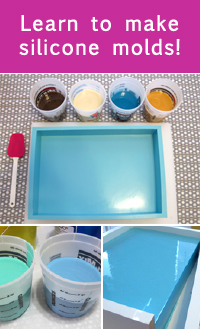
(Want to make your own silicone slab mold? Get the eBook here.)
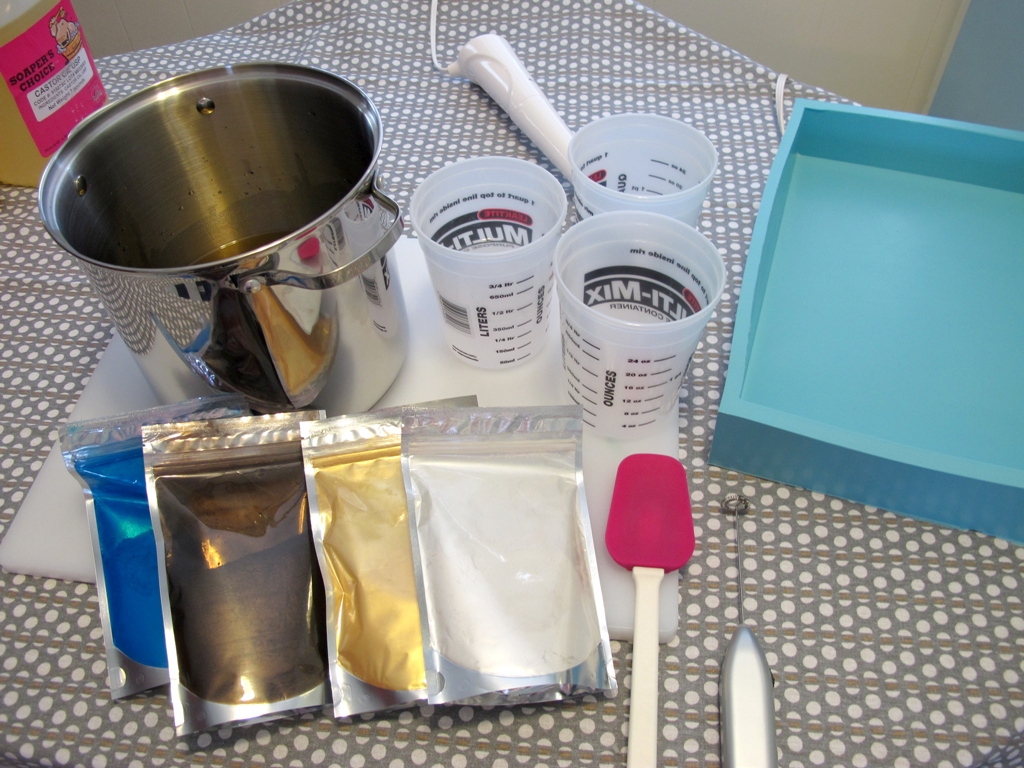
The Recipe
Olive oil – 16 oz
Coconut oil – 16.8 oz
Avocado oil – 4 oz
Castor oil – 3.2 oz
Rice bran oil – 4 oz
Shea butter – 4 oz
Lye – 6.82 oz
Water – 12 oz
Colorants (from The Conservatorie)
Peacock Blue Mica
Cupreous Brown Mica
Olympic Gold Mica
Shimmer White Satin Mica
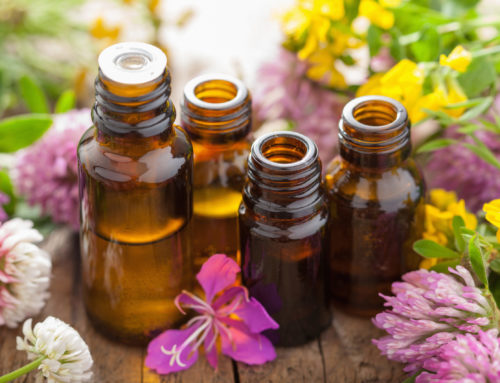
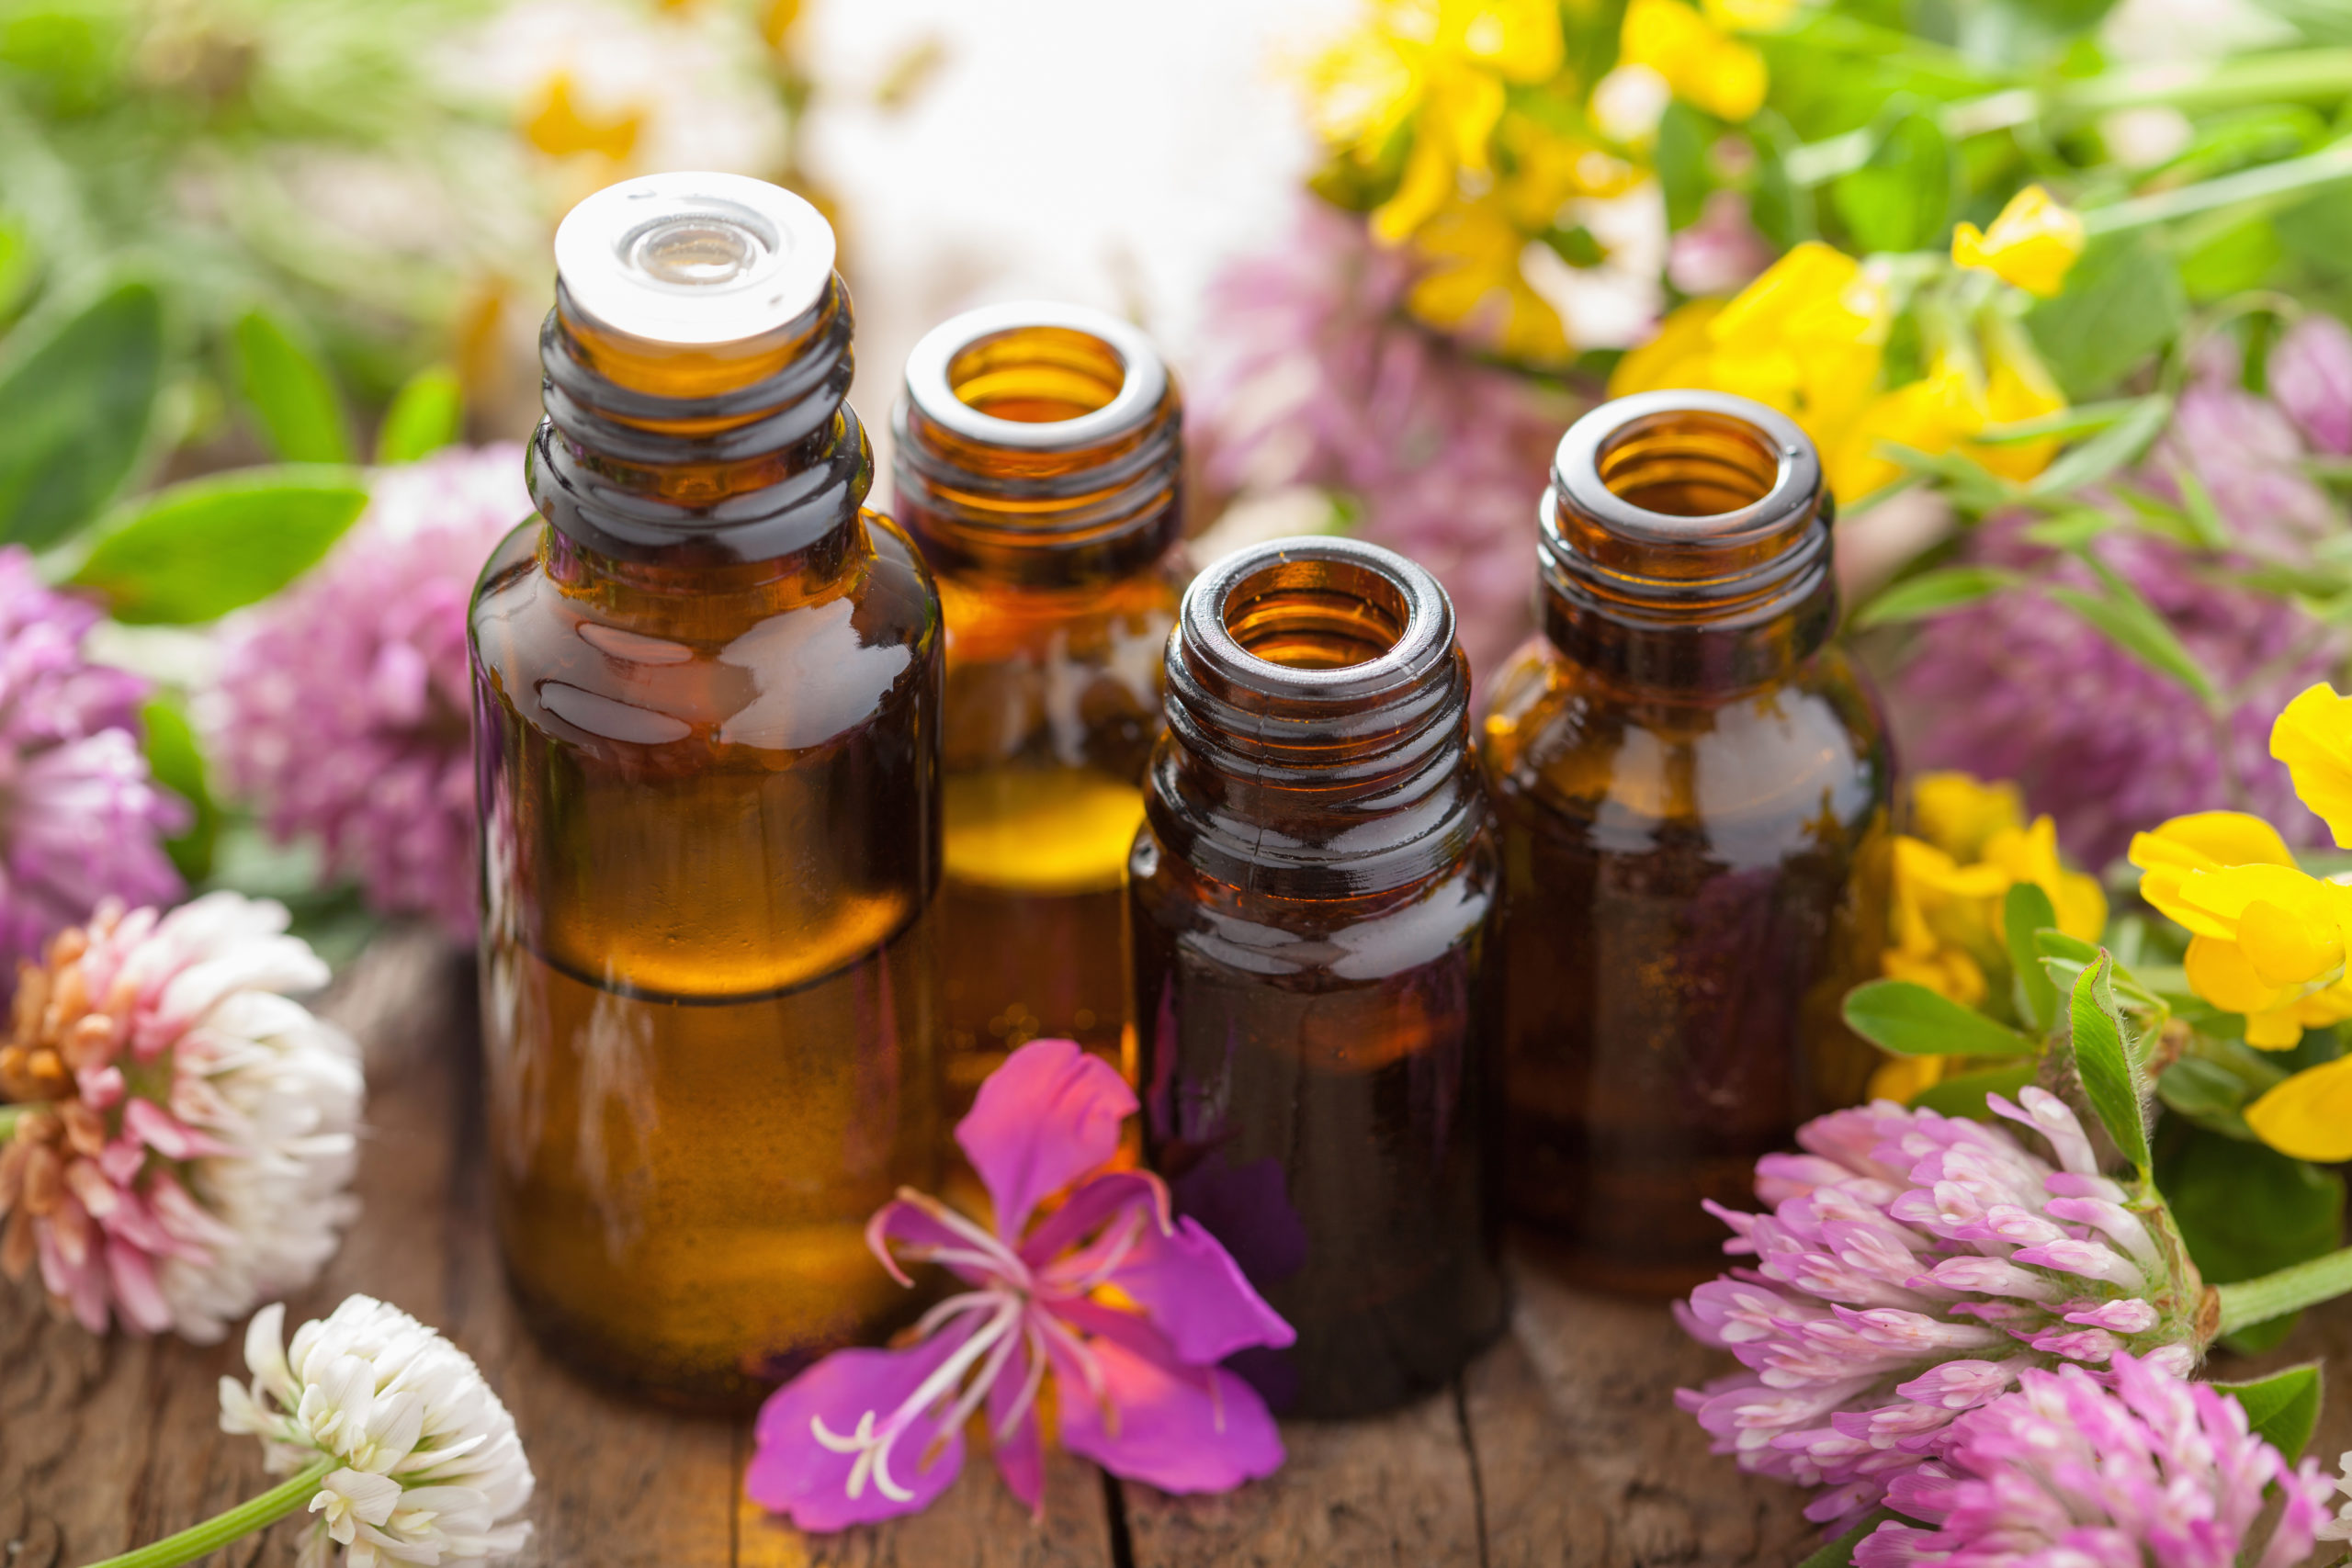
Scent
.5 oz Anise essential oil
.5 oz Cornmint essential oil
Swirling Tools
A spatula
Step 1
Weigh out the lye and water into two separate containers.
Gear up in your goggles and gloves before you handle the lye.
Step 2
Pour the lye into the water slowly while stirring. Set your lye solution to the side to cool down.
Step 3
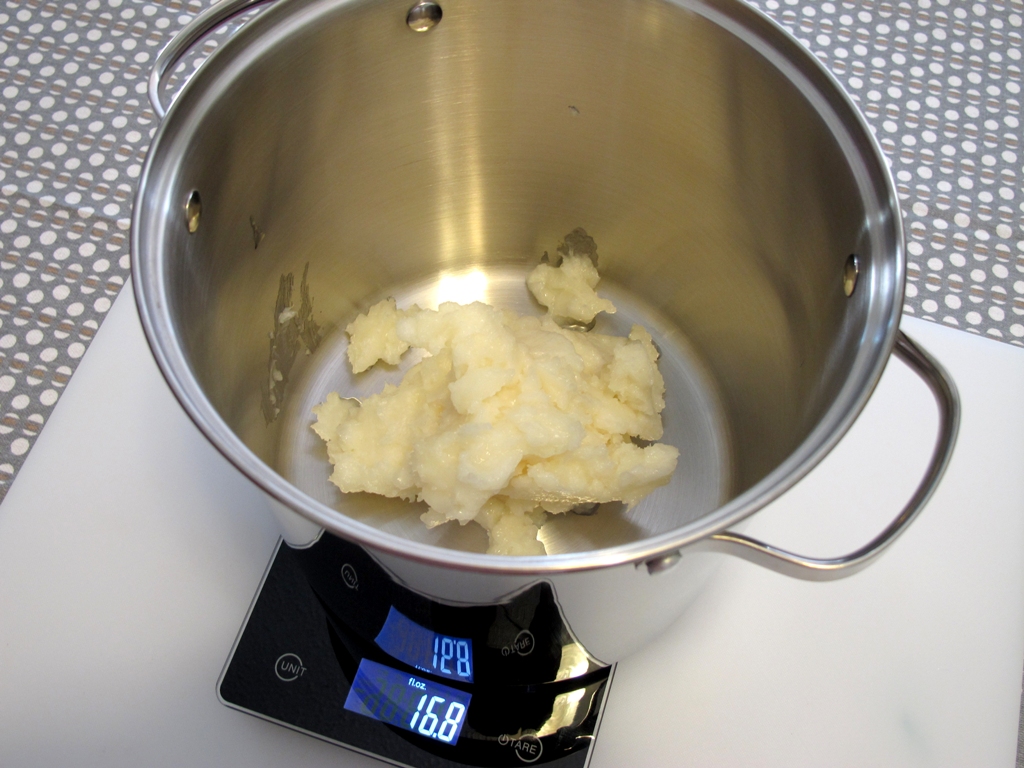
Measure out the coconut oil and shea butter and melt.
Step 4
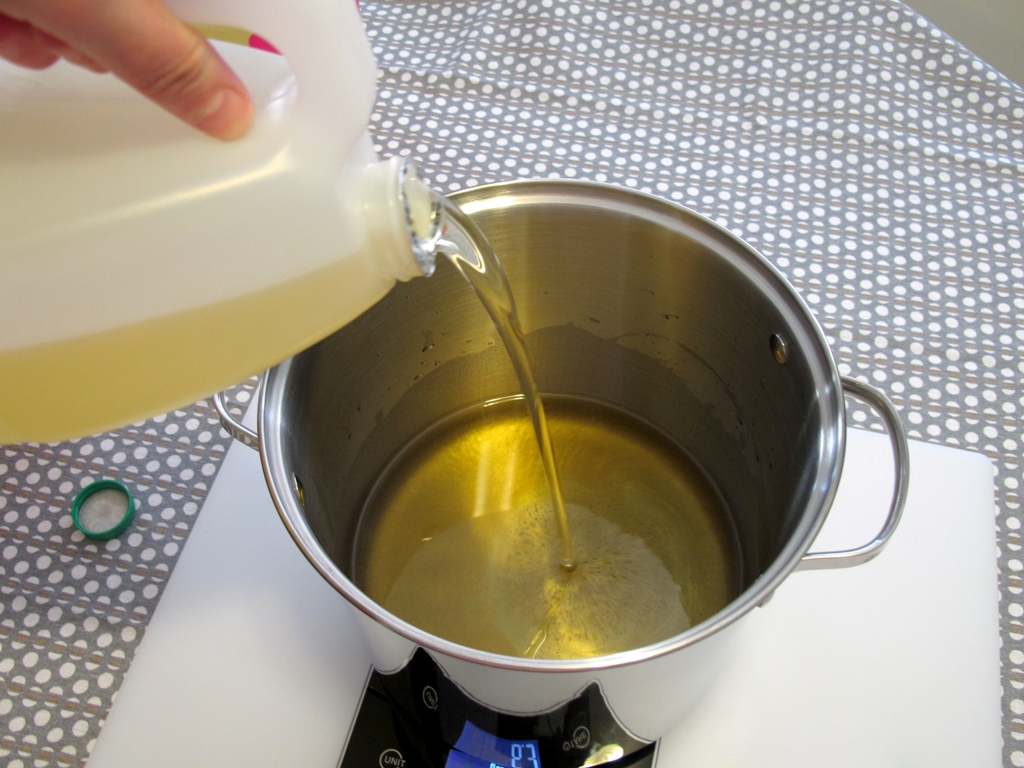
Measure out the liquid oils into the melted oils.
Step 5
Add the essential oils to the melted oils. I used .5 oz of anise essential oil and .5 oz of cornmint essential oil.
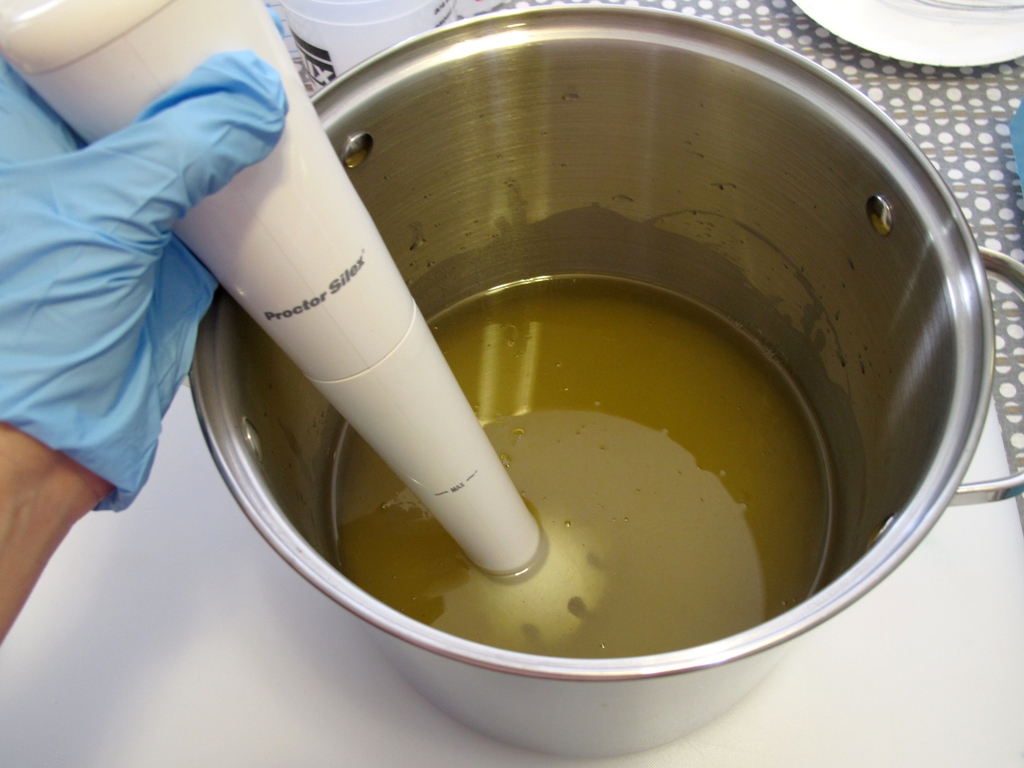
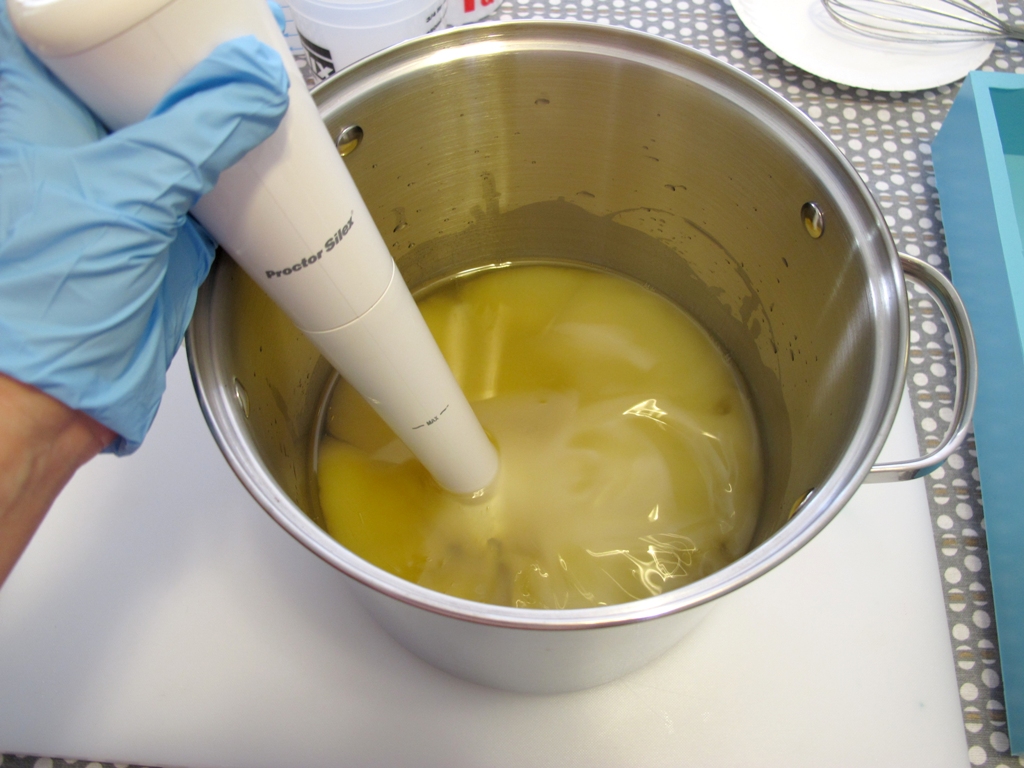
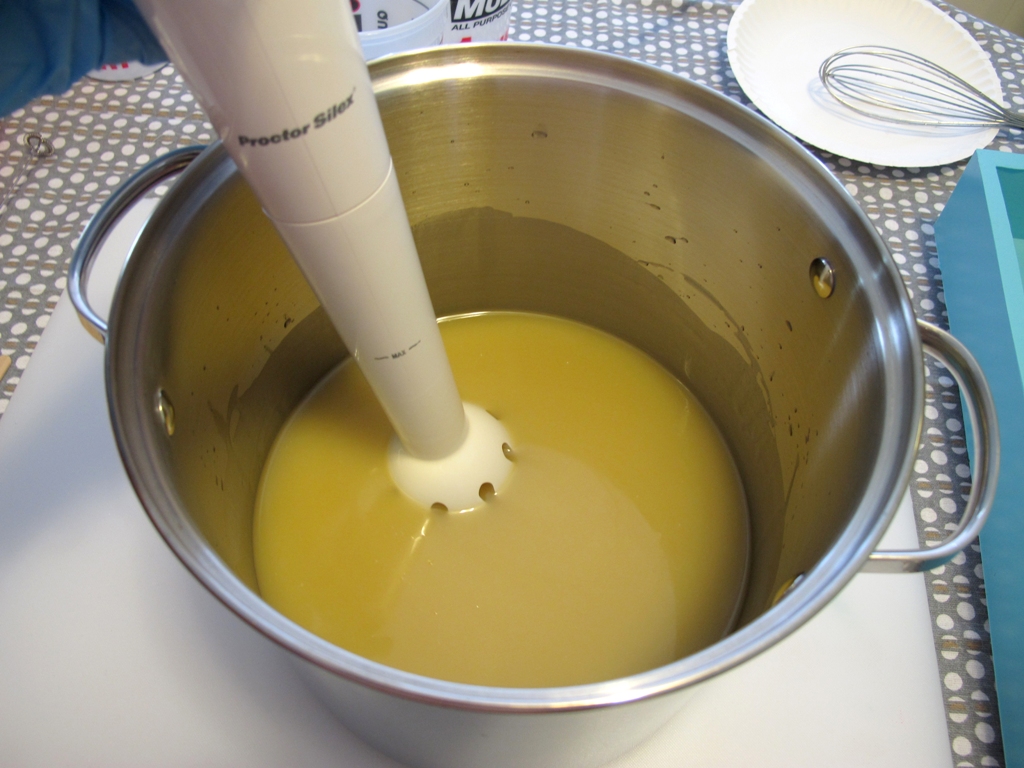
Step 6
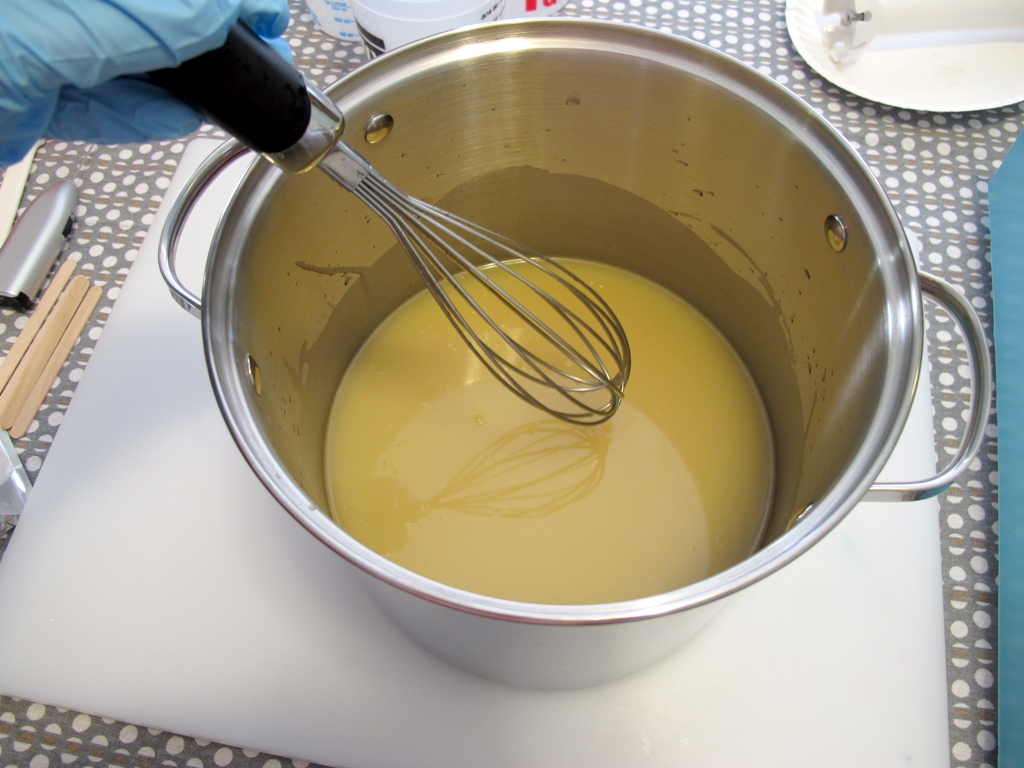
Time to stickblend!
Gear up in your goggles and gloves if you took them off to prepare the oils.
Touch the outside of both the oil container and the lye container. They should feel warm but not hot. If they feel hot, then let them sit for a bit longer. Aim for a temperature of 90-110 for the oils and lye. If the lye is a bit cooler you shouldn’t have any problems…you just don’t want it too hot.
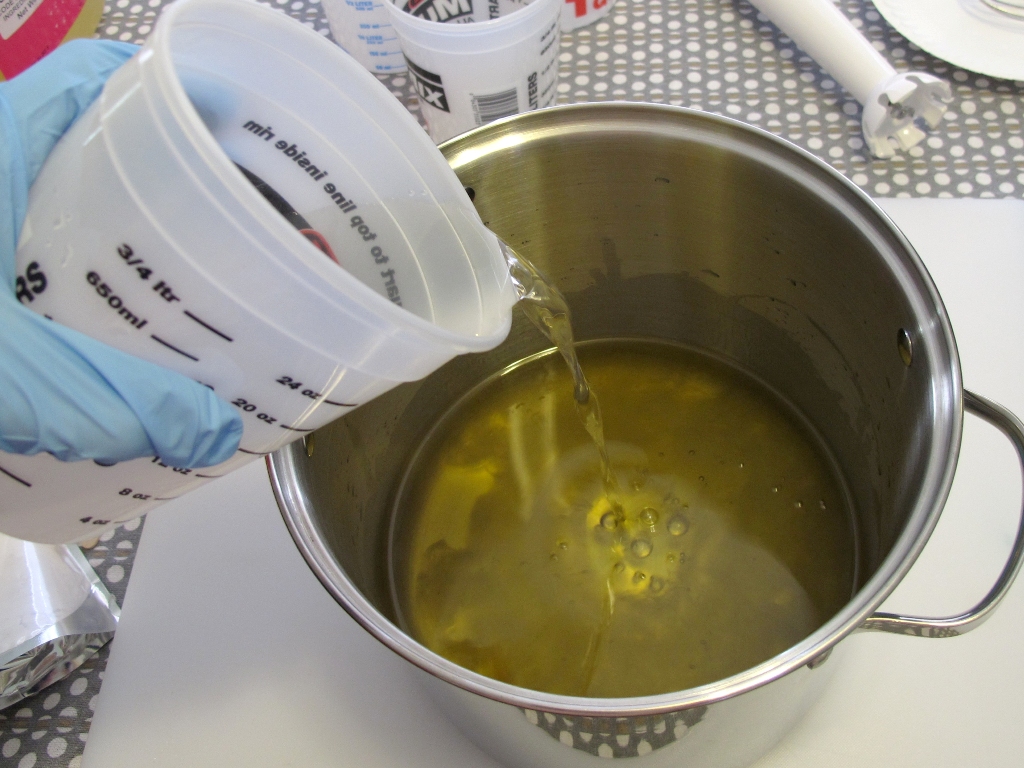
Pour the lye solution into the melted oils.
Stickblend until you get to a stable emulsion. Do not reach a visible trace or you have gone too far.
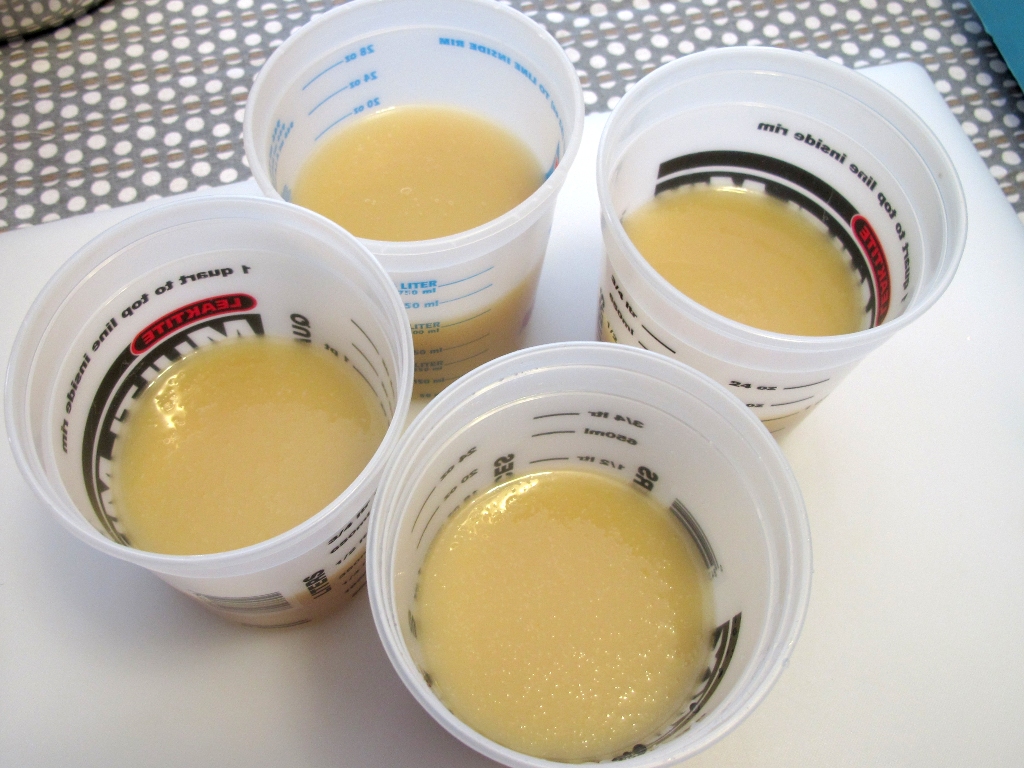
Divide the soap mixture into four containers (or however many colors you will be doing). You can divide it evenly or you can do more of certain colors if you want and less of others.

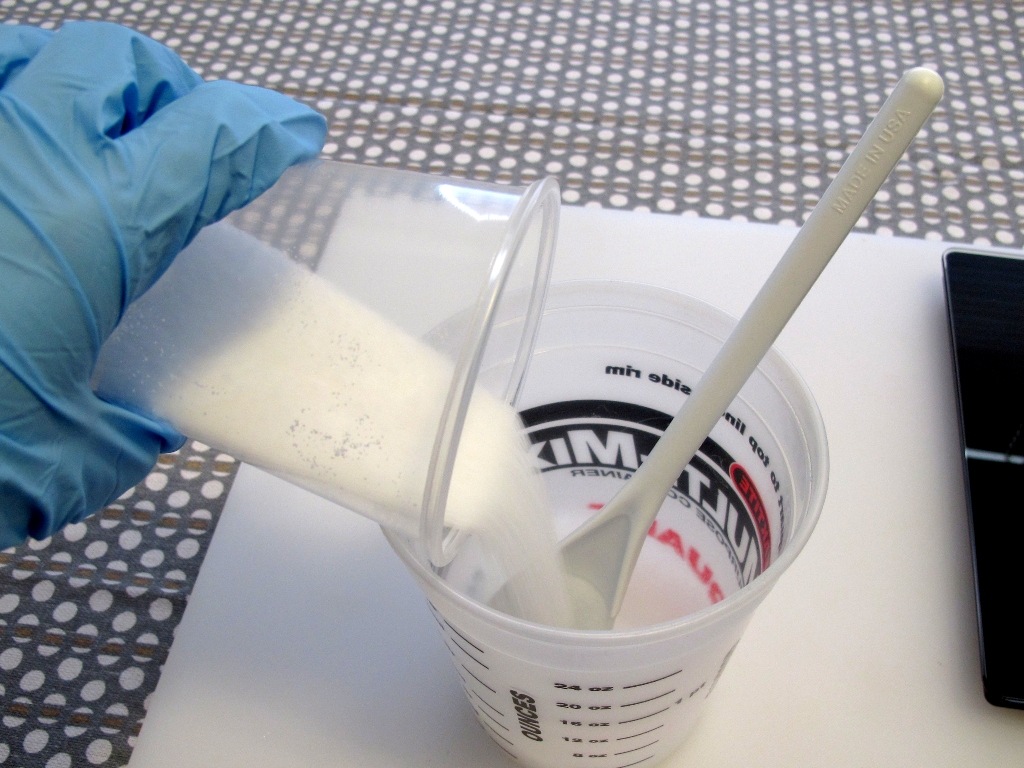
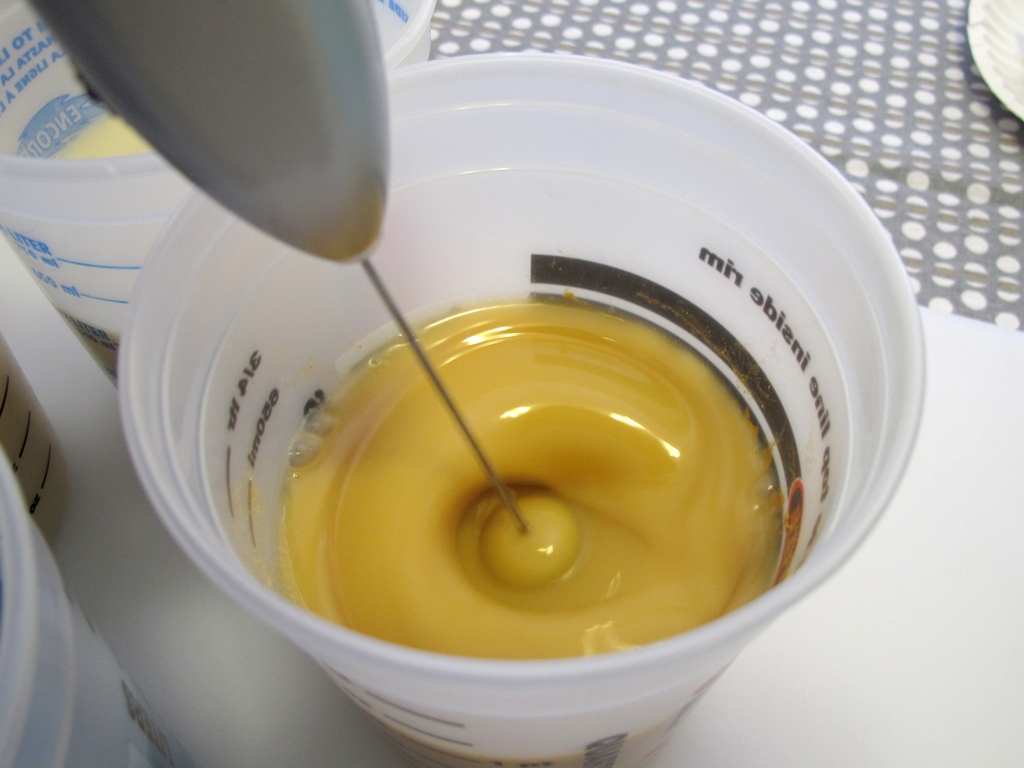
Add about two teaspoons of mica to each container. You might need more or less depending on the depth of color you want to achieve.
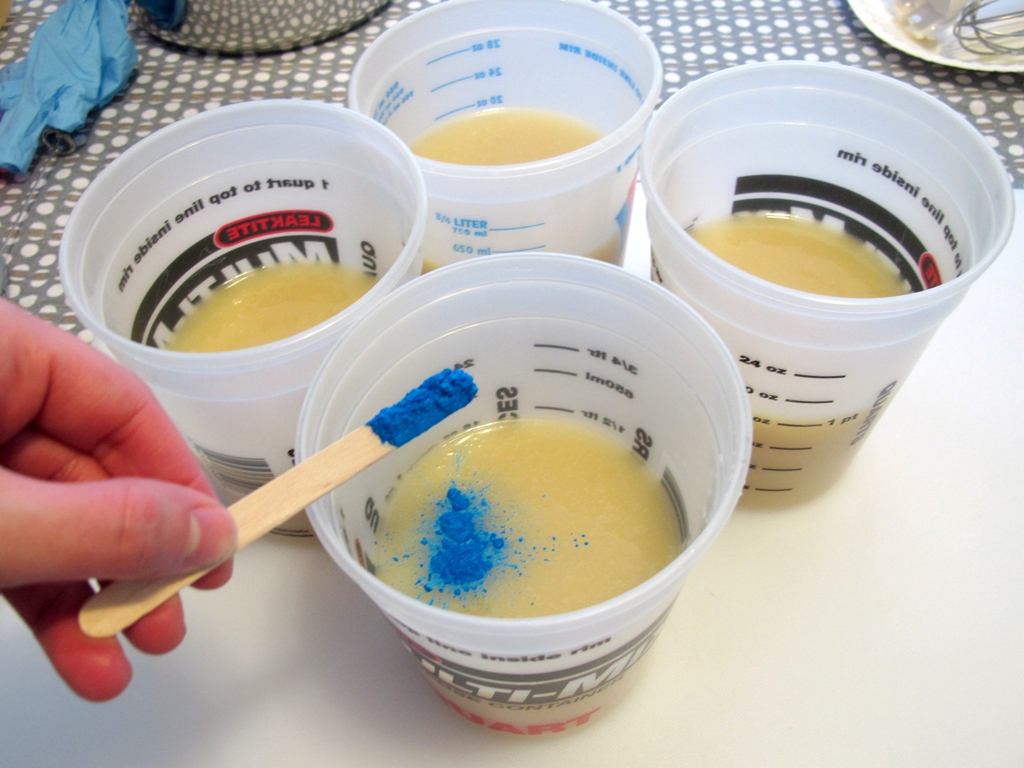
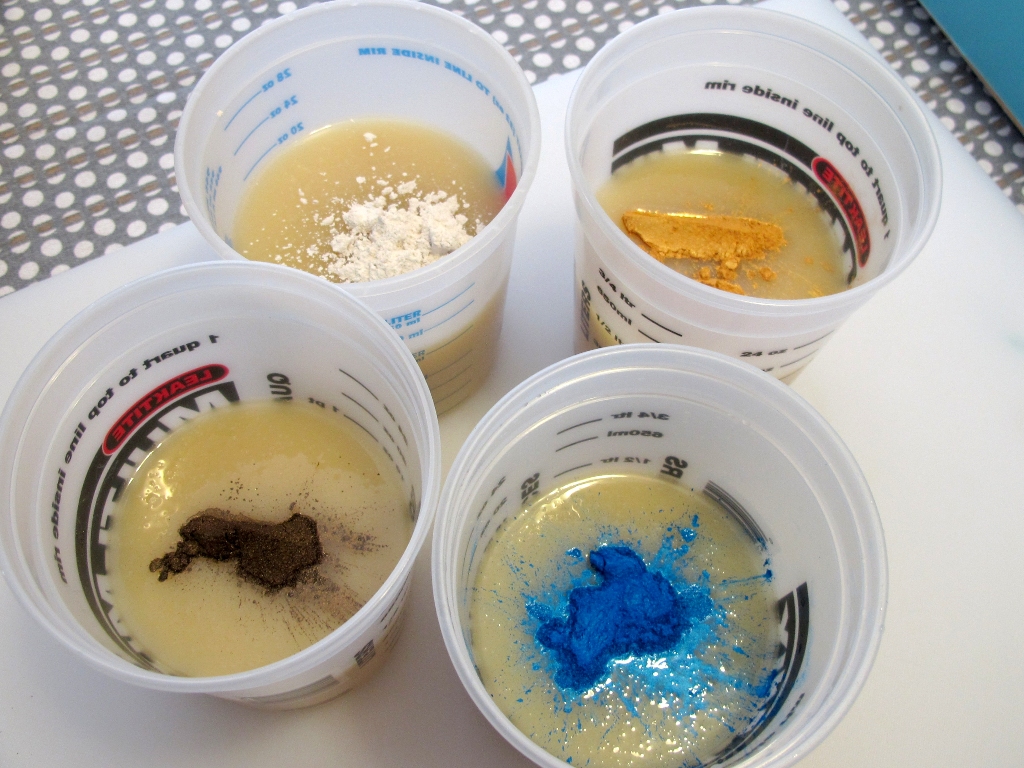
Use a spoon or mini-mixer to mix the color in. Make sure there aren’t any clumps.


When we pour this swirl we want all of the lines to go in one direction. So pour your first color.
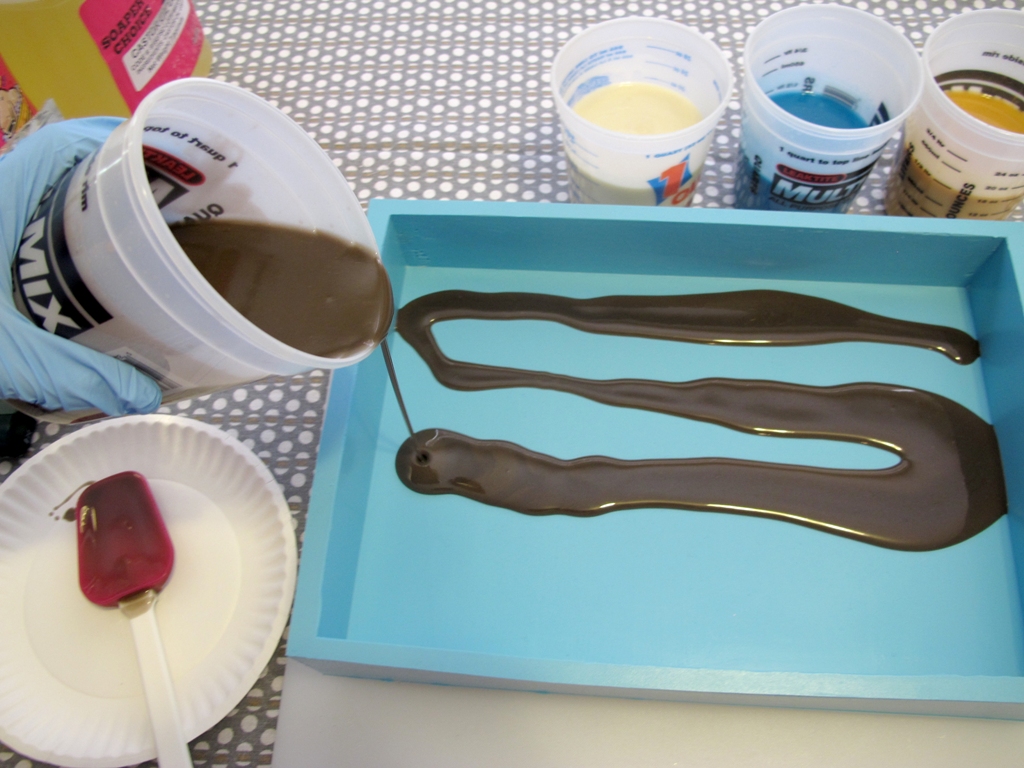
Pour the next color.
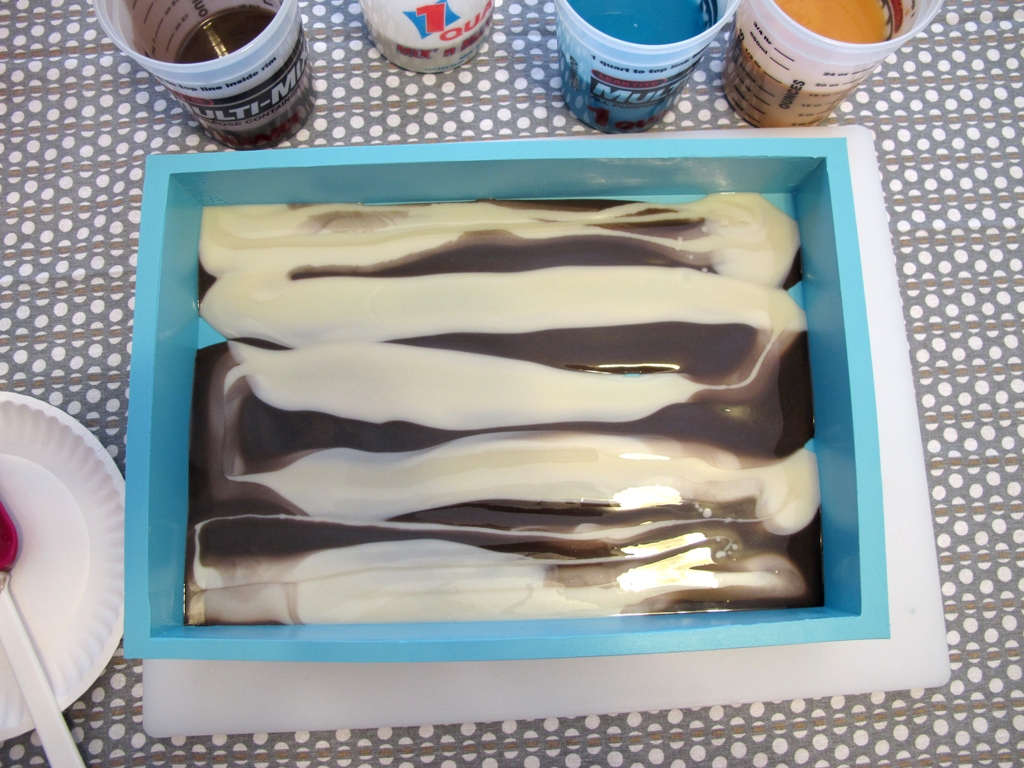
Keep doing this until you fill the mold up.


Be sure the top layers you pour has a little of each color.
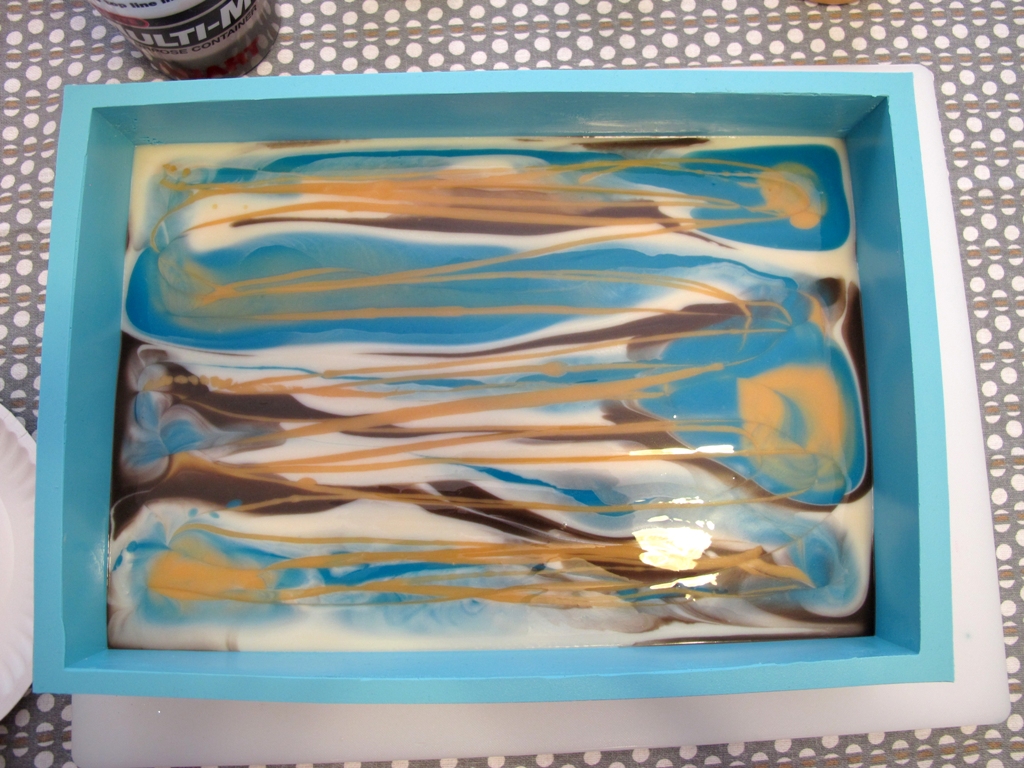
Grab your spatula! It is time to swirl! Use the motion below to break through the lines to swirl.

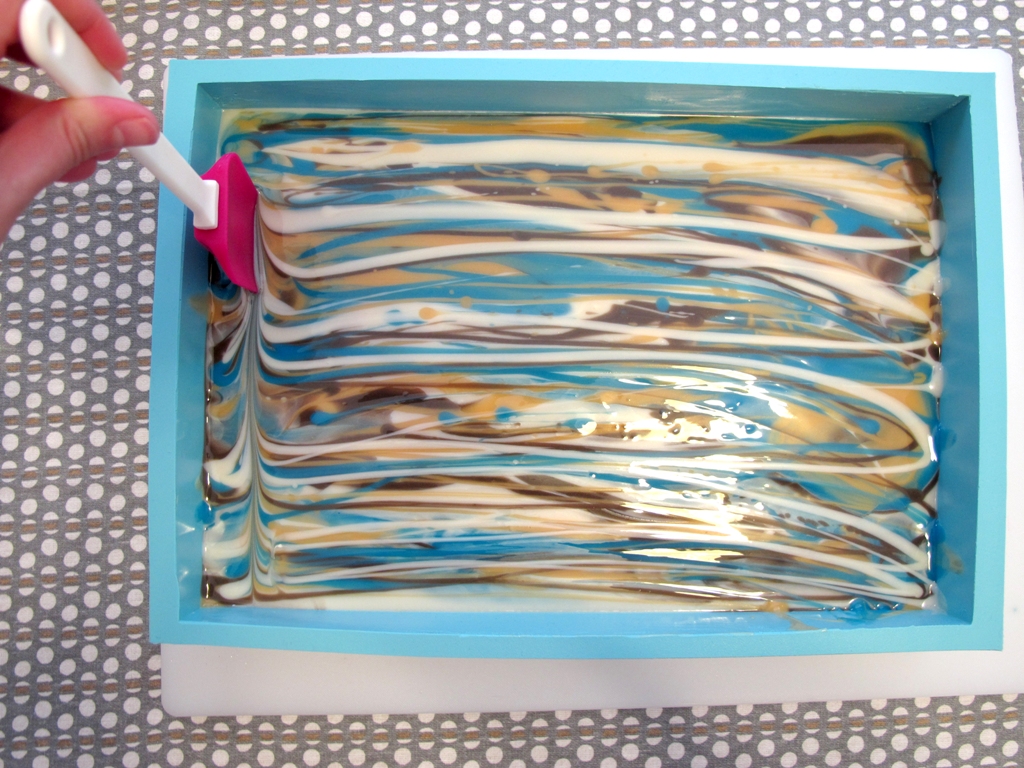
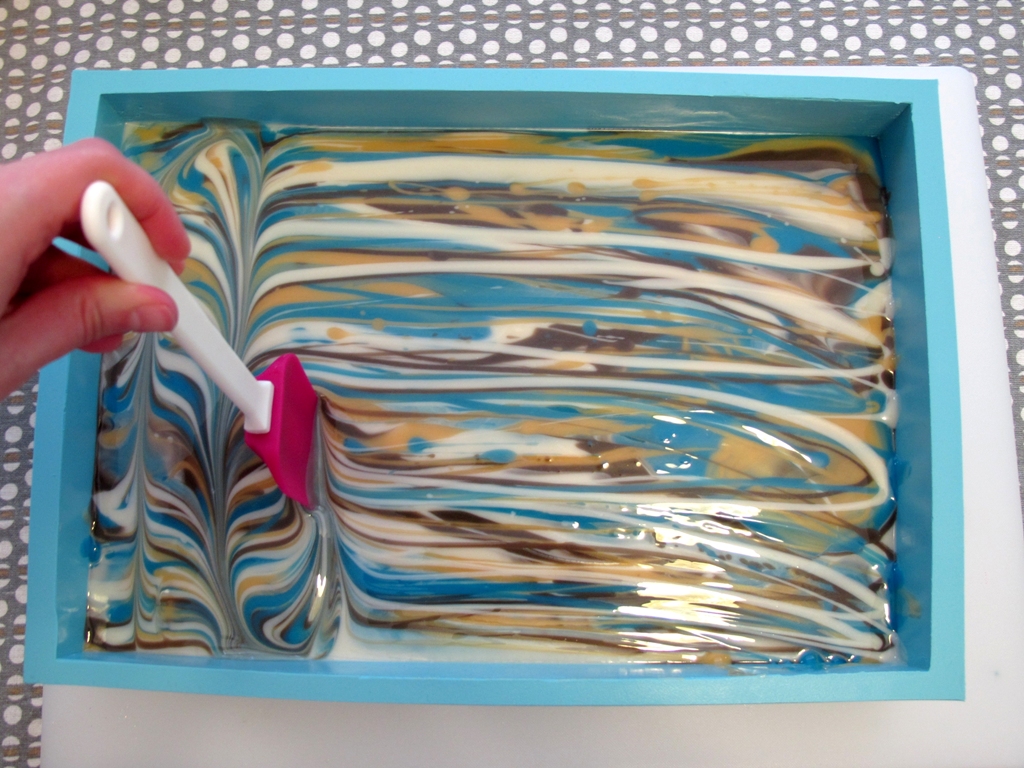
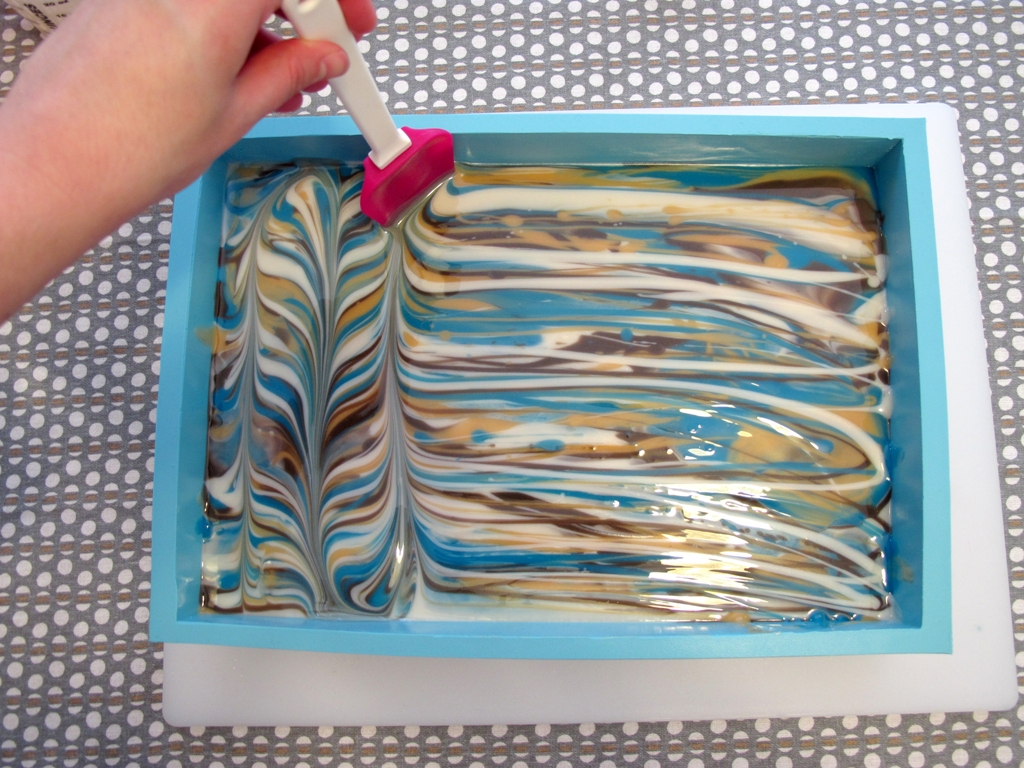
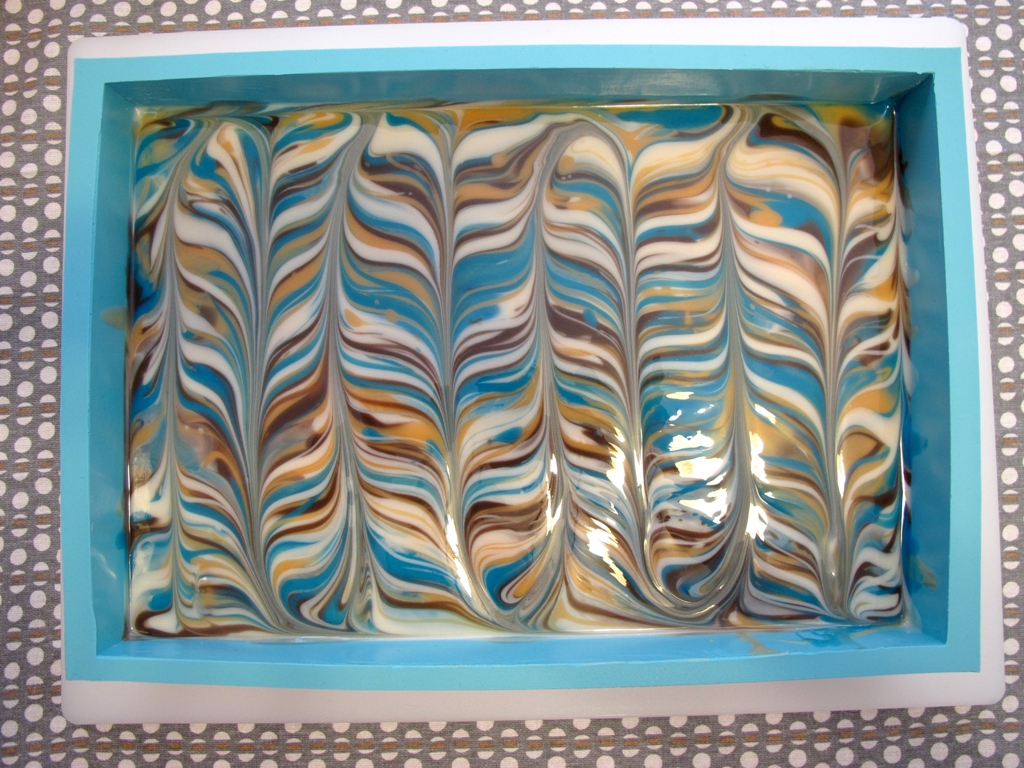
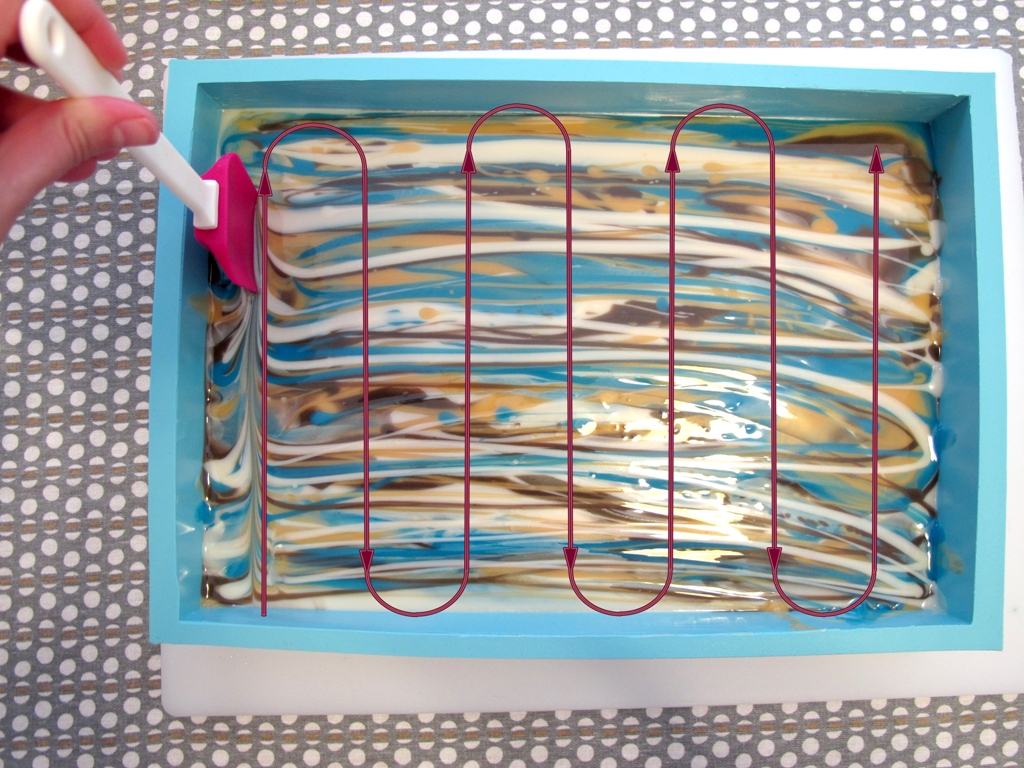
Here is the motion that I used. But…the cool thing about swirling is that you can pretty much do whatever you want and still get something awesome!
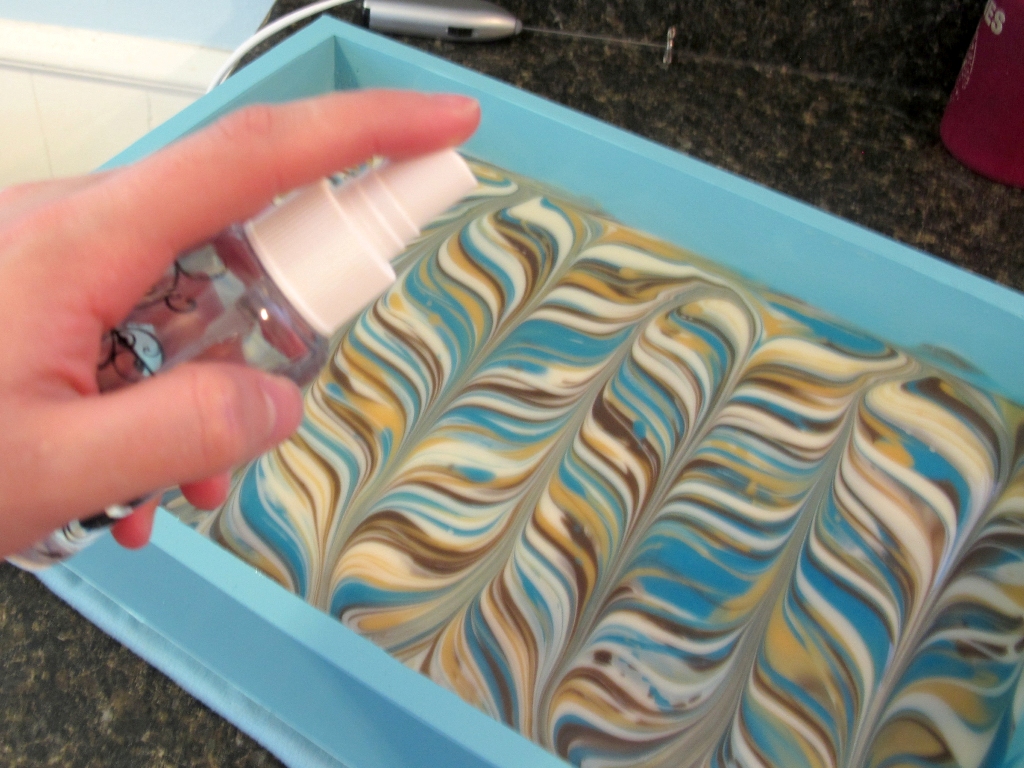
To prevent ash, spray with alcohol (any type- try to find 90%) about 10 minutes after you swirl. Then again in 30 minutes and again in 1 hour.
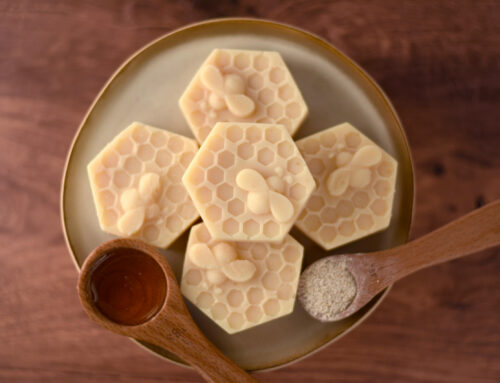
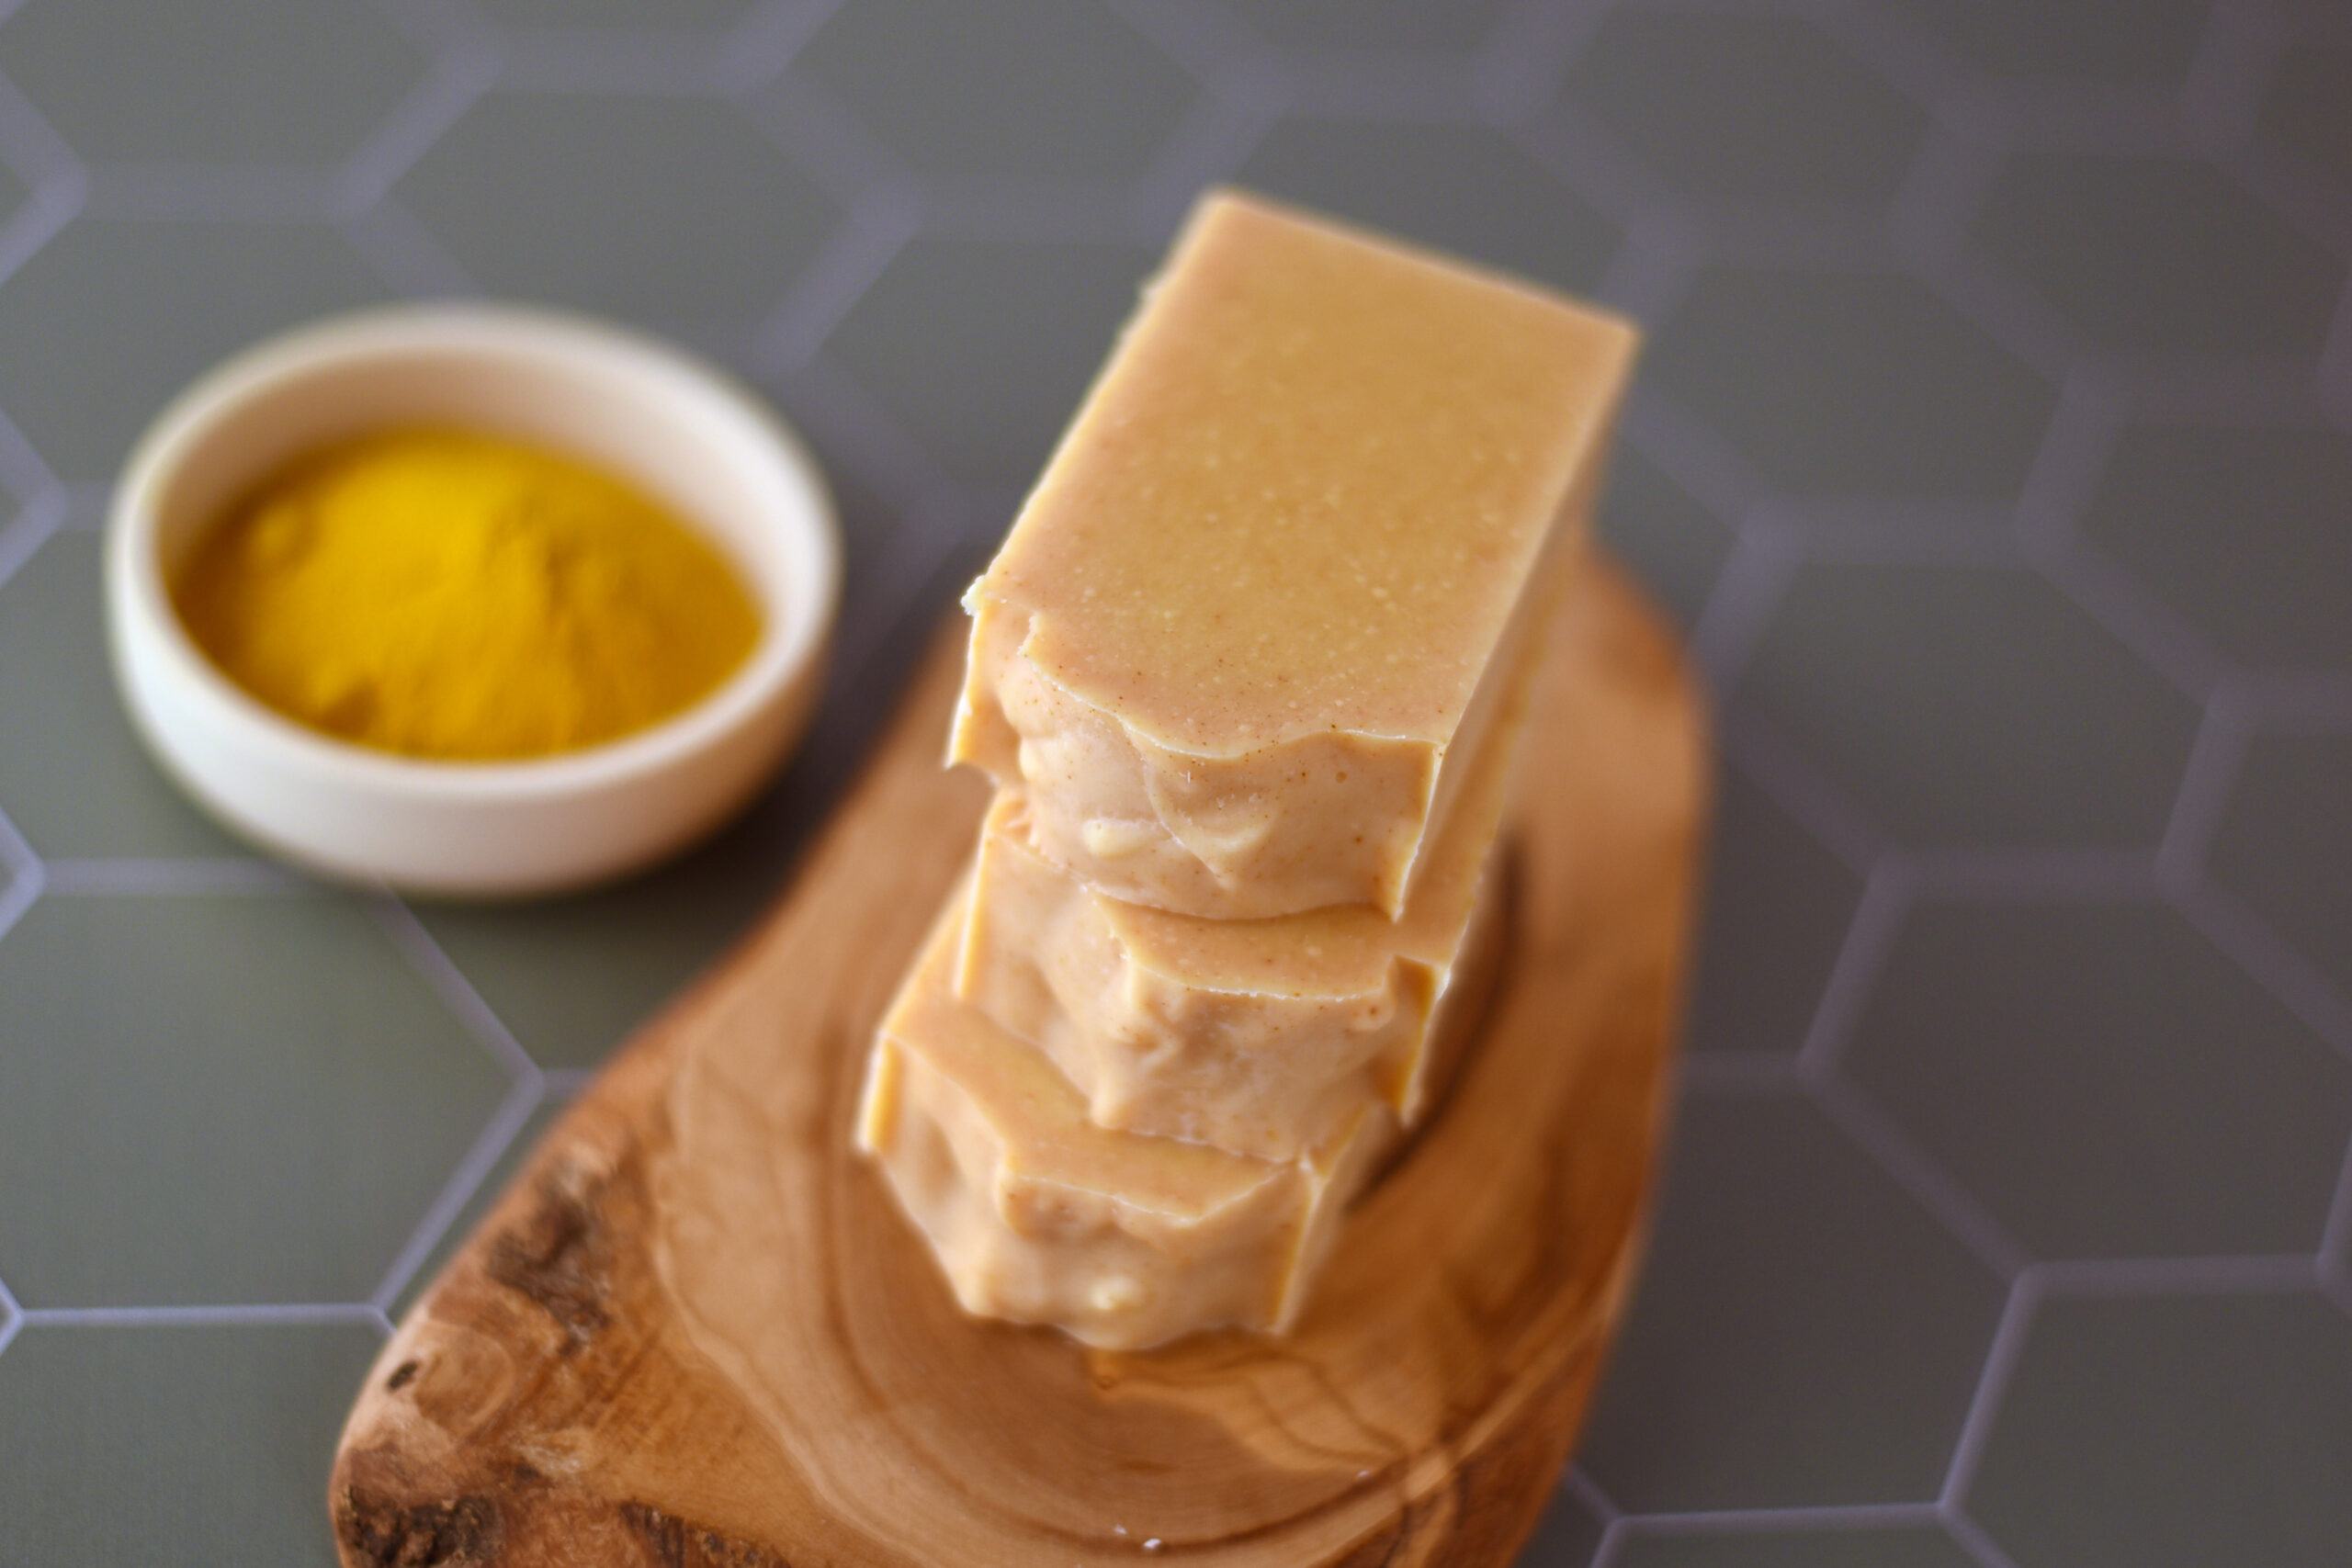
Let sit for 24-48 hours and cut and cure for 6 weeks.


Beautiful!
Pssst…don’t forget the eBook to make your own silicone molds.
Happy Soaping,
-Amanda Gail

How do I buy your liners??? Can’t find them anywhere
Can I substitute oils for the rice bran oil and avocado oil? And do I use the same ounces as you did for the 2 I want to substitute? Instead of 4 oz rice bran do I use 4 oz of, let’s say, 4 oz palm oil?
Can I substitute pile for the rice bran oil and avocado oil? And do I use the same ounces as you did for the 2 I want to substitute? Instead of 4 oz rice bran do I use 4 oz of, let’s say, 4 oz palm oil?
Beautiful tutorial! Just bought an acrylic 5lb slab mold to get started on my new soaping adventure. Will this recipe work or should I try my hand at SoapCalc to make adjustments. I’ve done so much reading and video watching until I am seriously ready to jump in and get going. So glad you did this technique in a slab mold since I don’t have a log mold yet. Thank you for the detailed tutorial!
Hi, thank you for the tutorial anfand the great idea…very beautiful….I can’t wait to do it by myself and see the results. Thanks again
Can I use one type of oil (olicolive oil only)
Amanda, I can’t tell you how much you and Benjamin have helped me remain calm and carry on with the soapy sideline life… Of course, work, family, dysfunctional moments notwithstanding ( just love that word ) WE CARRY ON !!! There is always someone that needs our help and joy. You are really a liver of that philosophy.
laurie in st louis
its looks beautiful new to soapmaking just a beginner ur tutorial looks straight forward would love to have seen it cut
Thanks for that beautiful soap.
Hi, Are you able to tell me what size mould you are using please. I have never done any swirl as yet , just learning so am going to try this one . Thank you.
Great tutorial, thanks so much. Do you feel the mold is stable enough not to bulge on the sides? I see you are not using a wooden mold or any other support. If it is stable enough I will try and make one myself. Thanks again.
Does the soap absorb the alcohol and make the soap drying? I would love to find an effective way to prevent soda ash on my soaps, but most of my customers have very sensitive skin, and I don’t want to add anything to my soap that would cause them problems.
Hi Heather! Alcohol evaporates and leaves behind a tiny bit of water which soaks in or evaporates as well. So the alcohol would not give the soap any drying properties.
Awesome & thanks!
I noticed the high cleansing. Would this dry you skin?
was the soap drying with nearly 40% coconut oil, I have never seen a recipe with this much coconut before
can you show the cut bars please, what does it look like inside ????????/
Hello,
Where do you buy your mica colors?
Awesome recipe and technique! Do you insulate with a towel, or blanket after the hour of spitting with the alcohol?
I don’t insulate. If I want to force gel, then I will set it on a heating pad with a box over it. But usually I just let it do its thing.
Hi Amanda
Loved your tutorial. I haven’t yet plucked up the courage to make cold pressed soap but this step-by-step tutorial has given me the push I need. However, from what I’ve read previously, I thought the soap mixture had to reach “trace” before pouring into the mould but you say to stick blend to reach a stable emulsion. I’m now confused 🙁
Many thanks for sharing
Regards
June
If you are new to soapmaking look for trace. But actually, soap doesn’t have to have a “seen” trace to turn into soap. You can pour at a stable emulsion.
Great tutorial. You always inspire us. Susie just buy things on sale and slowly collect what you need. I had to get over my fear of lye and when I did two years ago. Well let’s just say you are gonna love it.
What a fantastic tutorial! Thank you so much for taking the time and effort to be so detailed. Can’t wait to see the soap when cut. You will show us won’t you?
Hi Amanda, thanks you very much for the post. Is this receipe a slow trace receipe?
Thanks
It looks wow!!
When you swirl, do you insert the spatula all the way through to the bottom of the mold or keep it just slightly below the top layer?
I really want to learn how to make soaps and make them beautiful like this. 🙂
I’m starting to gather supplies. Husband laid off so it will take some time.
Susie in northern NY
Yes you insert the spatula all the way to the bottom of the mould to do this..keeping it touching the whole way through. I use a favourite chopstick myself..its a fabulous tutorial!
Very nice. Very helpful
Thank you very much