

I LOVE making salt bar soaps! I typically make them in individual cavity molds because the high amount of salt causes the soap to set up firmly REALLY quickly. There is a very short window where you can actually cut a loaf of salt bars with minimal crumbling.
Be sure to check out our last couple of blog posts on salt bars: Natural Color Infusions for Salt Bar Soap, and Spearmint, Lemongrass and Loofah Salt Bar Soap. If you’d like to learn more about making salt bars check out our eBook, Making Salt Bars. You’ll get our new bonus (7 Salt Soap for the Face) with your purchase!
Most of my tutorials on making salt bar soap usually include making them in individual cavity molds. I get asked all the time if it is possible to make salt bars in a loaf mold.
It is tricky…but possible!
Because you add a large amount of salt to salt bar soap, it sets up very quickly and the soap comes out rock-hard! If you wait too long to cut, you might end up with crumbly bars…if you can even cut it in the first place!
Here are three tips when making salt bars in a loaf mold.
- Cut the loaf into bars when the is still setup but still warm! There is a short window after you pour your soap from when it changes from fluid to setup enough to cut, without being crumbly. It will still usually be warm to the touch. I’ve had this window occur anywhere from 20 minutes after pouring up to 1 hour.
- When making salt bars I use salt at 50% of the total oil weight. The more salt you use, the more tricky a loaf is to cut. If you make salt bars at 100% of the oil weight in salt, you might try reducing it a bit.
- Use a smooth blade knife. You’ll get best results using a smooth blade knife. In the tutorial below, I used my soap cutter, but got a bit of crumble. Horrible? No. But it would have been better if I had used a smooth blade knife.
I’ll walk you through a batch of salt soap made in a loaf mold! Let’s get started!
Rose Clay Salt Bar Loaf
- Coconut Oil – 405 grams (90%)
- Cocoa Butter – 45 grams (10%)
- Sodium Hydroxide – 64 grams
- Water – 128 grams
- Fine Sea Salt – 225 grams
Colorants
- Shredded Loofah – 1 teaspoon
- Rose Clay – 1/2 teaspoon
Essential Oil Blend
- Orange Essential Oil – 10 grams
- Ylang-Ylang Essential Oil – 8 grams
- Lavender Essential Oil – 4 grams
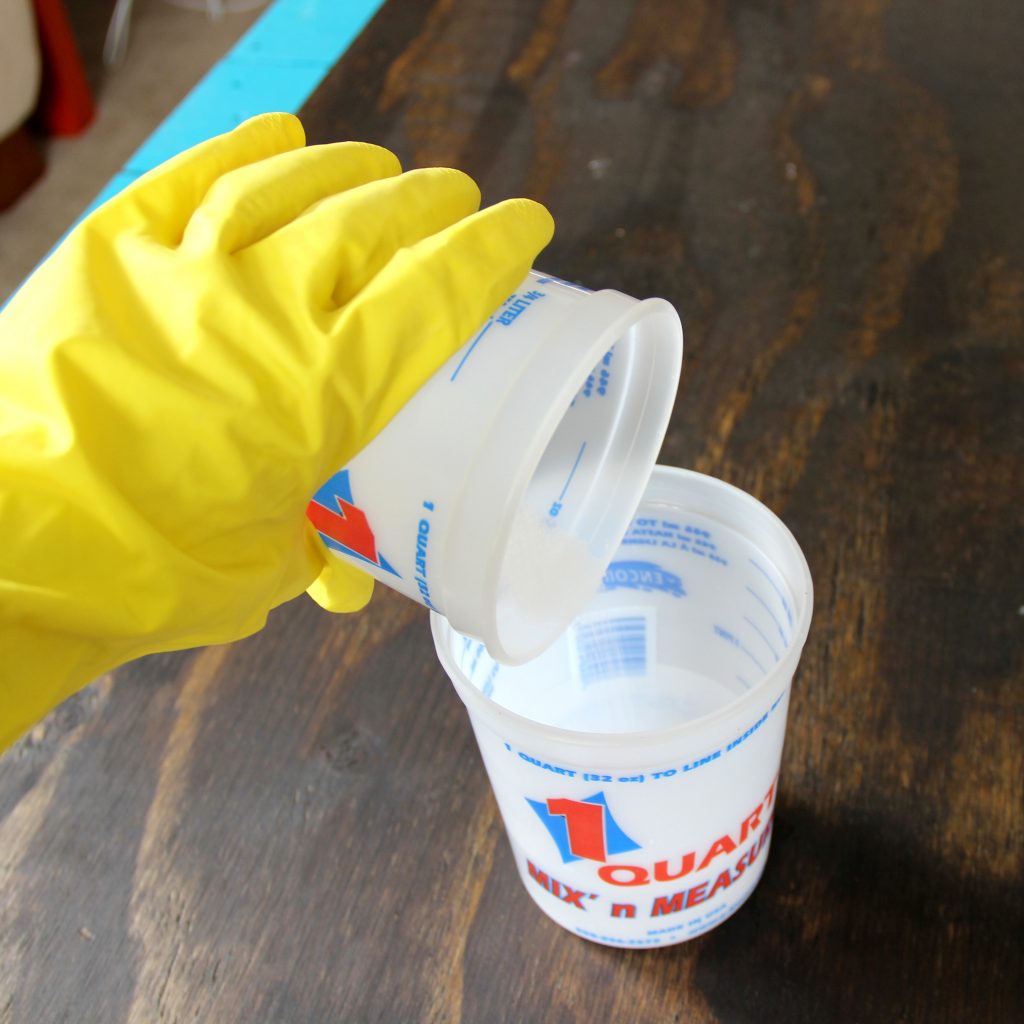
Safety: Gear up in your goggles and gloves to make soap.
To learn how to prepare your oils and lye solution, please watch our basic video series.
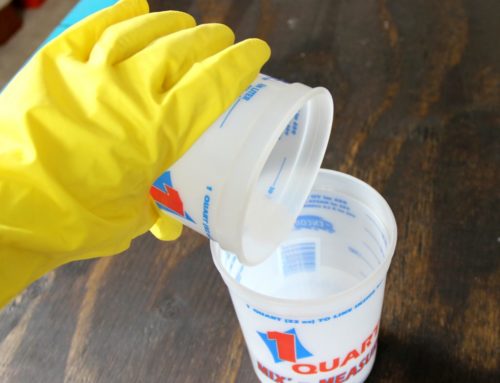
Step 1: Create a lye solution. Weigh the water and sodium hydroxide into two separate containers. Slowly pour the sodium hydroxide into the water while stirring. Stir until completely dissolved and set aside to cool.
Step 2: Prepare the base oils. Weigh the coconut oil and coca butter into a container and melt. You can melt using the microwave or low heat on a burner.
Step 3: Prepare your mold. If you need to line your mold, line it. I’m using an 8″ silicone loaf mold from Wholesale Supplies Plus.
Step 4: Check the temperatures. You should now have a container containing liquid base oils and a container containing lye solution. Take the temperatures using an infra-red temperature gun. Be sure to stir each mixture before taking the temp. You want your temperatures to be between 90-120 degrees F.
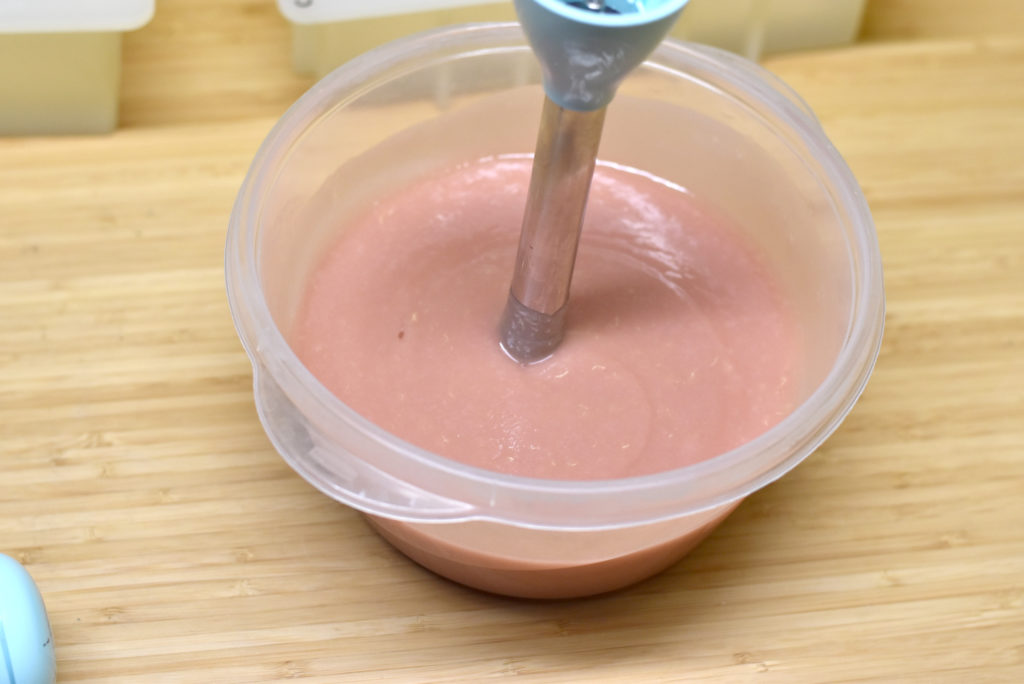
Step 5: Weigh your essential oils into a glass or stainless steel container and add to your prepared base oils.
Step 6: Add your shredded loofah and rose clay to prepared base oils and blend to get rid of any clumps.
Step 7: Weigh and add the fine sea salt to the prepared base oils.
Note: You can add your salt to the liquid oils before combining with your lye solution or you can add the salt to traced soap. Either works!
Step 8: Pour your lye solution into base oils and mix to medium trace! You want the soap to be thick enough to suspend the salt.
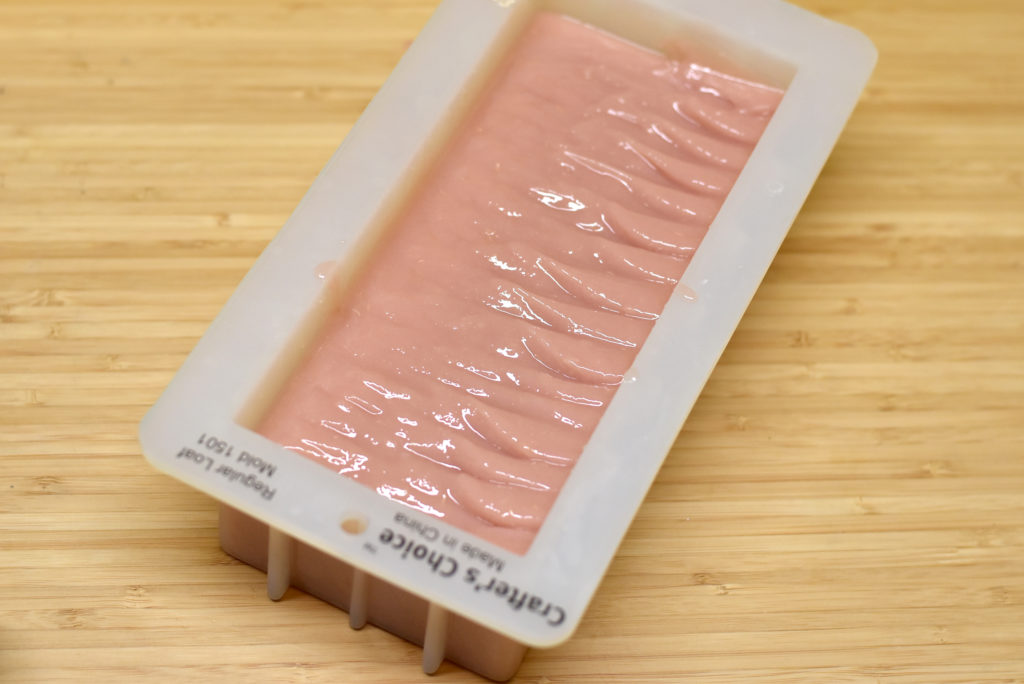
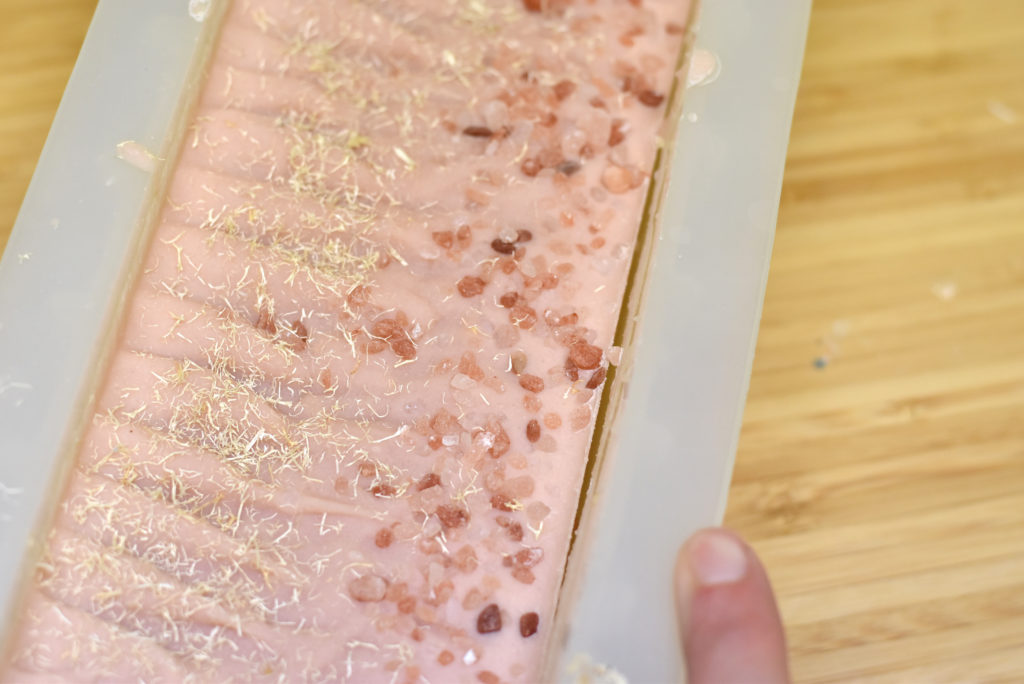
Step 9: Pour traced soap into your loaf mold. I used a spatula to create some texture on top.
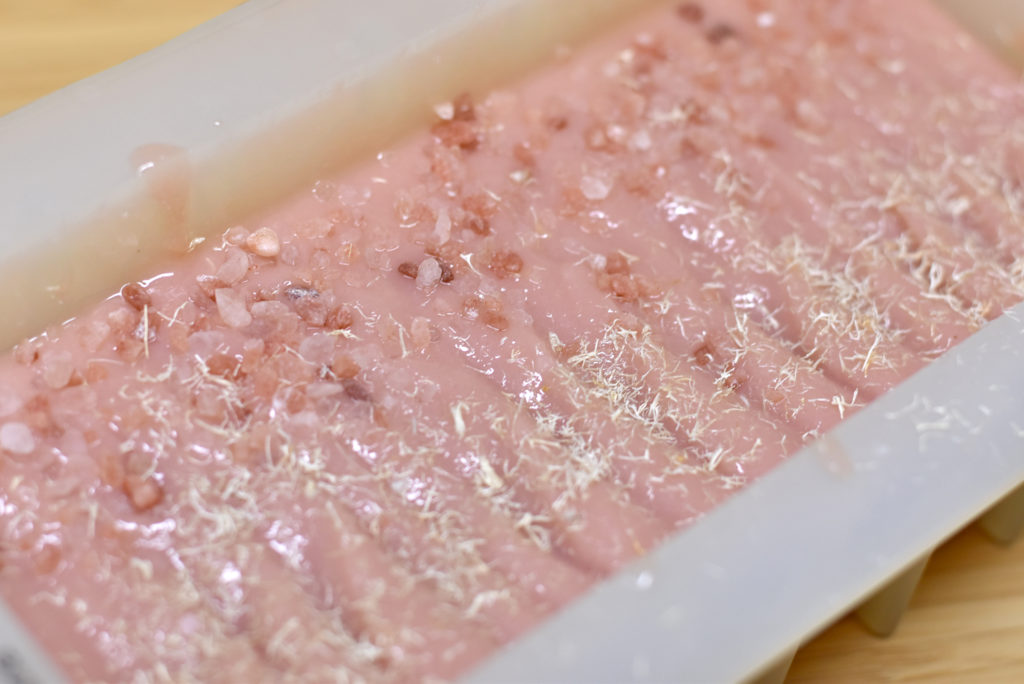
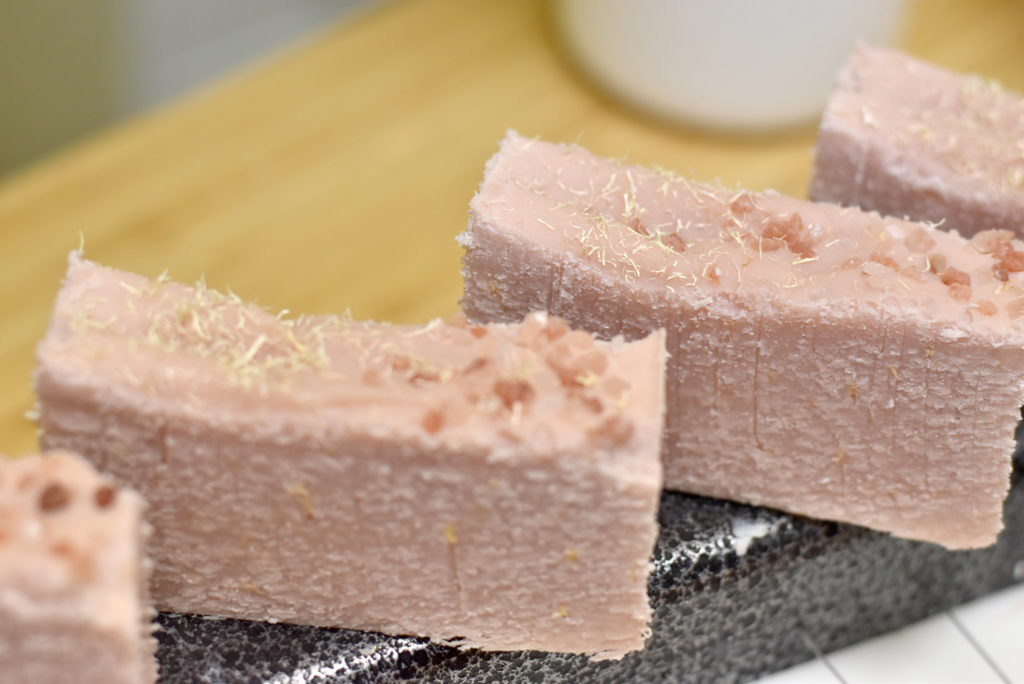
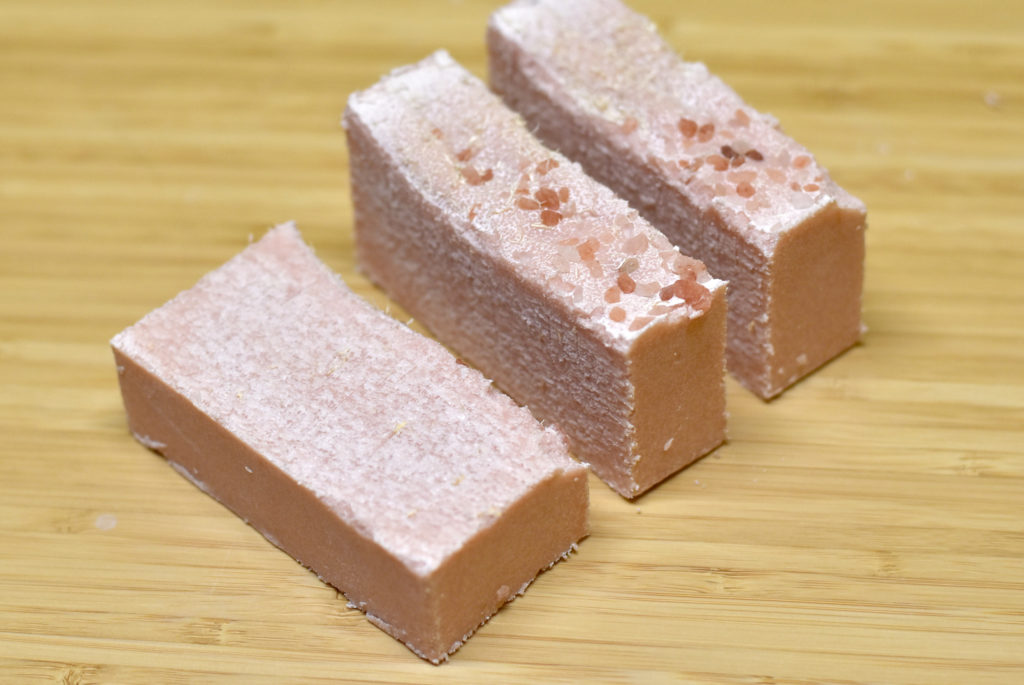
I then topped it with some large grain pink salt and shredded loofah.
Step 10: Allow your loaf of soap time to setup. This is where you have to really pay attention. You can’t pour your soap and then walk away. Stay close!
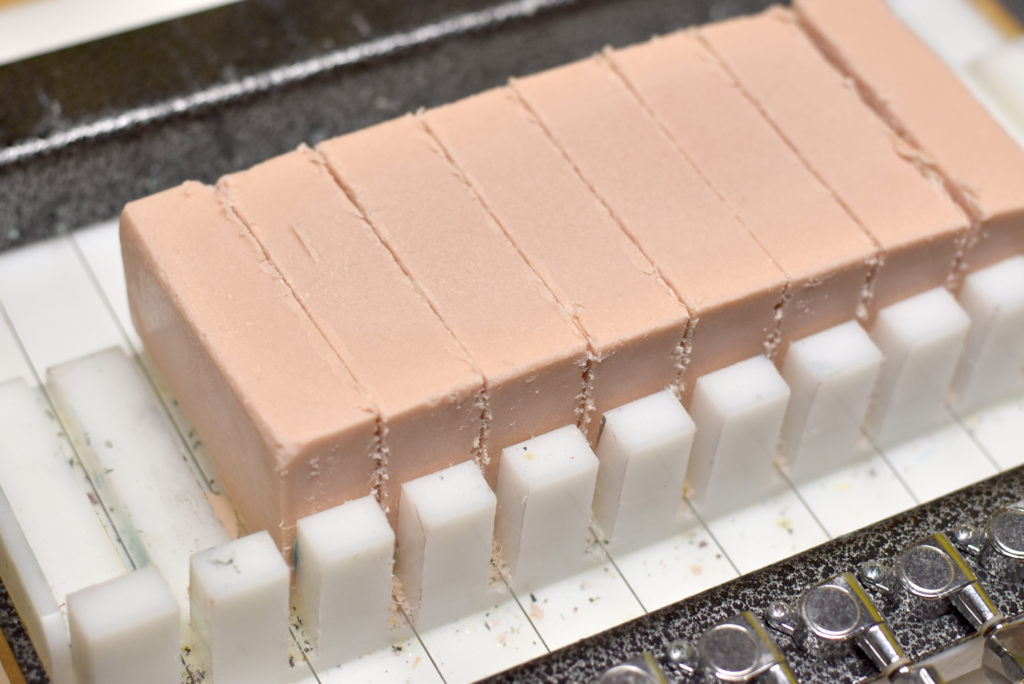
You want your soap to setup solid but still be warm. As soon as it is solid and you can pull the side away, it is time to unmold and cut! Your soap will still be warm. This batch was ready after 25 minutes!
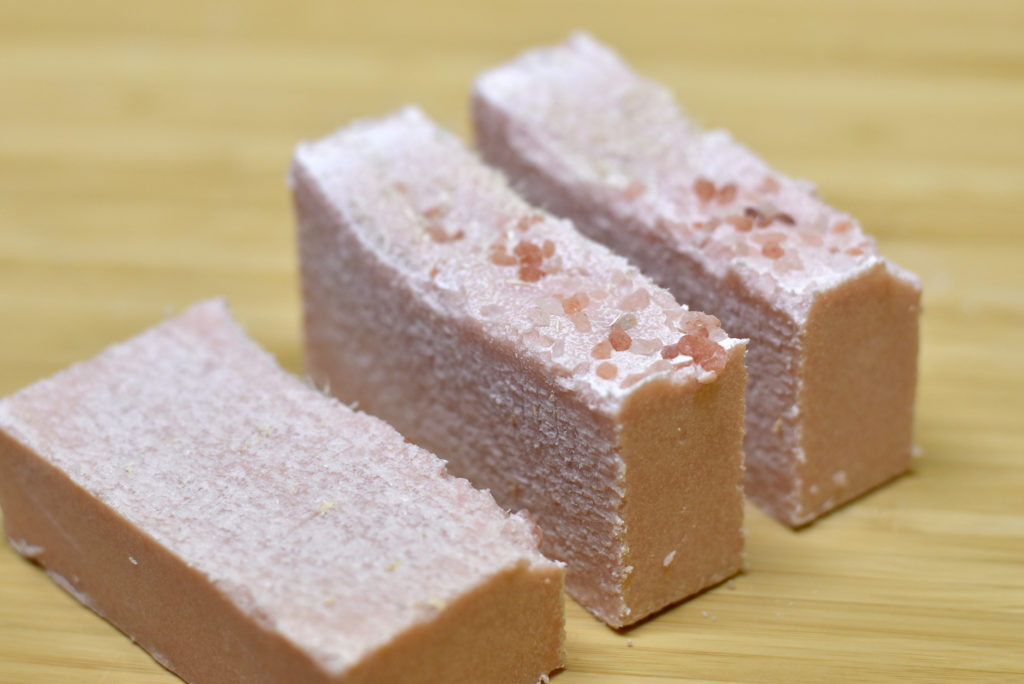
Step 11: Unmold and cut! I cut this soap using my wire cutter! If you use a smooth blade knife, you’ll get better results. I just wanted to try it and see. You’ll still have a bit of crumbling just because the salt is being pushed out of the soap. No big deal! It just gives it that ‘salt bar’ look. 🙂
Notice that I also put my salt bar loaf top down. I didn’t want the pink salt to be dragged through the loaf.
Step 12: Cure for a minimum of 4-6 weeks. I actually prefer my salt bars to have a nice long cure, closer to 8 weeks. Try your salt bar at 4 weeks, 6 weeks and 8 weeks and see what you prefer.
More tips from the community!
I asked in our Facebook Group, Saponification Nation, if anyone had tips for making salt bars in a loaf mold. And people did!
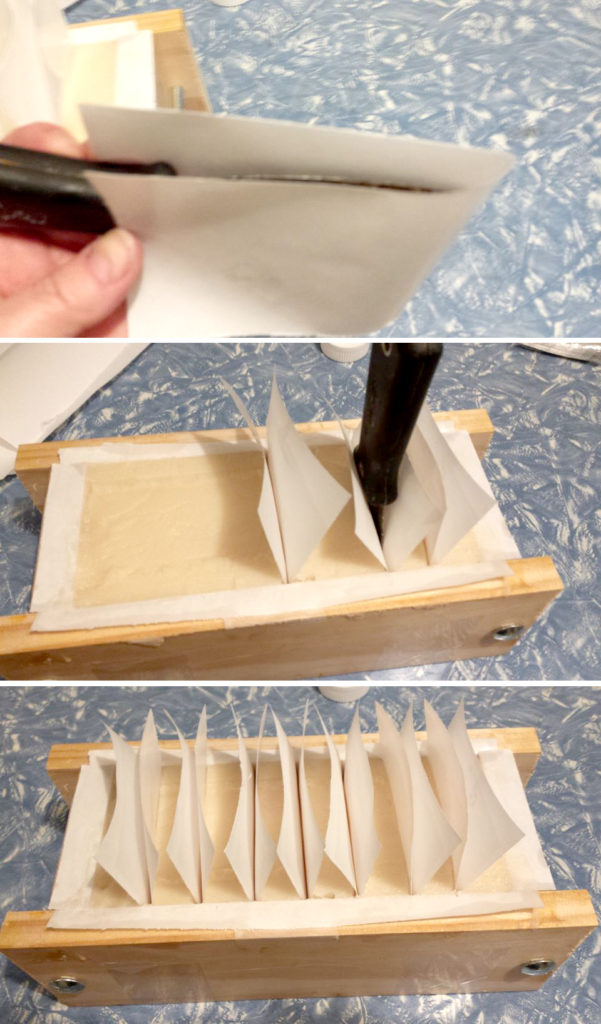
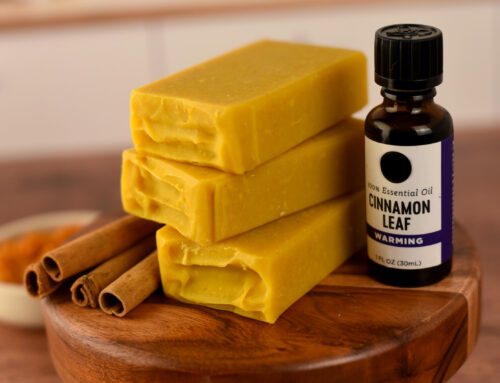
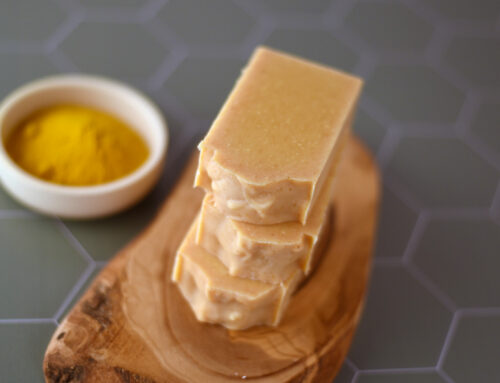
Vicky Farnum posted a brilliant idea…inspired by cheesecake! I’m so glad she shared!
She took freezer paper cut to the width of her mold and folded it over her 3″ blade. She then inserted each divider into her mold at 1″ intervals. Vicky said to be careful pushing the paper in. Depending on how full the mold is, the soap could squeeze over the edges. She poured at medium trace and inserted the dividers a few minutes later when it had set up a bit more.
I hope this helps you with making salt bars in a loaf mold!
For more natural salt bar soap recipes, be sure to check out my eBook, Making Salt Bars – Creating Decadent Spa Bars by Combining Sea Salt and Cold Process Soap!
Happy Soaping!
Amanda Aaron

Can you do that recipe with melt and pour?
This is a timely article for me Amanda. Great tute! I have your salt bar ebook and am planning on making my 1st salt bars using your book. Can’t wait. How can I get the new facial bar book? Looks amazing too.