
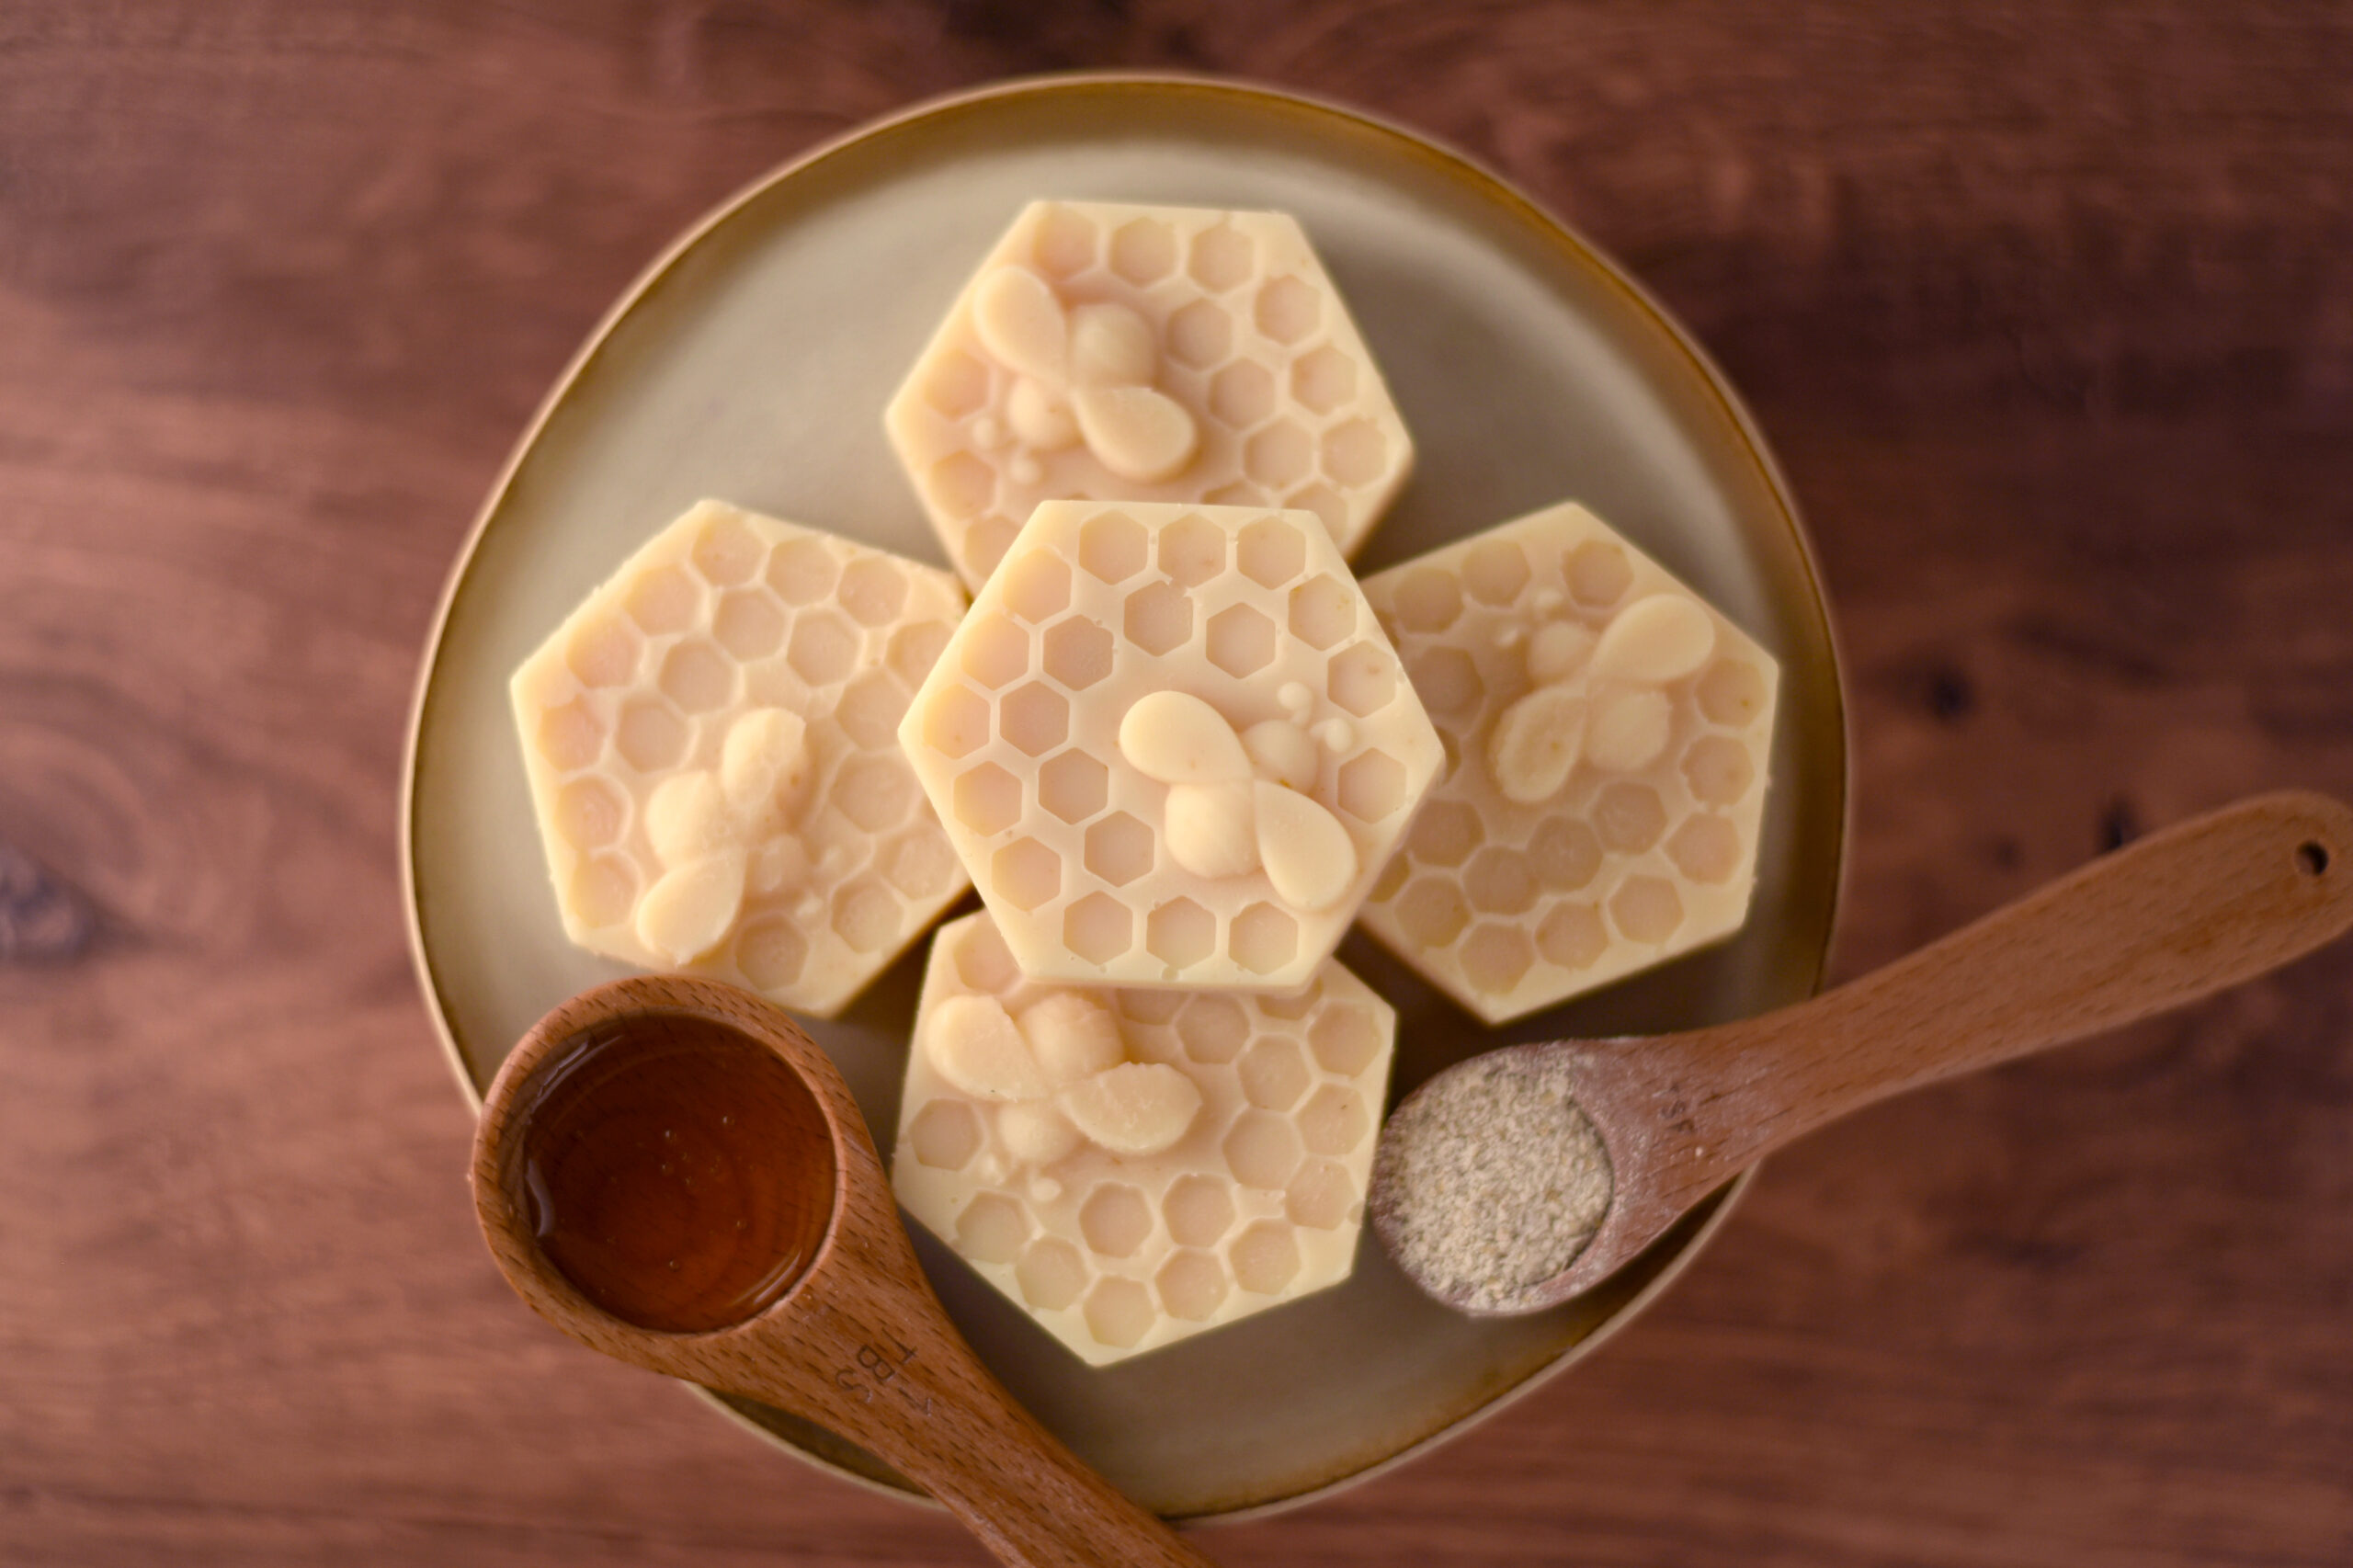
The Holiday countdown is officially started and it is time to make some Christmas or Holiday themed soaps! If you choose Melt & Pour, there is no cure time and you can use a pre-made base, making your turn around time very short. This project can be adapted for home crafters as well as professional soapmakers.
For this tutorial, I am using the Double Tall and Skinny Premium Mold from Nurture Soap Supplies that holds 9 lbs of Melt & Pour, but I am only using one side. Of course, you can use any other MP suitable mold for this tutorial and adapt accordingly to the mold’s capacity.
For this recipe, I will be using 2050 grams of Melt & Pour base, creating 11 soap bars of approximately 180 grams each.
Holiday Melt & Pour Soap Recipe
- 900 grams of white Melt & Pour base
- 1150 grams of clear Melt & Pour base
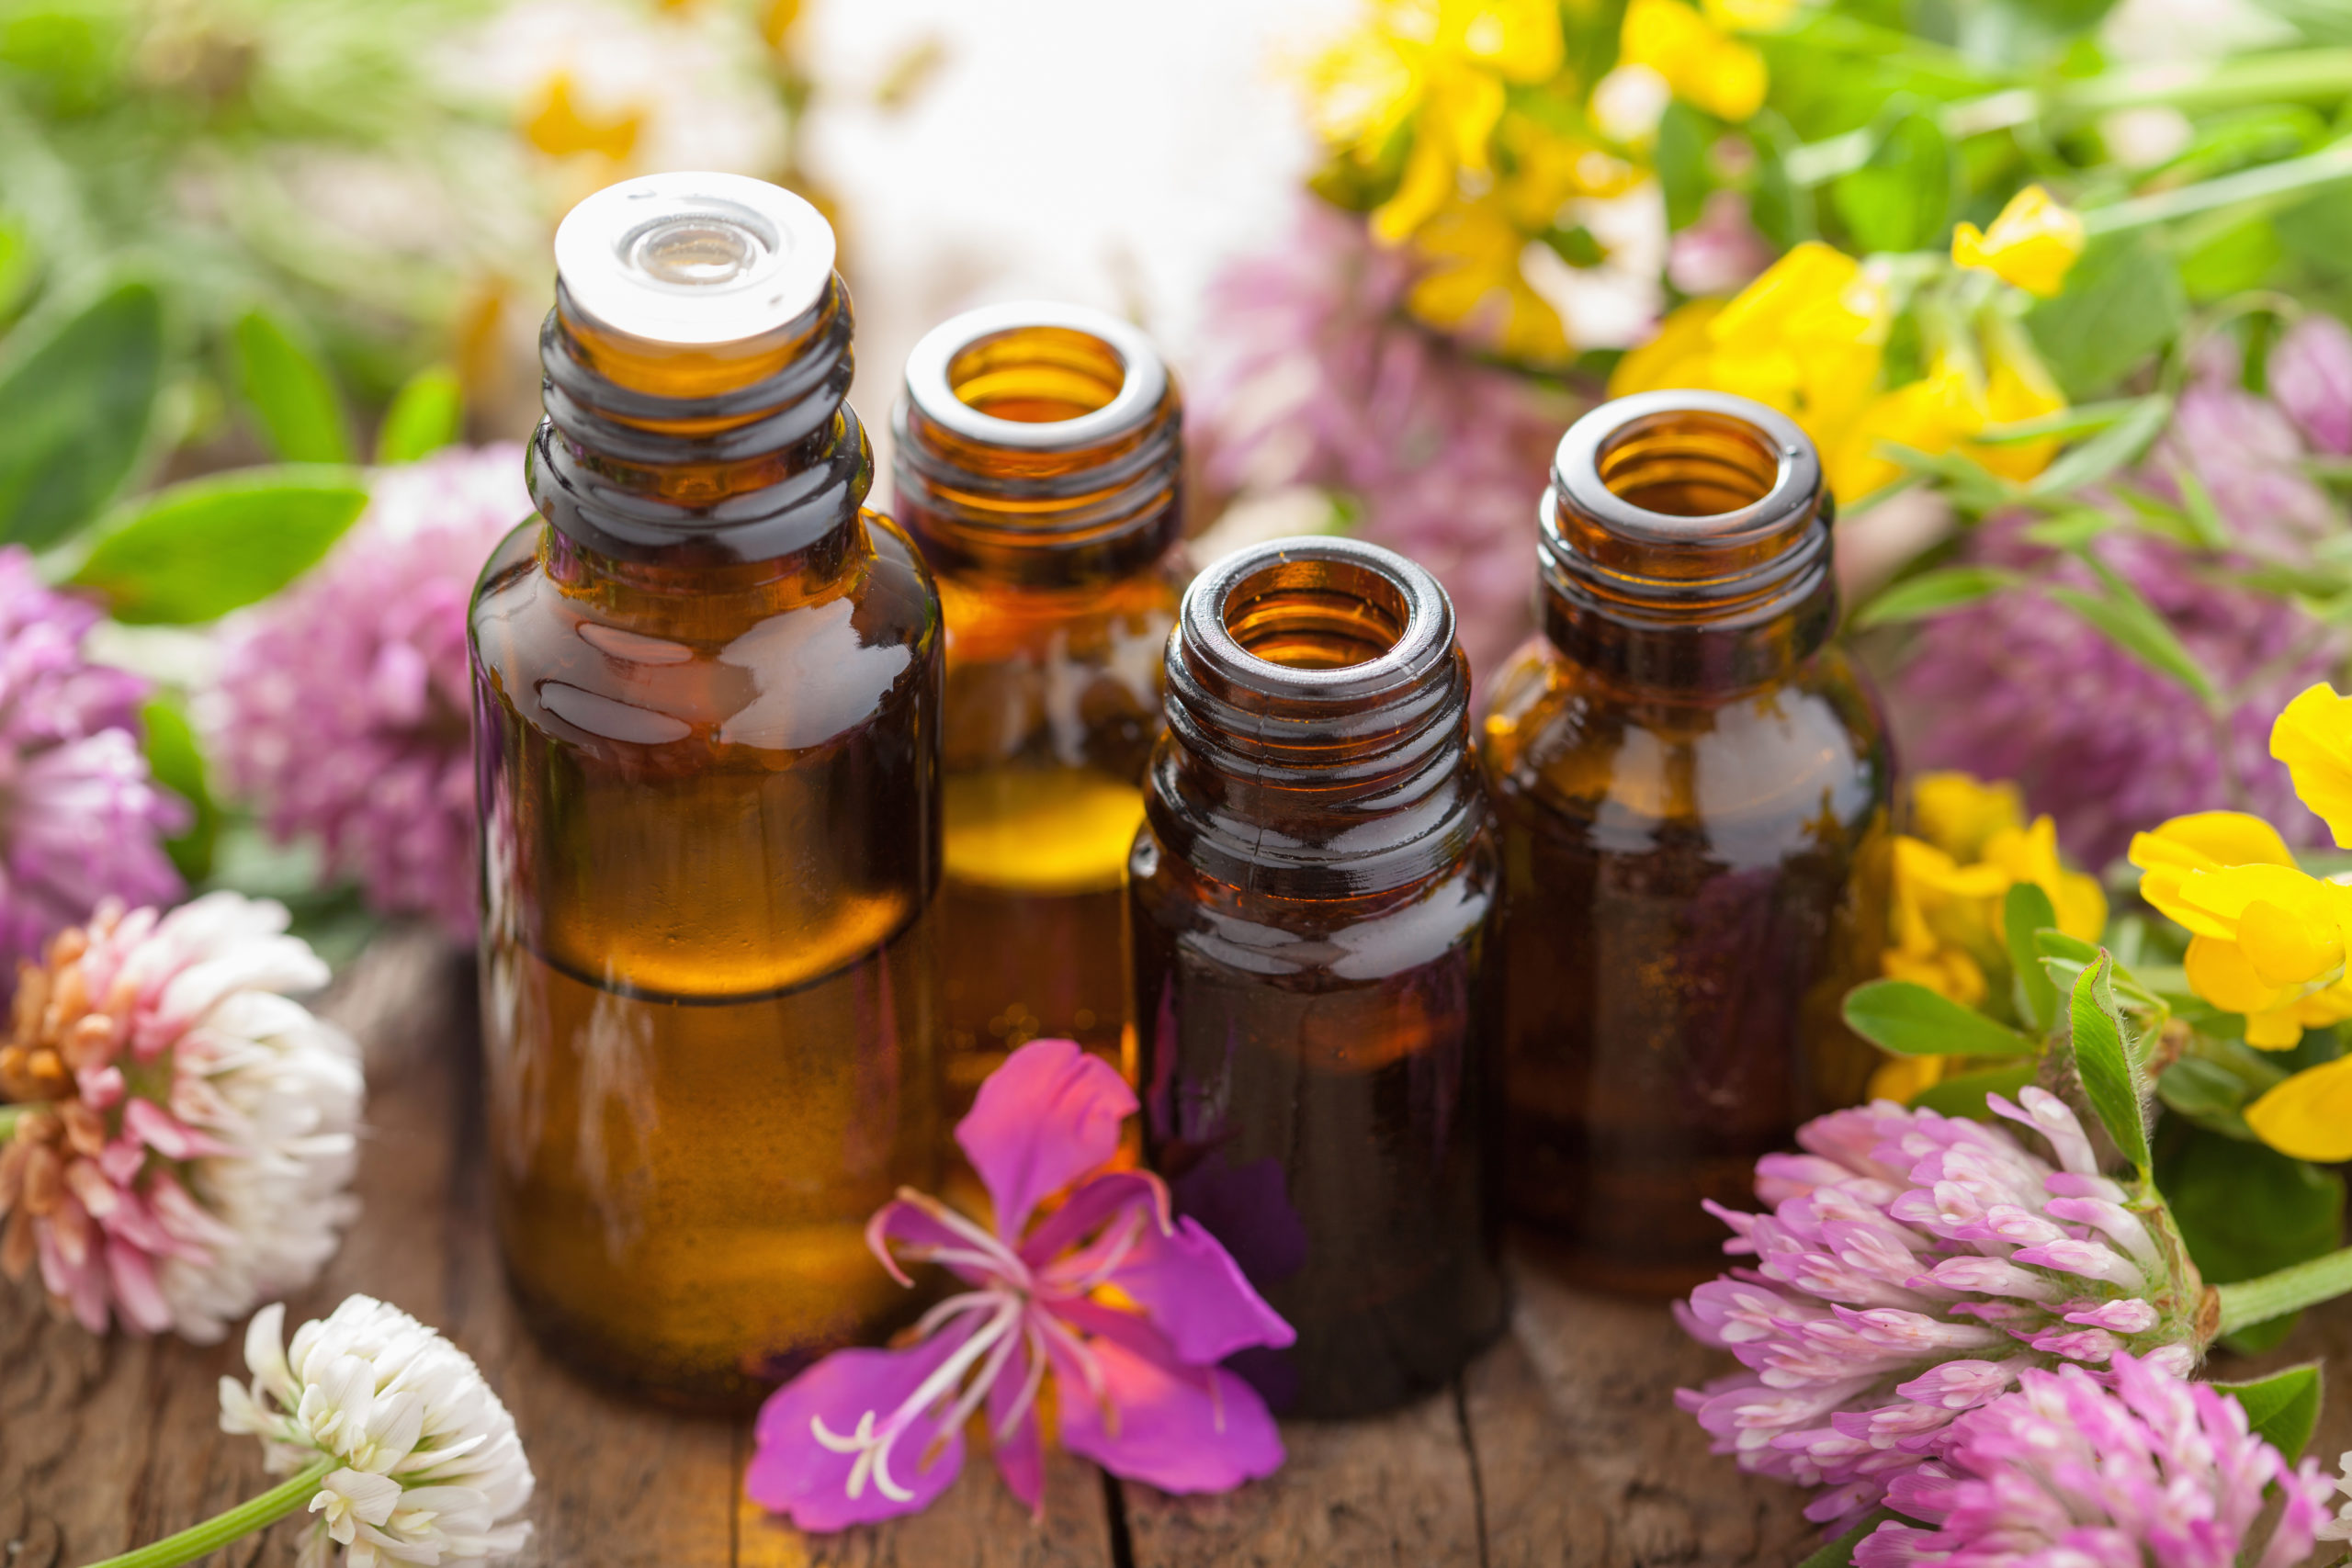
- 18 grams of Spearmint Essential Oil (New Directions)
- 16 grams of Santa’s Spruce Fragrance Oil (Bramble Berry)
- 6 grams of Cranberry Fig Fragrance Oil (Bramble Berry)
- 1/2 teaspoons of Green Vibrance Mica (Nurture Soap)
- 1/4 teaspoons of Raspberry Red Mica (Nurture Soap)
- 1/4 teaspoon of Super Sparkles Biodegradable Glitter (Nurture Soap)
- Spray Bottle of Rubbing Alcohol (find it at the drugstore)
- 2 small stockpots
- Scale, Measuring Cups, Mold, Thermometer, spoon or spatula and soaping utensils
- A miter box & soap cutter
- Plastic Film or shrinkwrap system to wrap your soaps.
You can buy Melt & Pour bases, colors, molds and fragrances from your favorite suppliers. Here are a few places I like:
MELT THE MELT AND POUR
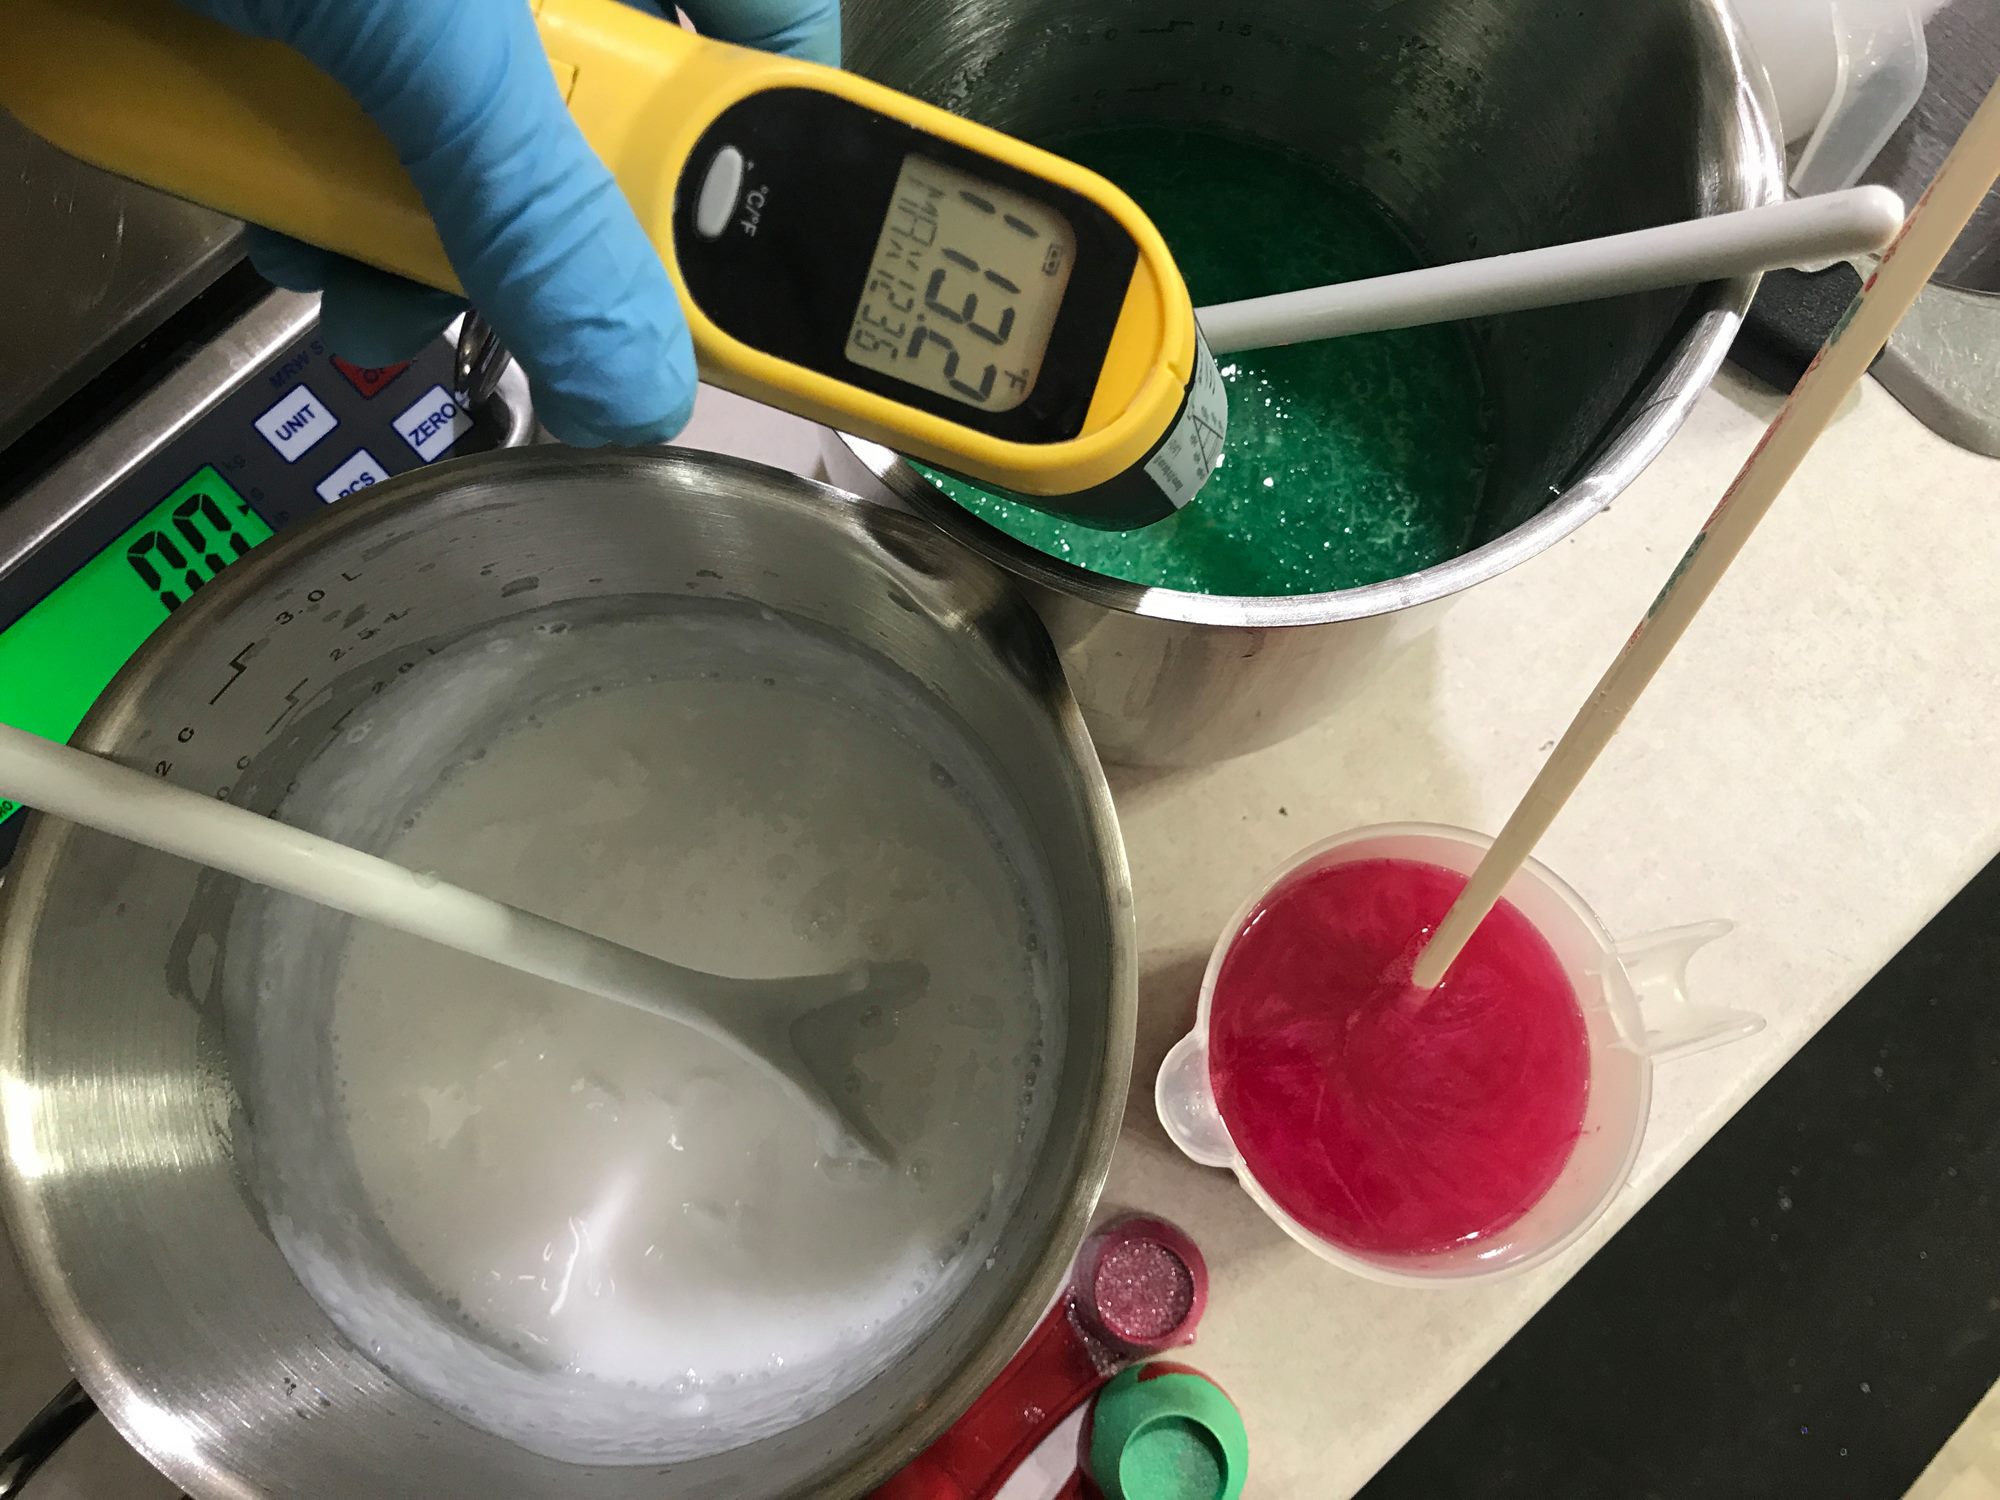
First, chop up and weigh 900 grams of white Melt & Pour and place in a stockpot. Repeat with 1150 grams of clear Melt & Pour base and melt both slowly over low heat in a stainless steel stockpot, always keeping an eye not to boil your soap.

You could also do this in the microwave, using large heat safe measuring cups and melt the Melt & Pour in 30 seconds increments.
Once the bases are completely melted, monitor the temperature using a thermometer. I like to work at around 140 to 150 degrees Fahrenheit with my bases, but check with your supplier for the melting point of the brand you are using. Never leave melting soap base unattended as you could end up with boiling Melt & Pour or a soap catastrophe!
COLOR YOUR SOAP
Portion out 300 grams of the clear Melt & Pour and add the raspberry red mica. Stir with a spoon until all the mica is dispersed. If the mica clings into clumps, sprits with a little bit of rubbing alcohol to help disperse the mica and stir some more.
Add ½ teaspoon of Green Vibrance Mica and ¼ teaspoon of Super Sparkles Biodegradable Glitter to the remaining clear Melt & Pour soap. Stir, sprits, stir! Until all that color is beautifully dispersed in the clear soap base. It should have a smooth, pearlescent and glittery look; perfect for the Holidays!

ADD YOUR SCENT
In a small glass-measuring cup, weigh 6 grams of Cranberry Fragrance and add to the small red cup of Melt & Pour. In the same measuring cup, weigh 16 grams of Santa’s Spruce Fragrance and add to the green Melt & Pour.

Repeat the same process for the 18 grams of Spearmint Essential Oil and add to the white Melt & Pour. Stir all very well to combine. Make sure no oil is floating back to the surface before pouring in the mold. You could also choose any other skin safe, non-discoloring Holiday fragrance oil if you wish.
POUR YOUR SOAP
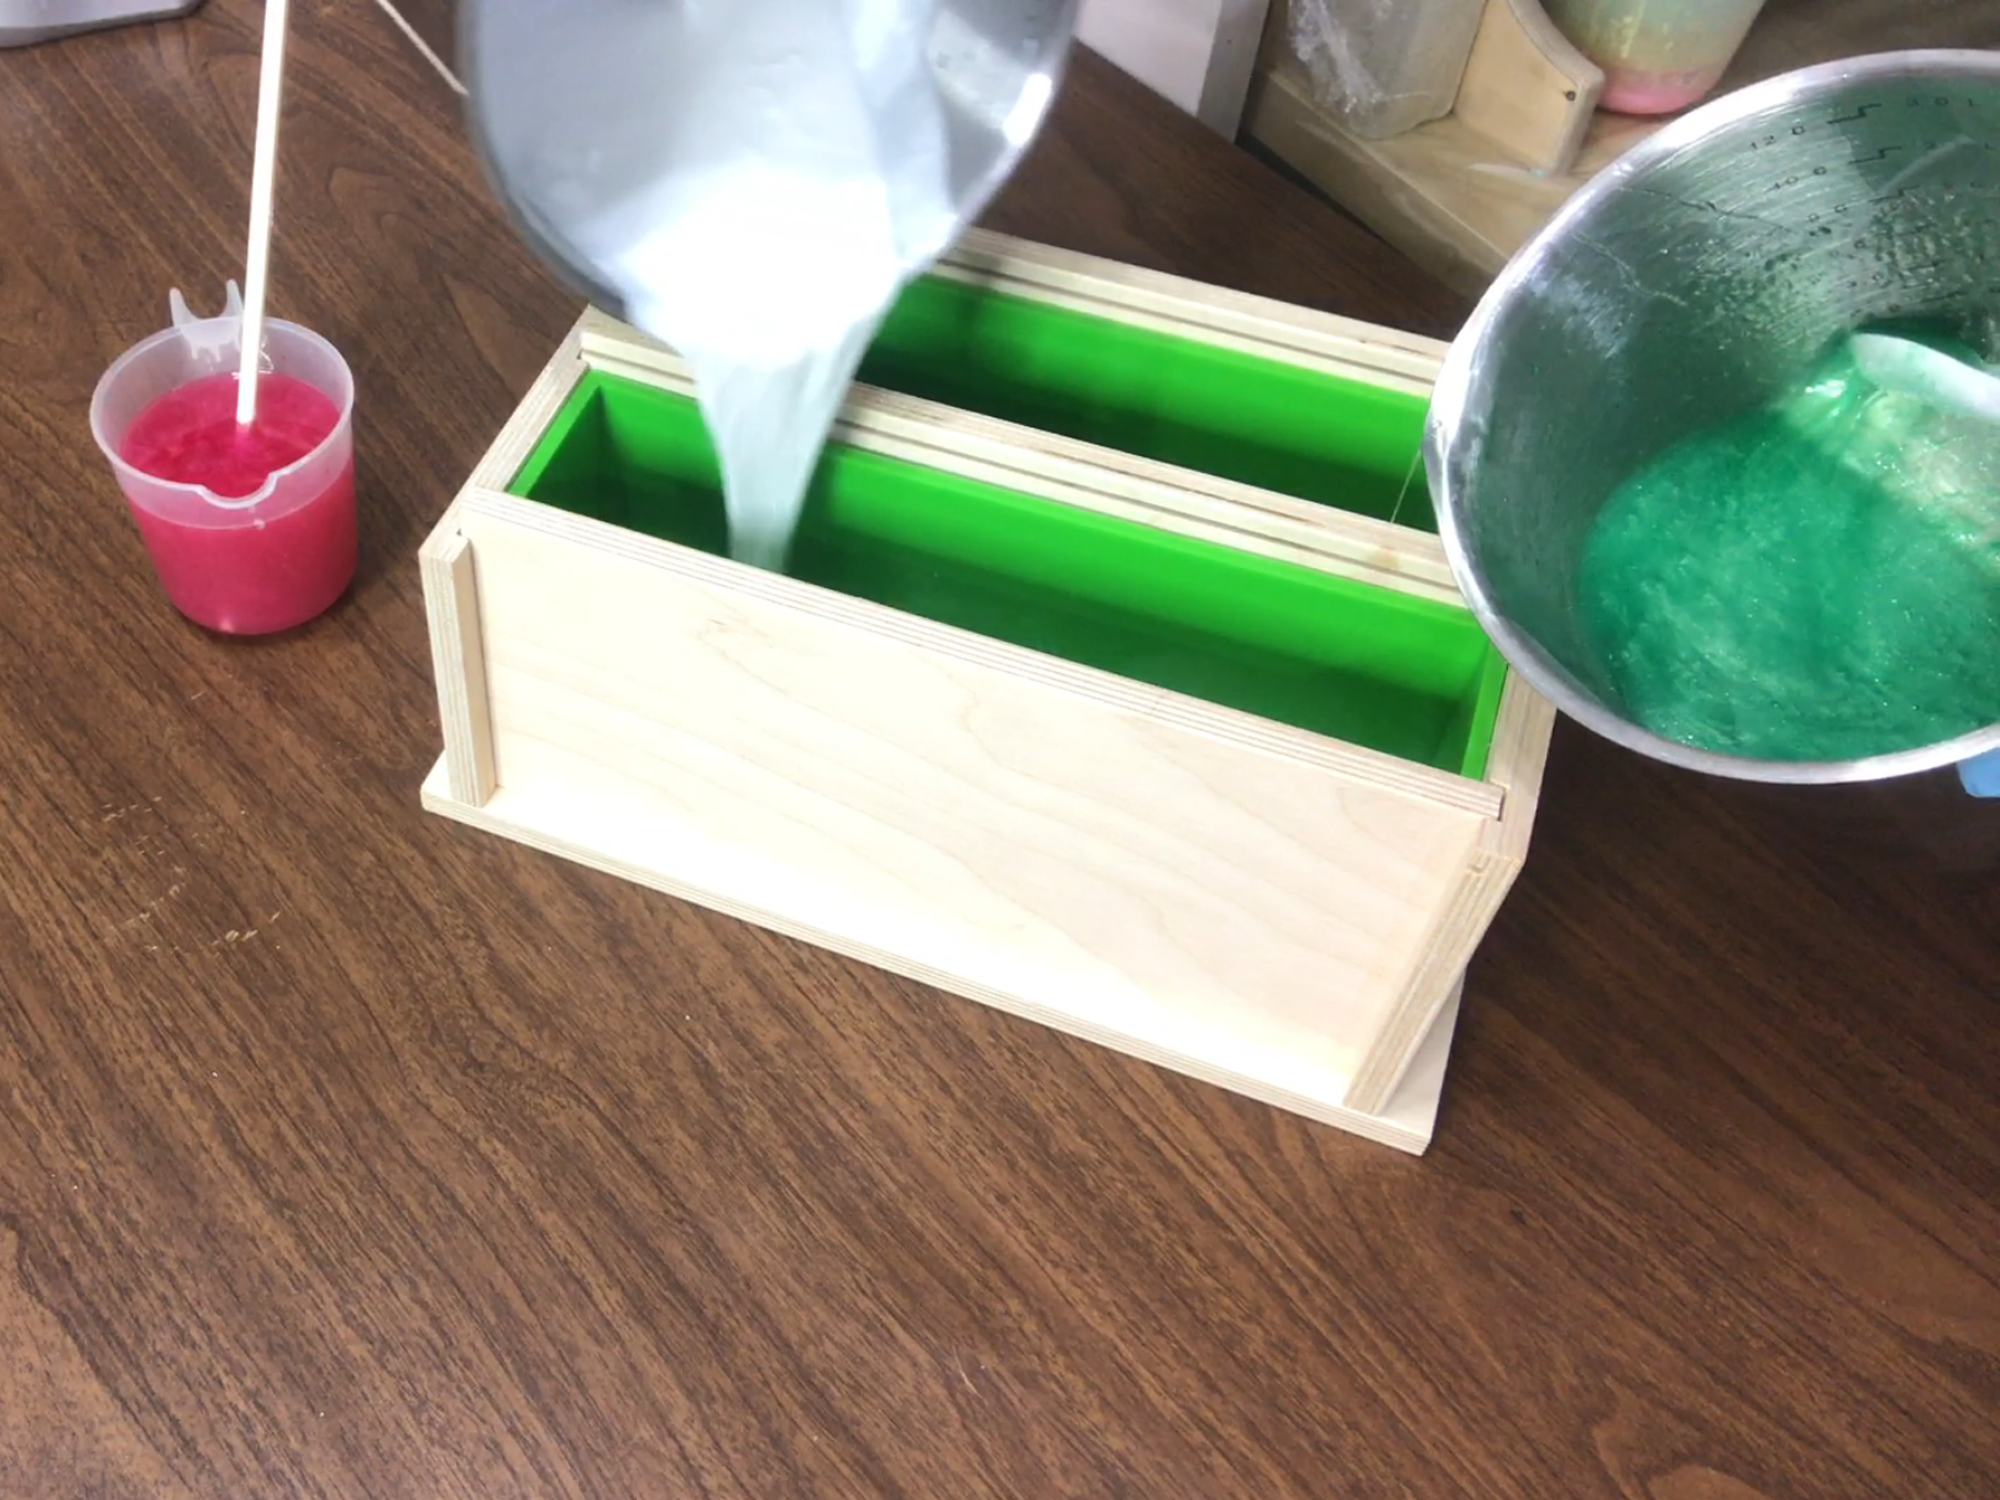
Make sure your mold is clean and on a leveled surface.
Check that the temperature of your soap is good to go.
For this particular project, we are looking to reach a “gel-like” consistency so monitoring the temperature very closely is important. You may need to reheat your bases if they don’t reach gel consistency at the same time. For my bases, the white was thick enough at around 125-130 degrees Fahrenheit’s and the clear green at around 115 degrees Fahrenheit’s.
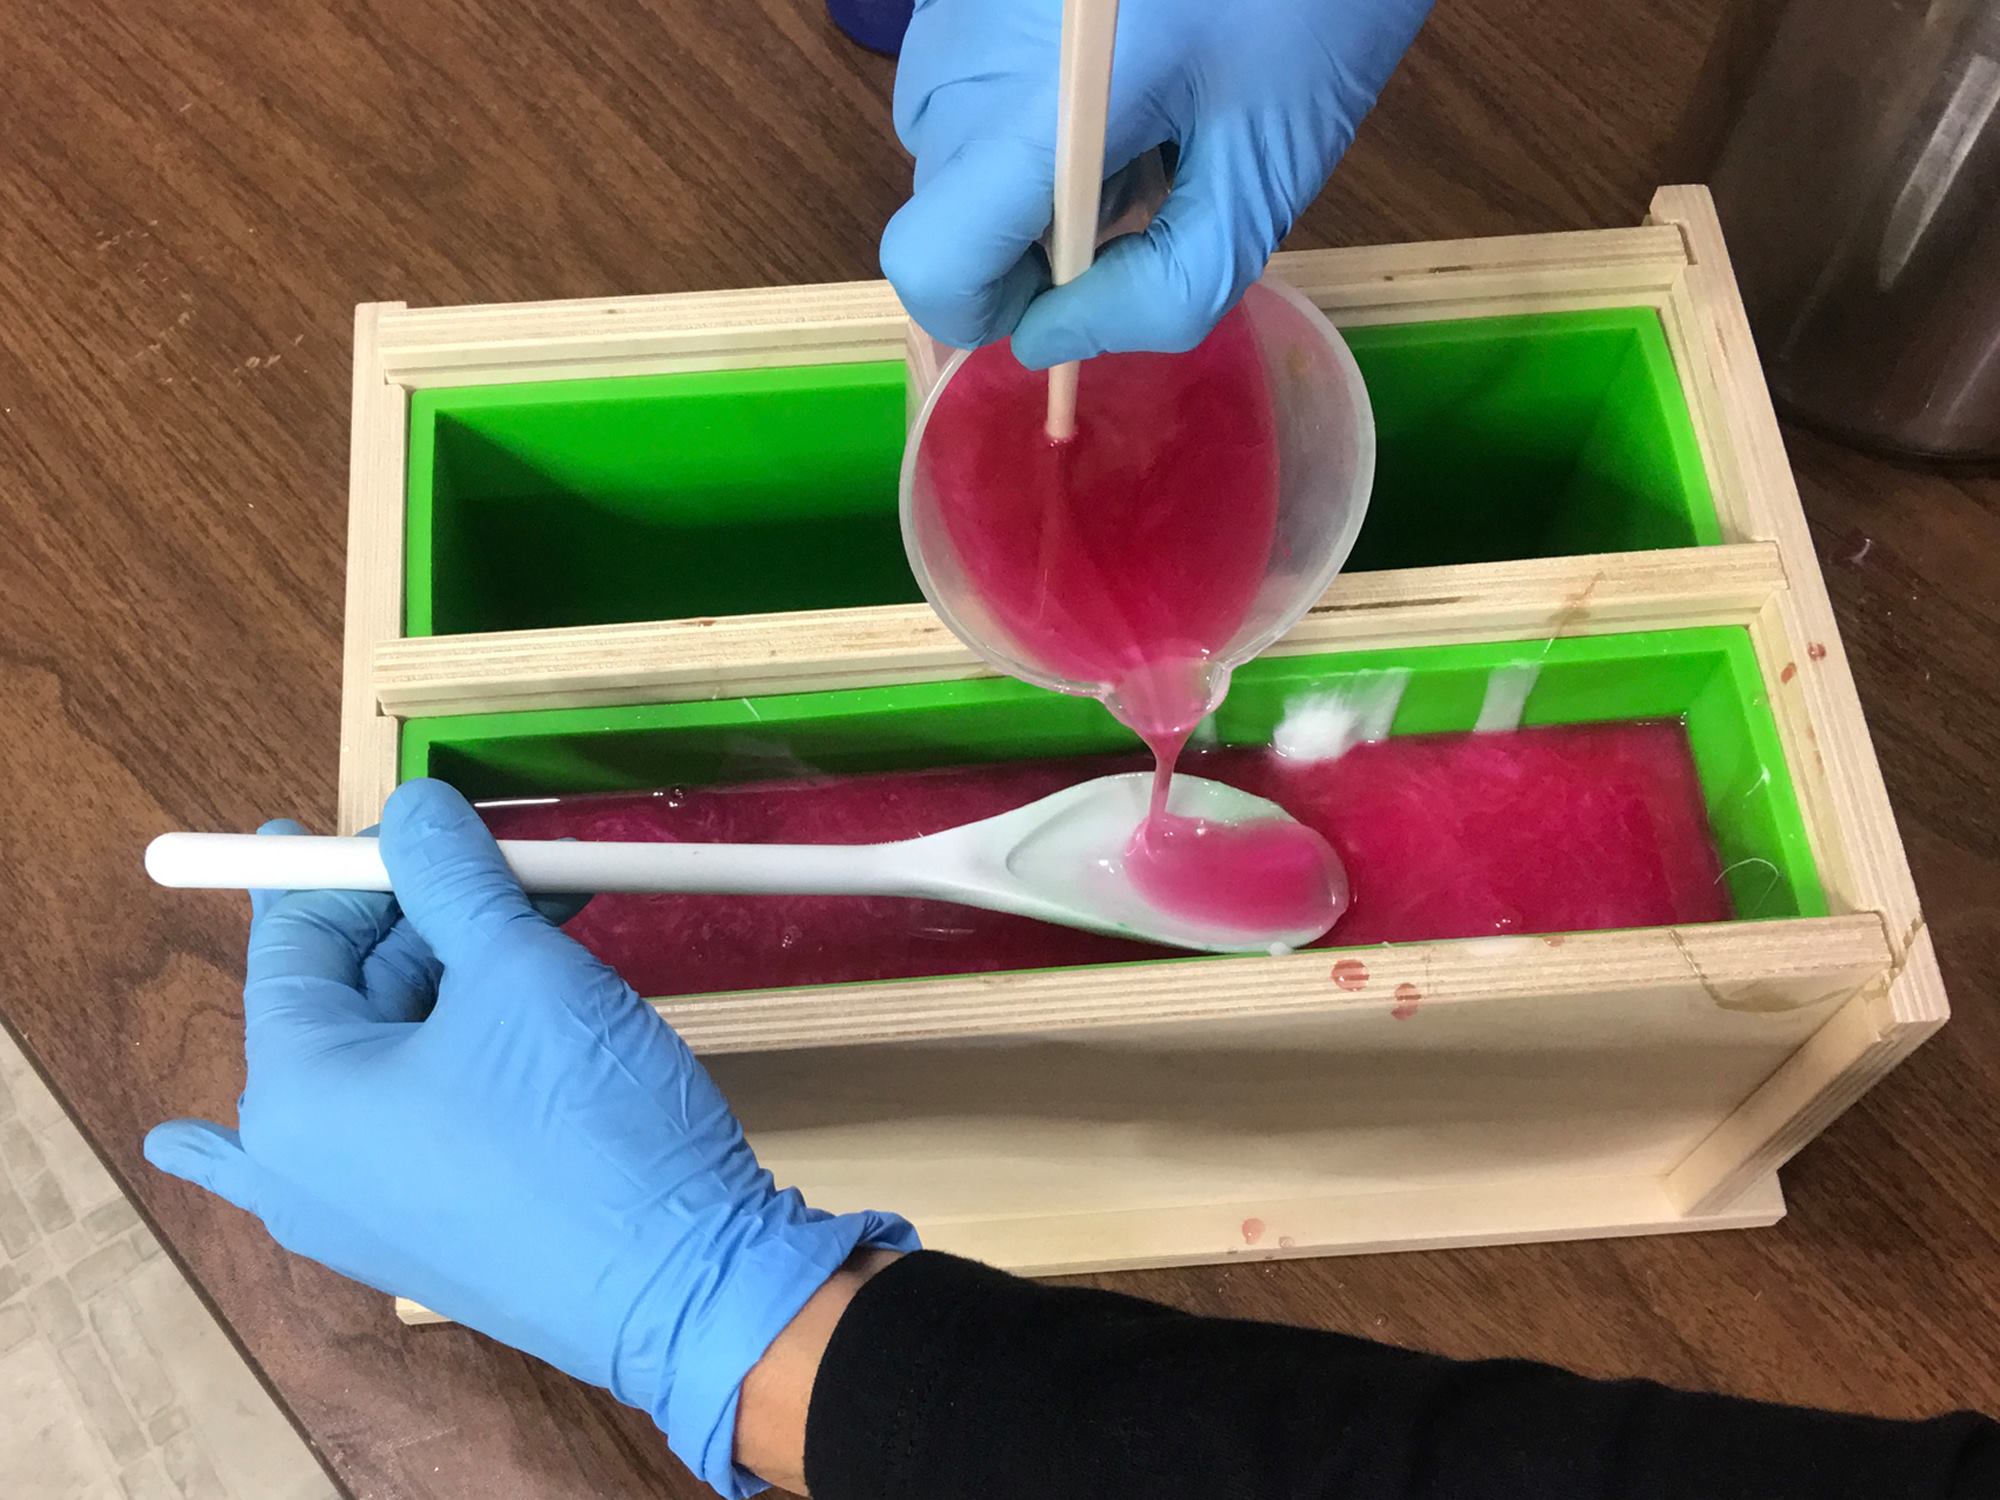
Now is time to have fun! Simultaneously pour each of the bases, making many passes, alternating the colors with the white and the green. Once all is in the mold, wait for the soap to harden up a little bit. Once it is firm enough to support the red, reheat the clear red Melt & Pour in the micro-wave until it is at around 130-140 Fahrenheit’s.
Spritz the top of the soap with rubbing alcohol so that the layers bond. Pour the red soap. I like to pour it on a spoon or spatula to prevent breaking the surface. If desired, sprinkle some Eco Glitter on top of the red layer to give that final magical Holiday touch.
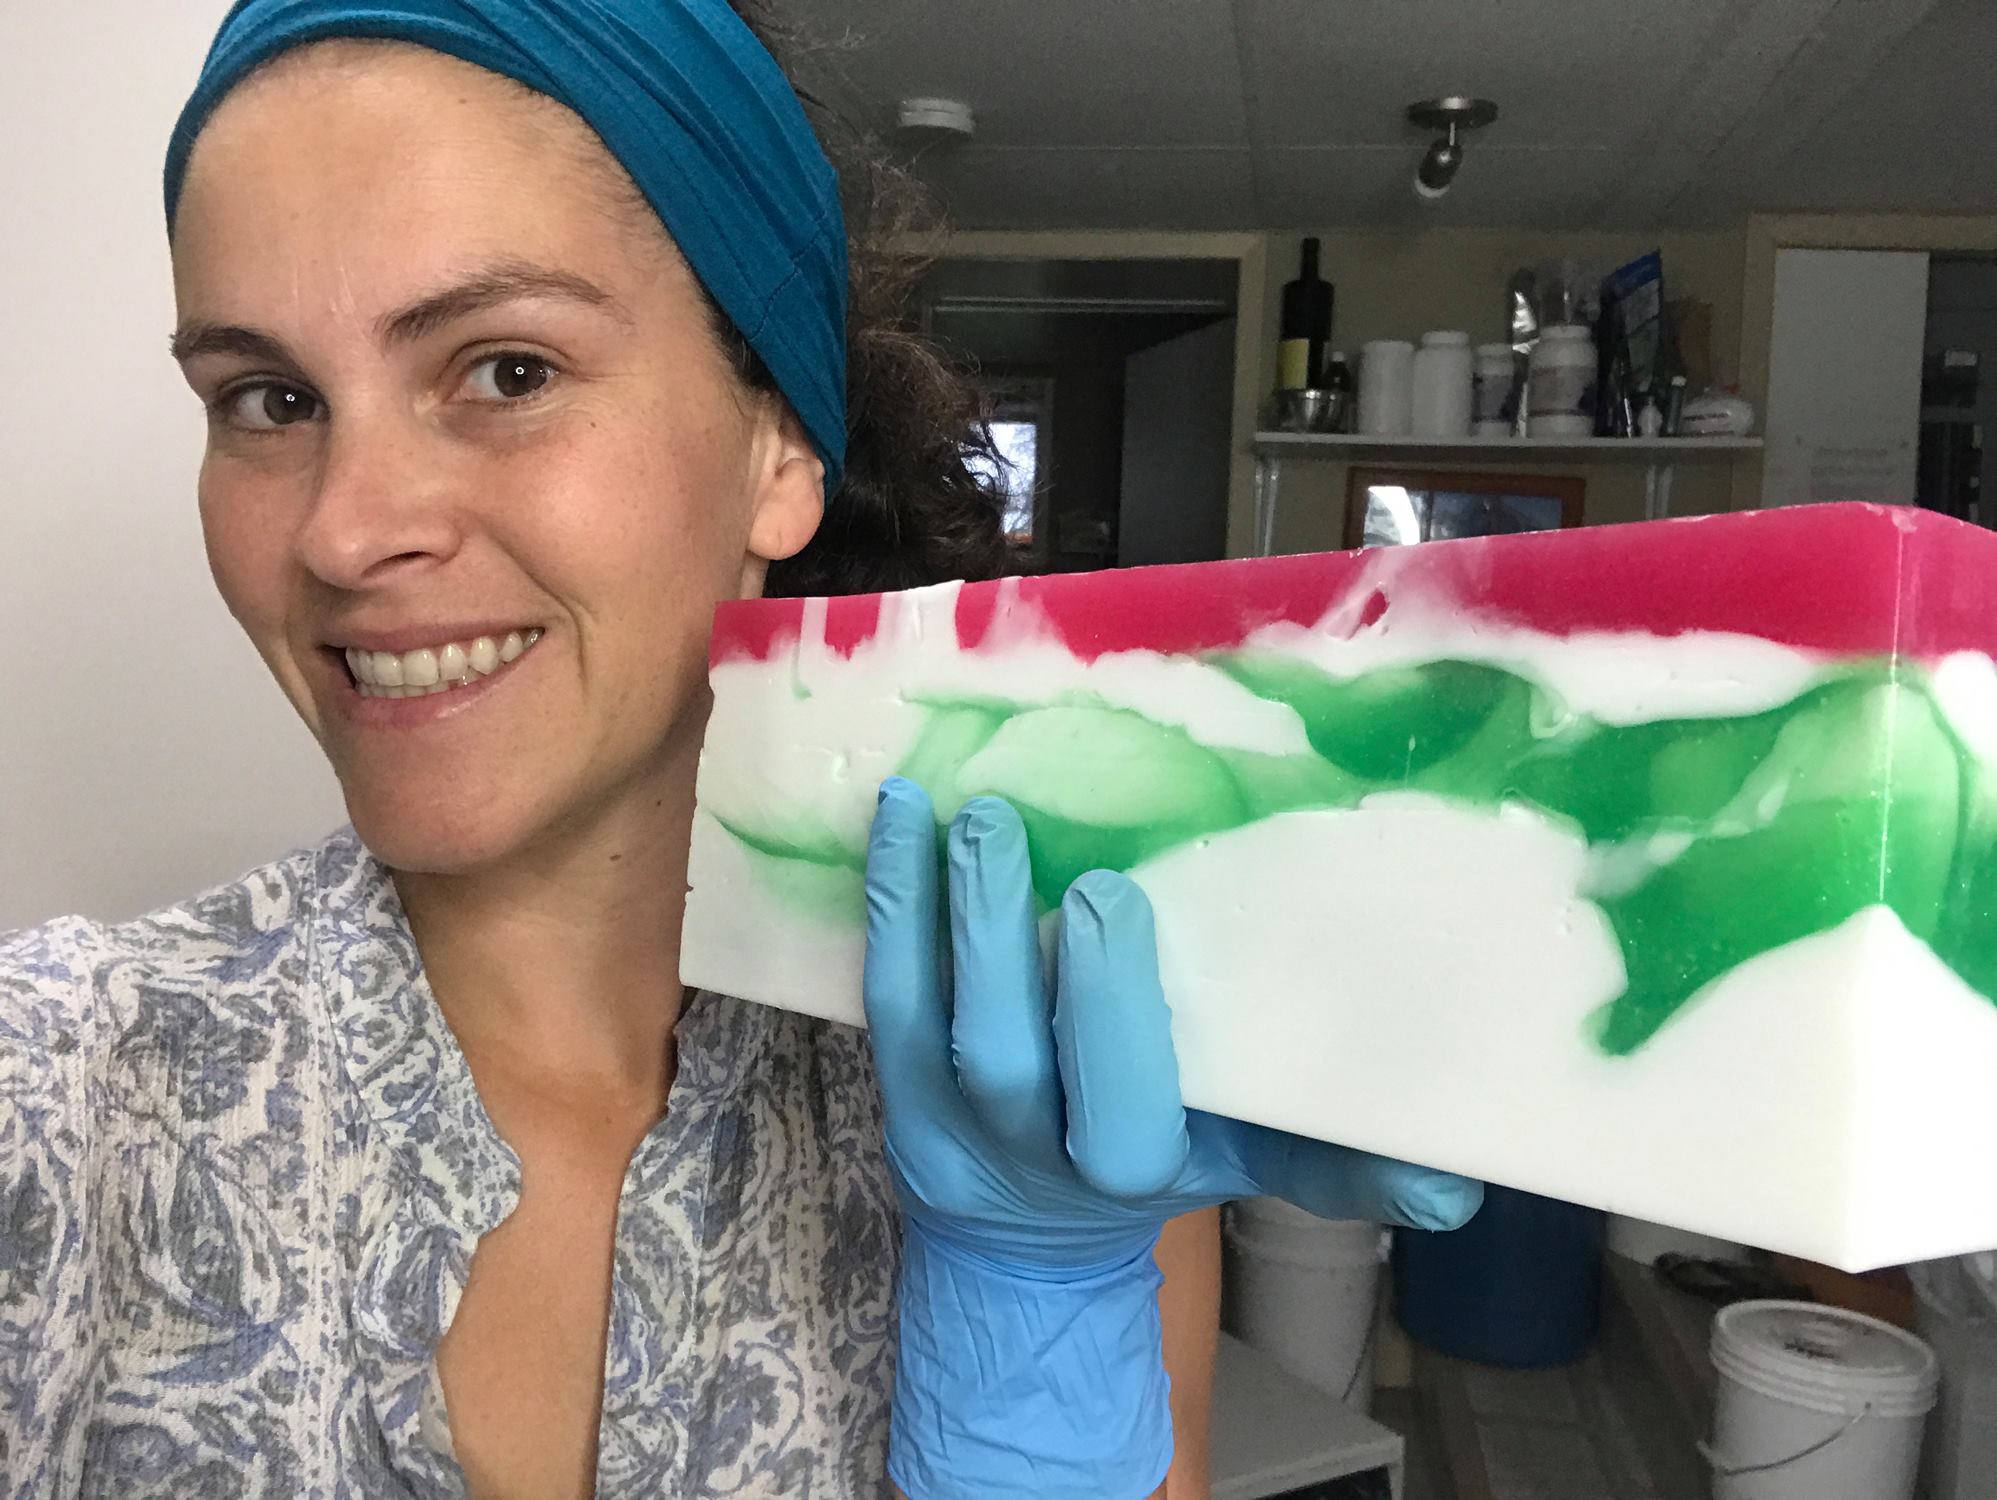
This soap needs to harden and cool completely before being removed from the mold. Usually, with such a big brick, I wait until the next day.
UNMOLDING, CUTTING & WRAPPING
When using Nurture Soap’s Tall and Skinny Silicone molds, you will need to remove the silicone liners from the wooden box first, then detach the liner from around the soap and break the vacuum to release the soap. I usually flip the mold over, place a finger between the small end of the liner and the soap while pushing the bottom of the mold down. You will get the hang of it! It will slip right out.
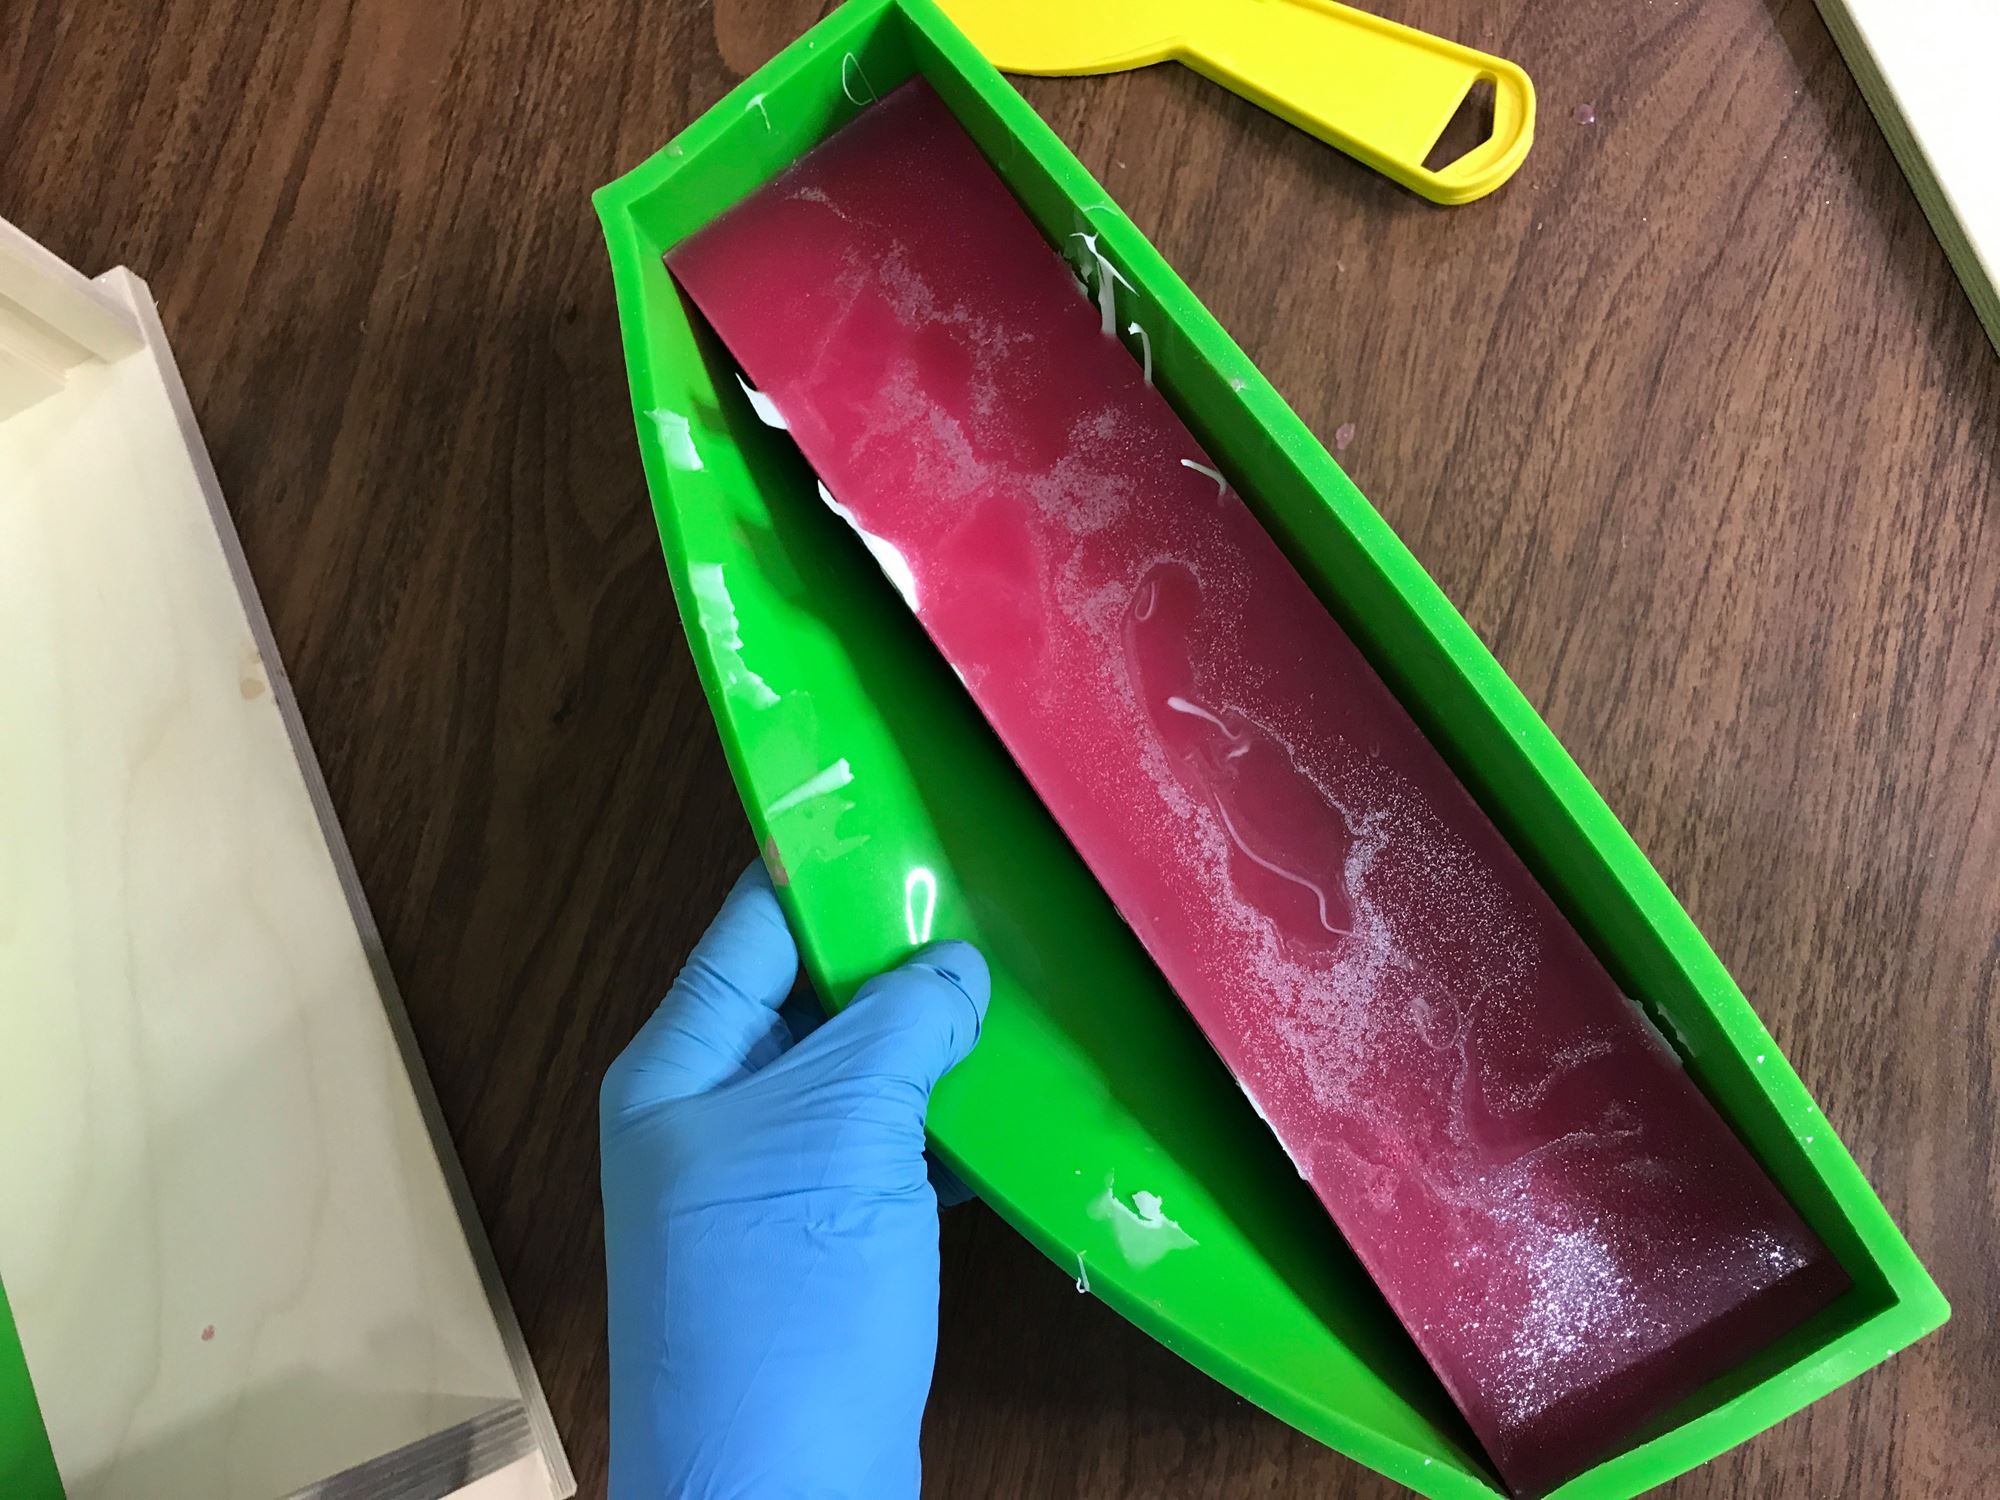
You can wrap the whole loaves in plastic film to be stored away from sunlight this way for a couple of weeks or immediately cut into bars using a miter box and a non-serrated knife or soap cutter.
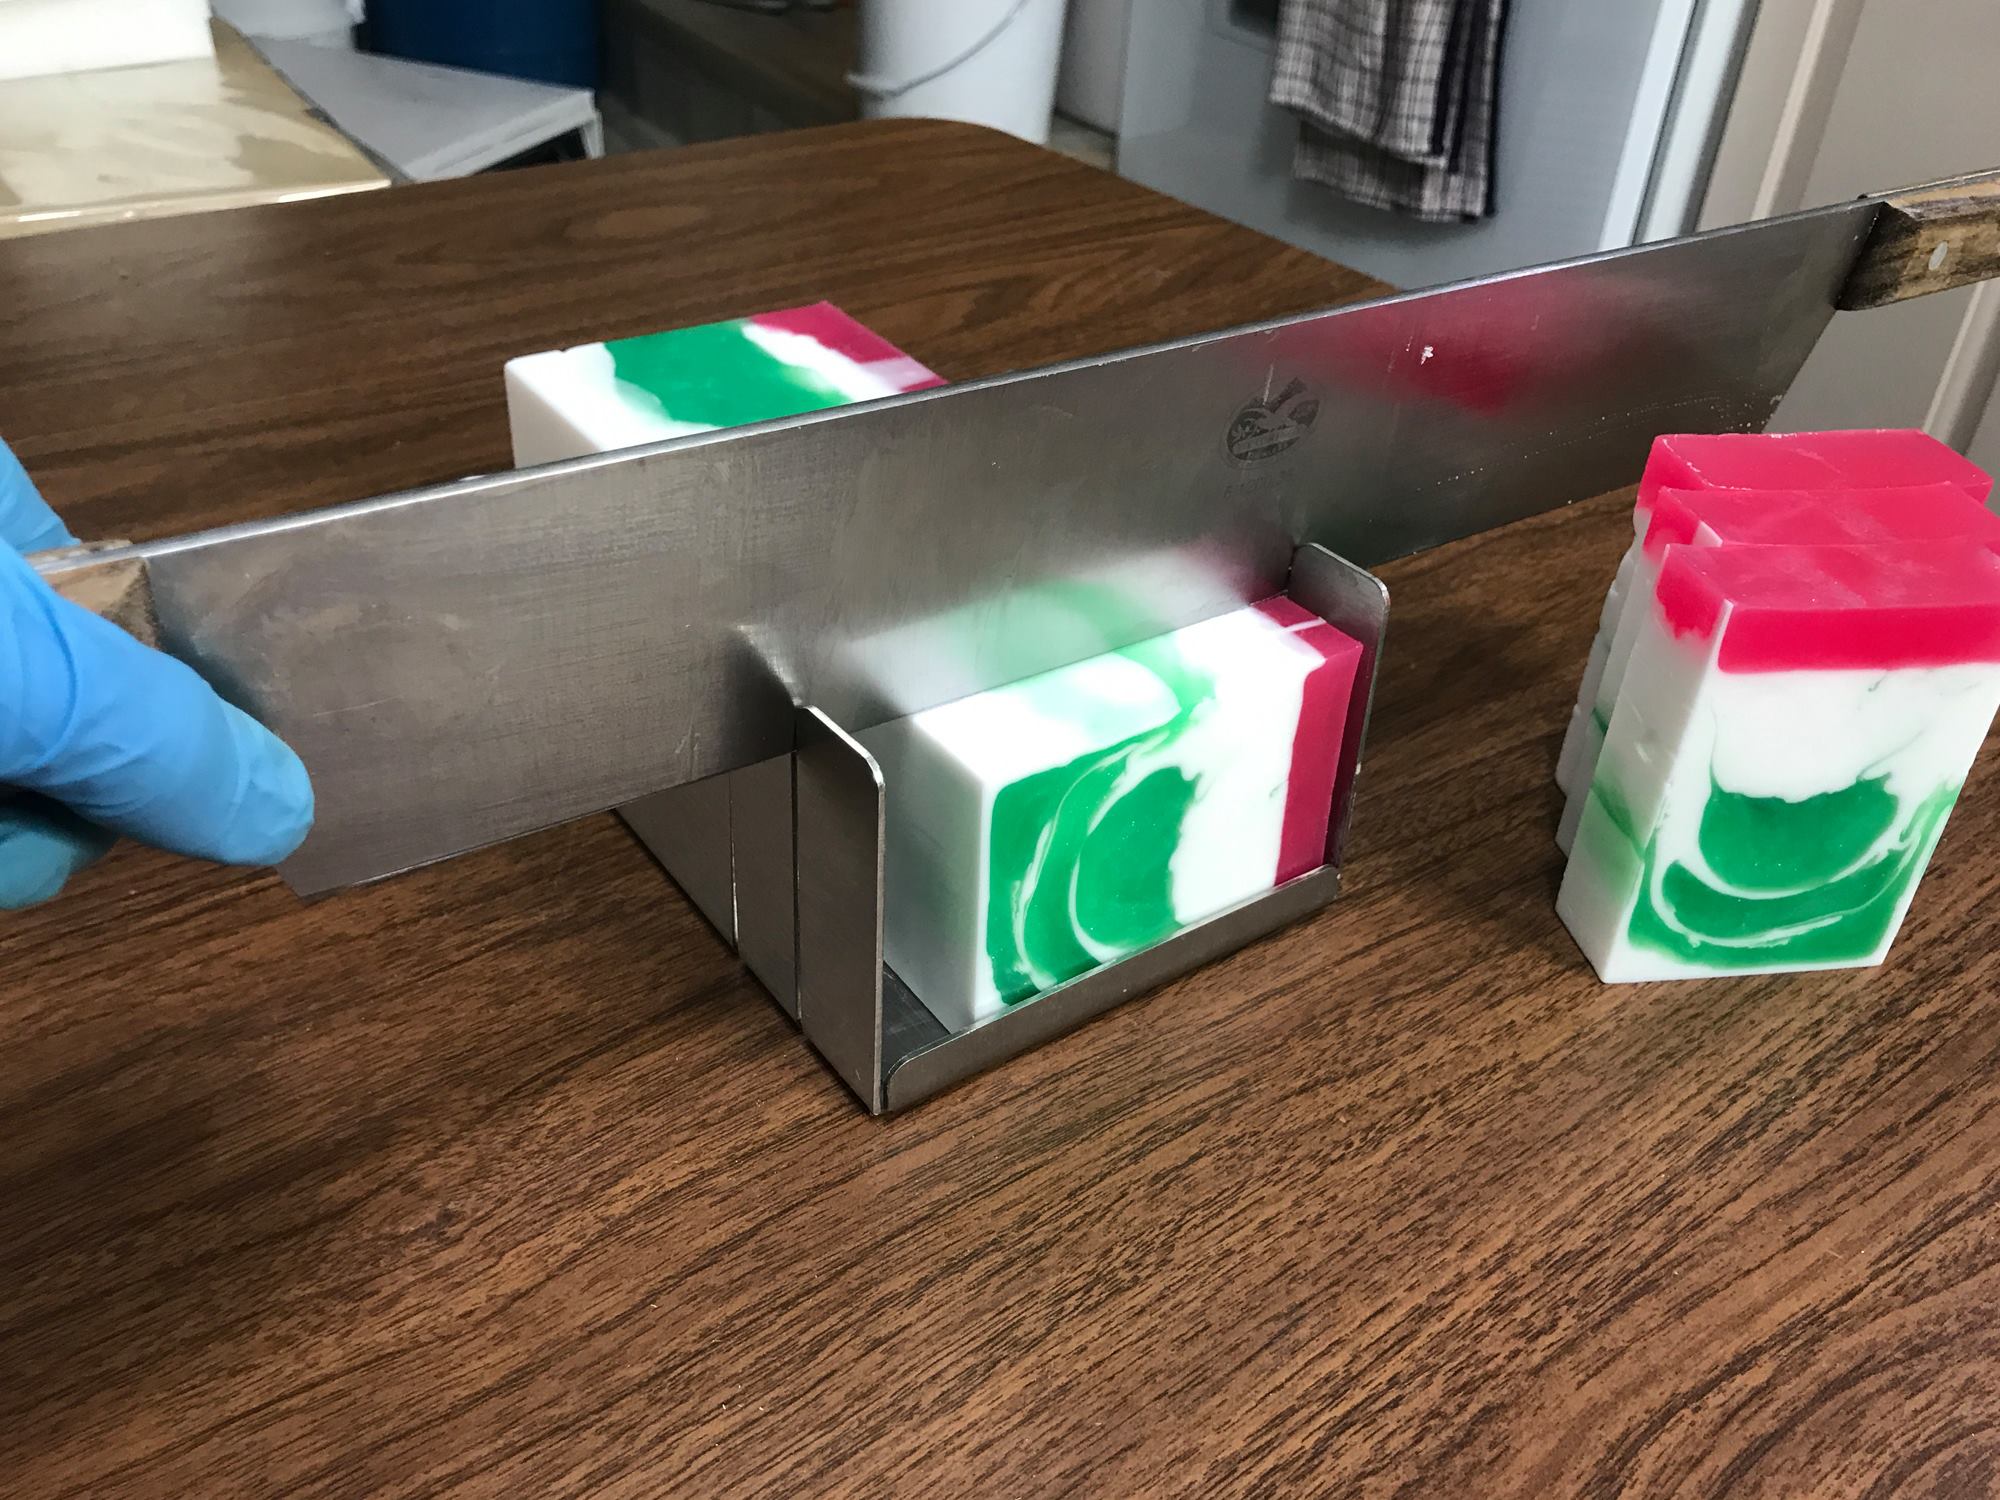
I like to cut my bars 1 inch thick and wrap them individually using the National Shrink Wrap System. Label accordingly and use good manufacturing practices if you intend to sell your soaps. Find a fun Holiday name for that soap and it will be perfect for Holiday gifts & stockings!
Keep in mind that this soap can be made with different colors or fragrances! Your imagination is your only limit. Thanks for reading me and I hope you enjoyed this tutorial.
Voilà!
 About Ariane C Arsenault
With a University degree in Visual Arts and creativity up her sleeves, Ariane founded La Fille de la Mer, Savonnerie Artisanale in 2003 in the Magdalen Islands, Quebec, Canada. The colours and design of her products make her stand out as a soapmaker. Born on an island and raised on a sailboat, no wonder Ariane’s product lines are inspired by the seaside! Always in search of local products to add to her soap formulations, she uses local honey, kelp, sand as well as many other hand picked fruits and botanicals.
After over 10 years in the handmade cosmetics industry, soapmaking is part of her daily life and she is always looking to learn and improve her techniques. In Canada, she is a leader in the industry and is very active on specialized social media. Her YouTube channel and Facebook page are places where she shares her skills with her clients.

Love your soaps! They’re beautiful and well designed.