

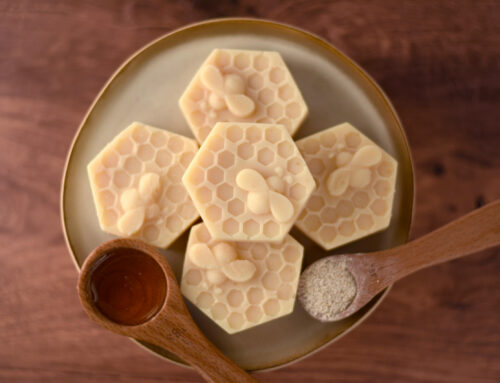
This week is yellow week of Bramble Berry’s #SoaptheRainbow series. They asked if I wanted to participate by posting during yellow week. Of course! I actually have two yellow tutorials for you this week. Today is a natural yellow tutorial, and on Wednesday I’ll post a yellow tutorial using yellow mica!
You have to check out Amy’s tutorial she posted during red week. Her Apple Berry Faux Tall & Skinny soap is adorable. I love the design!
For more natural soap recipes, check out Lovin Soap Studio Cold Process Soap Recipe Book with 50 recipes + 64 essential oil blends.
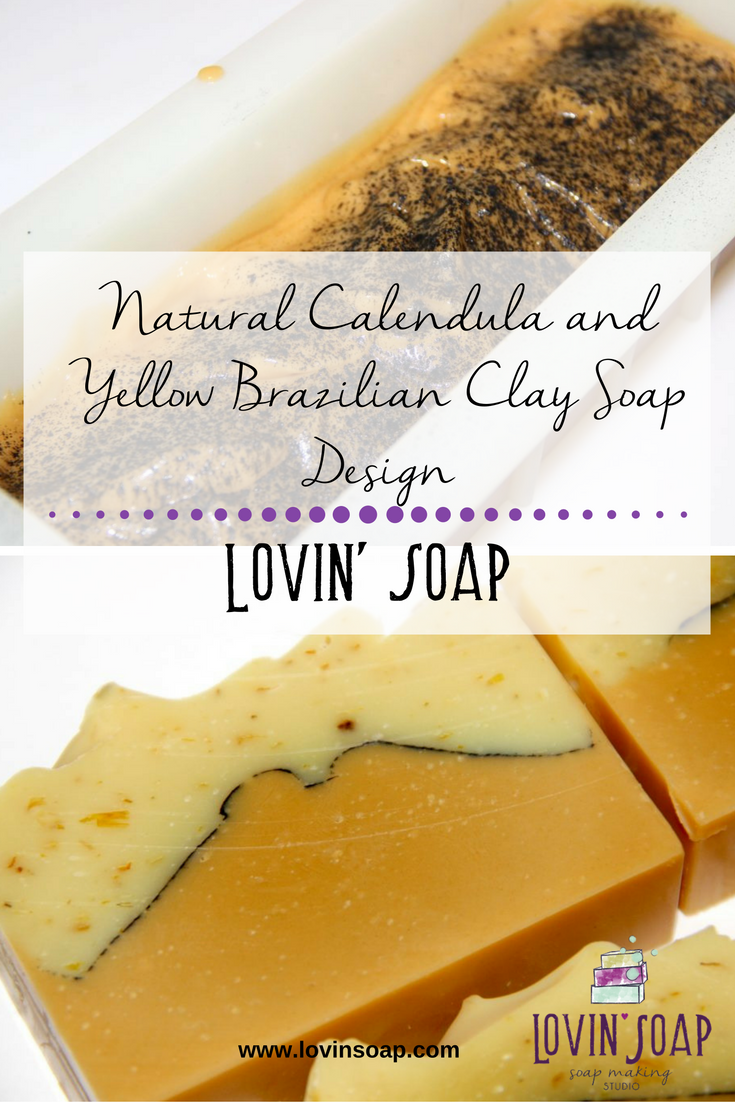
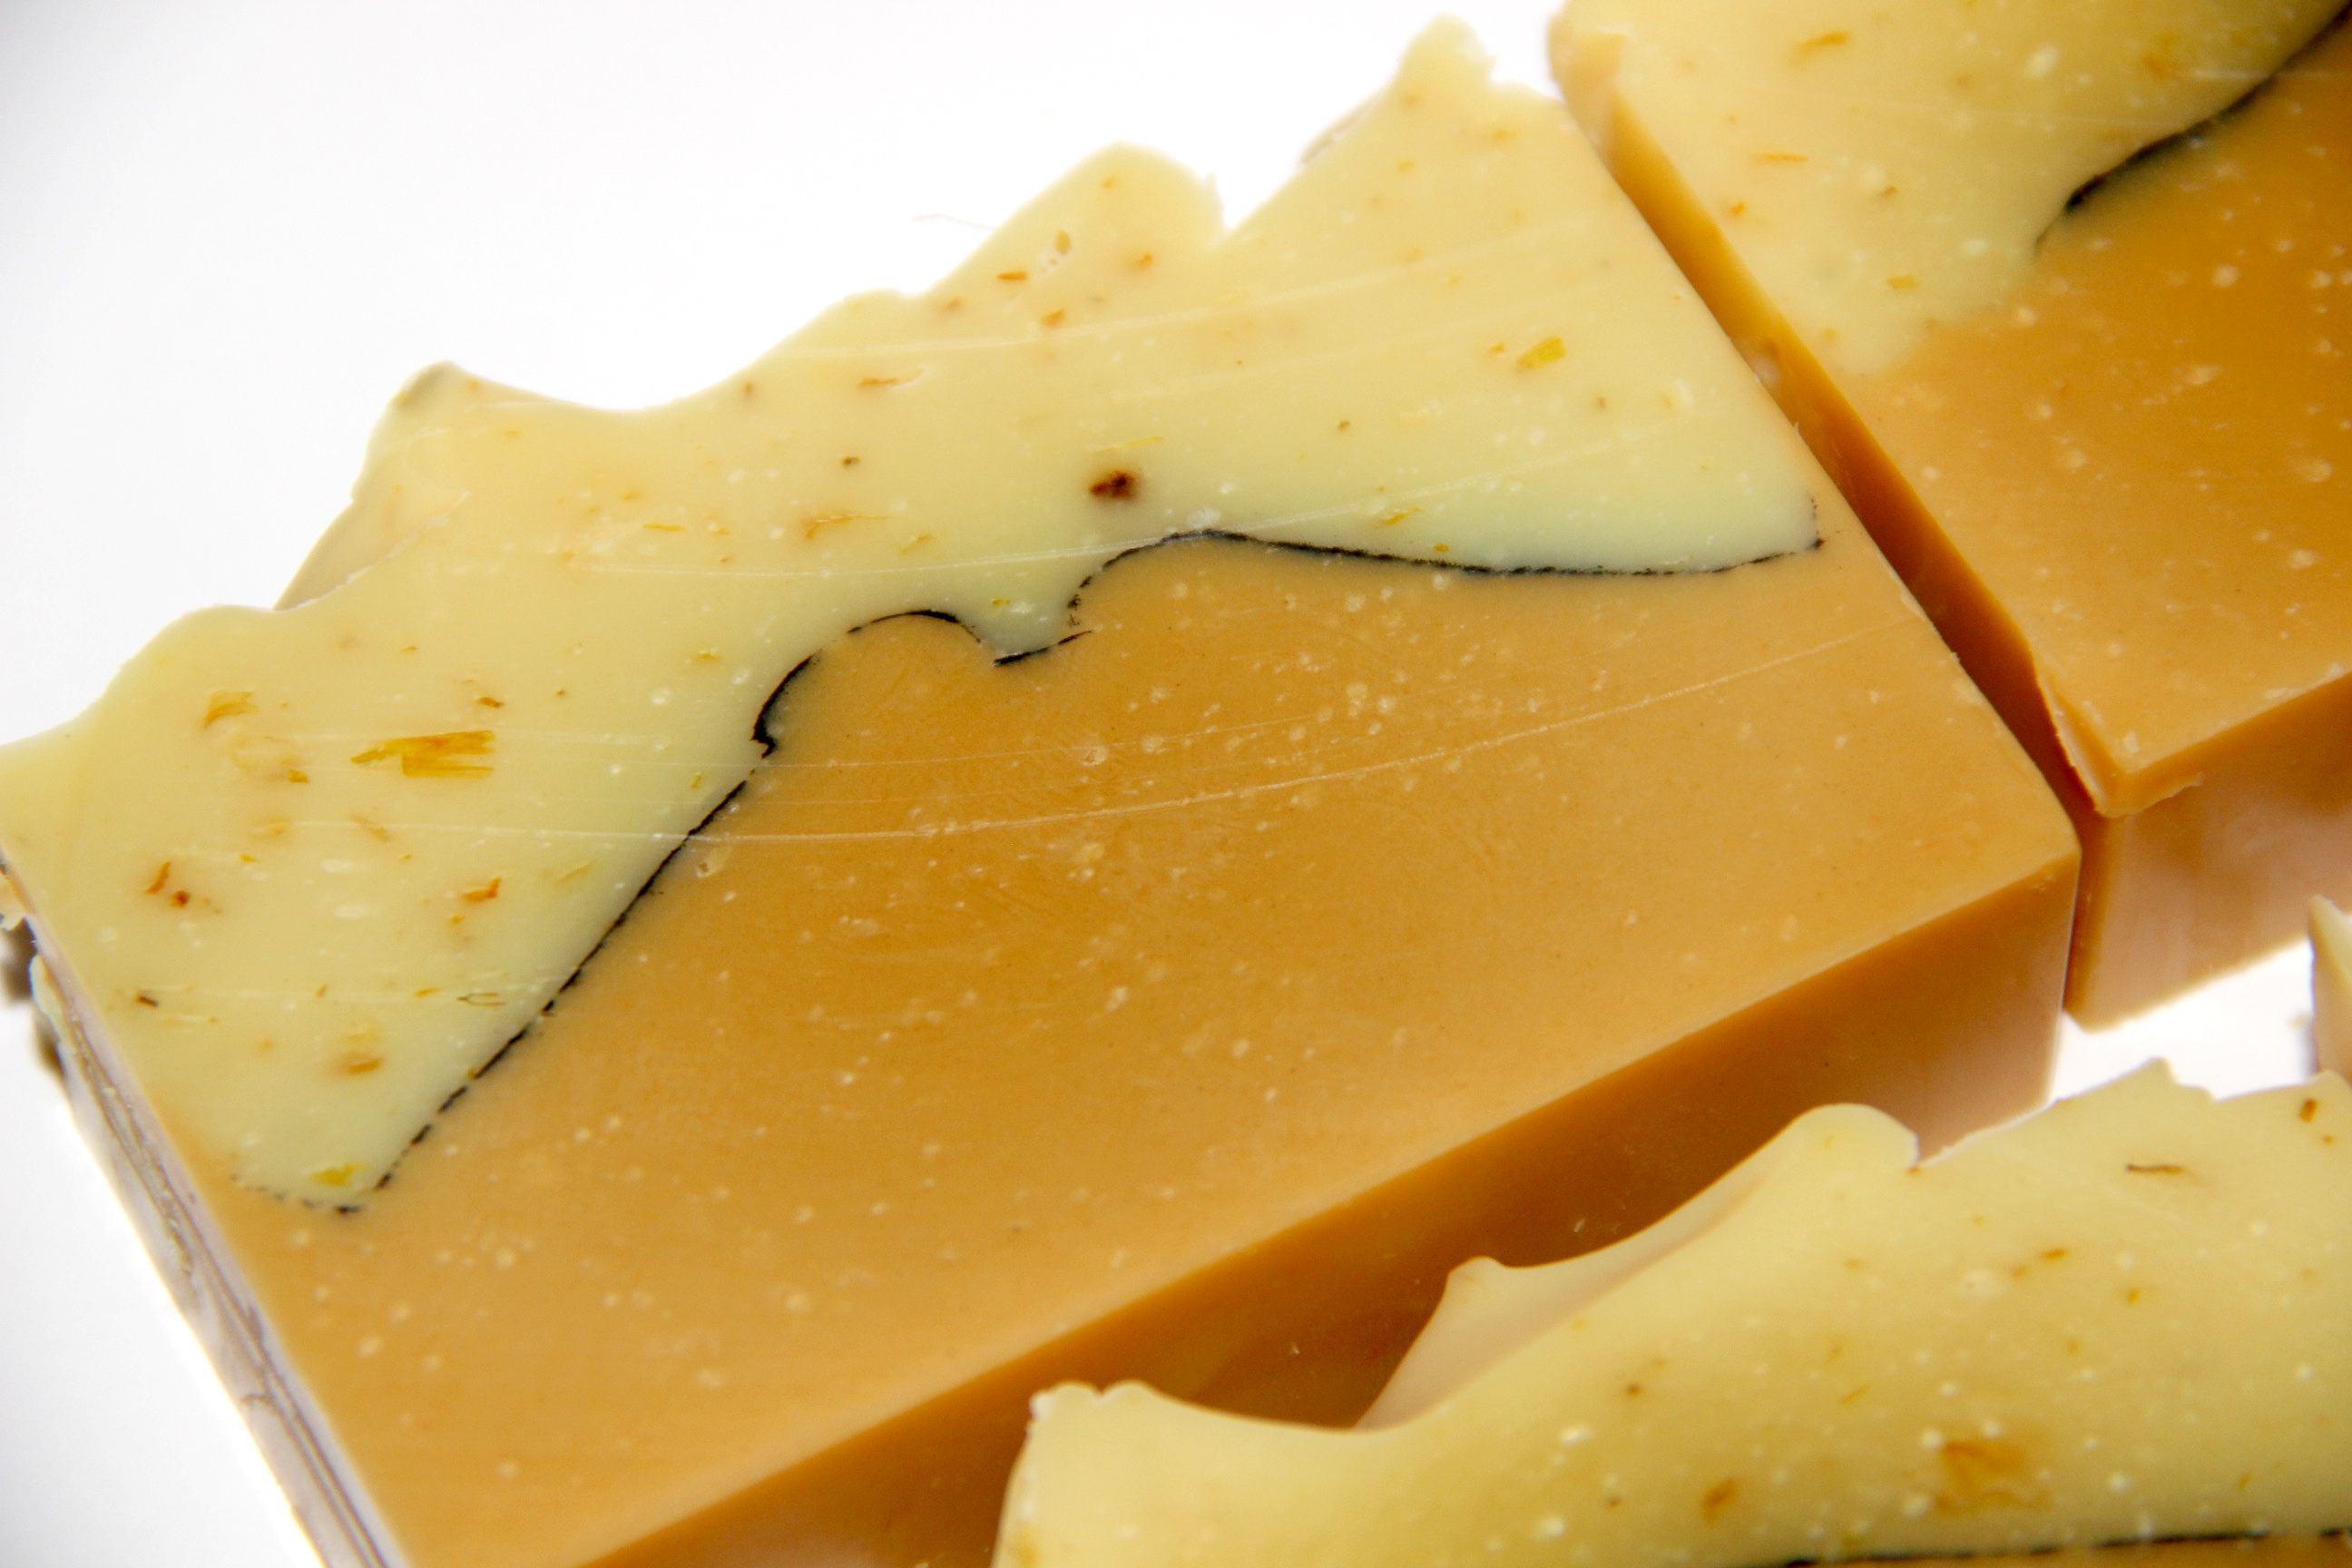
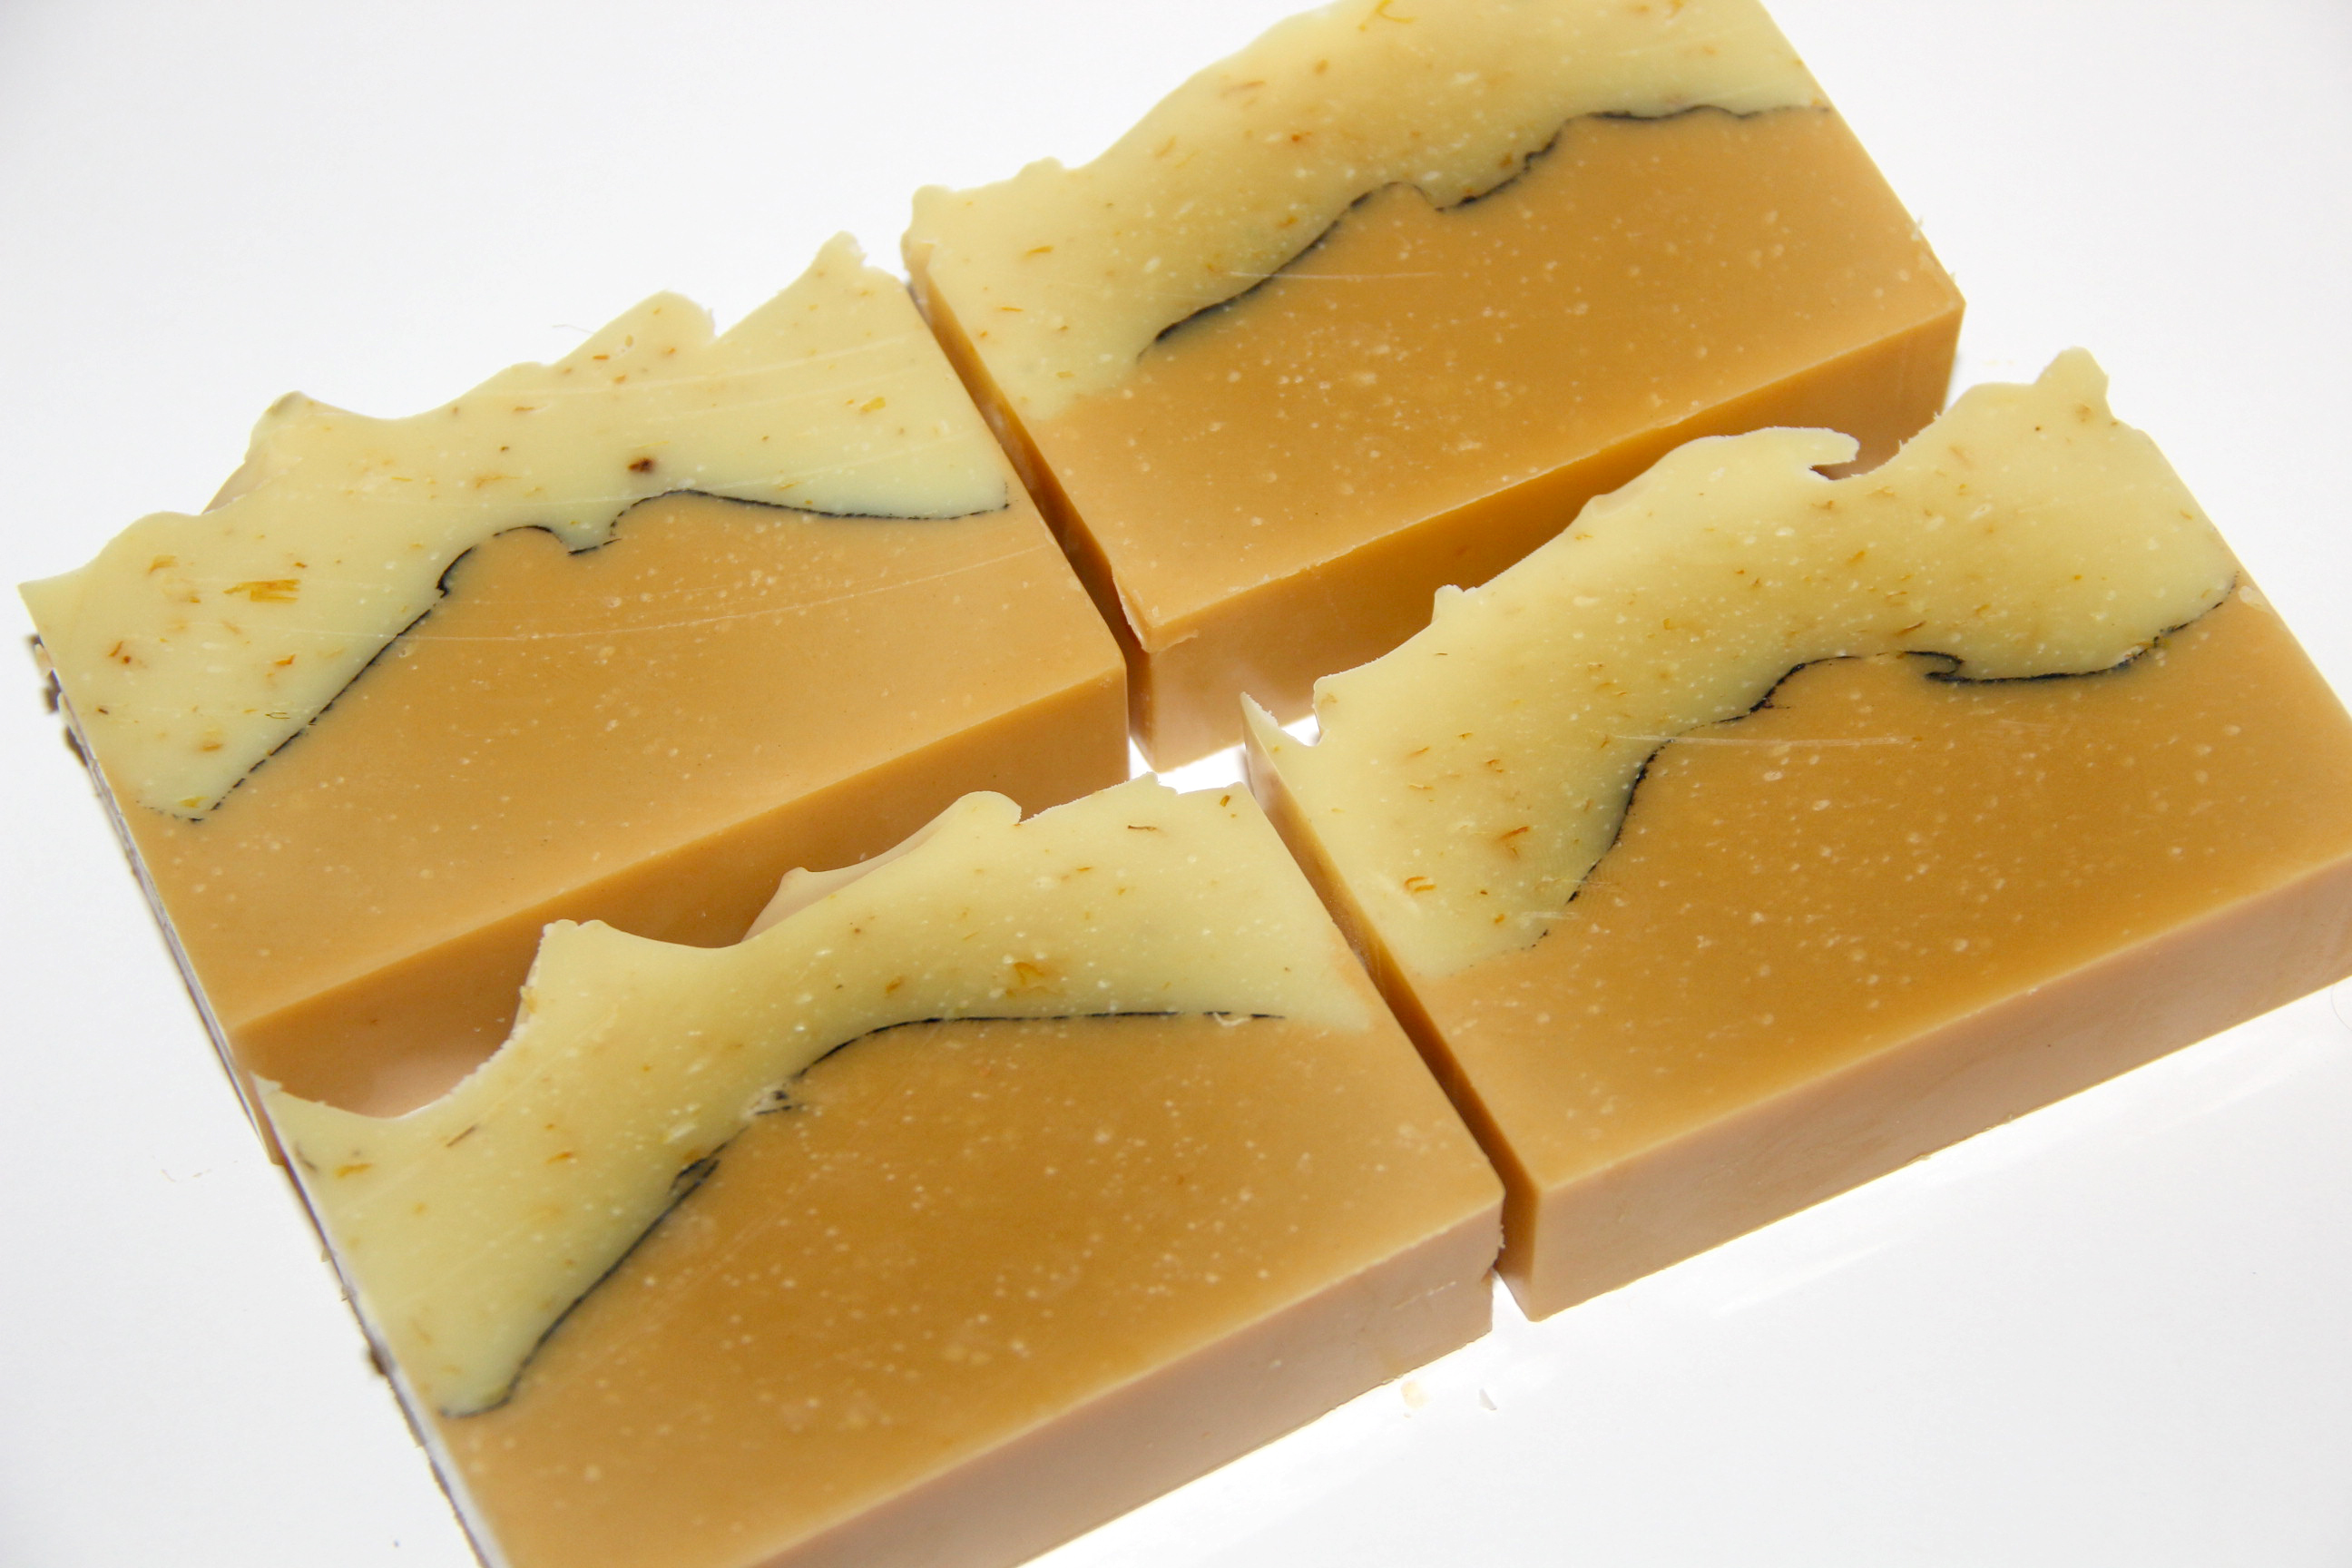
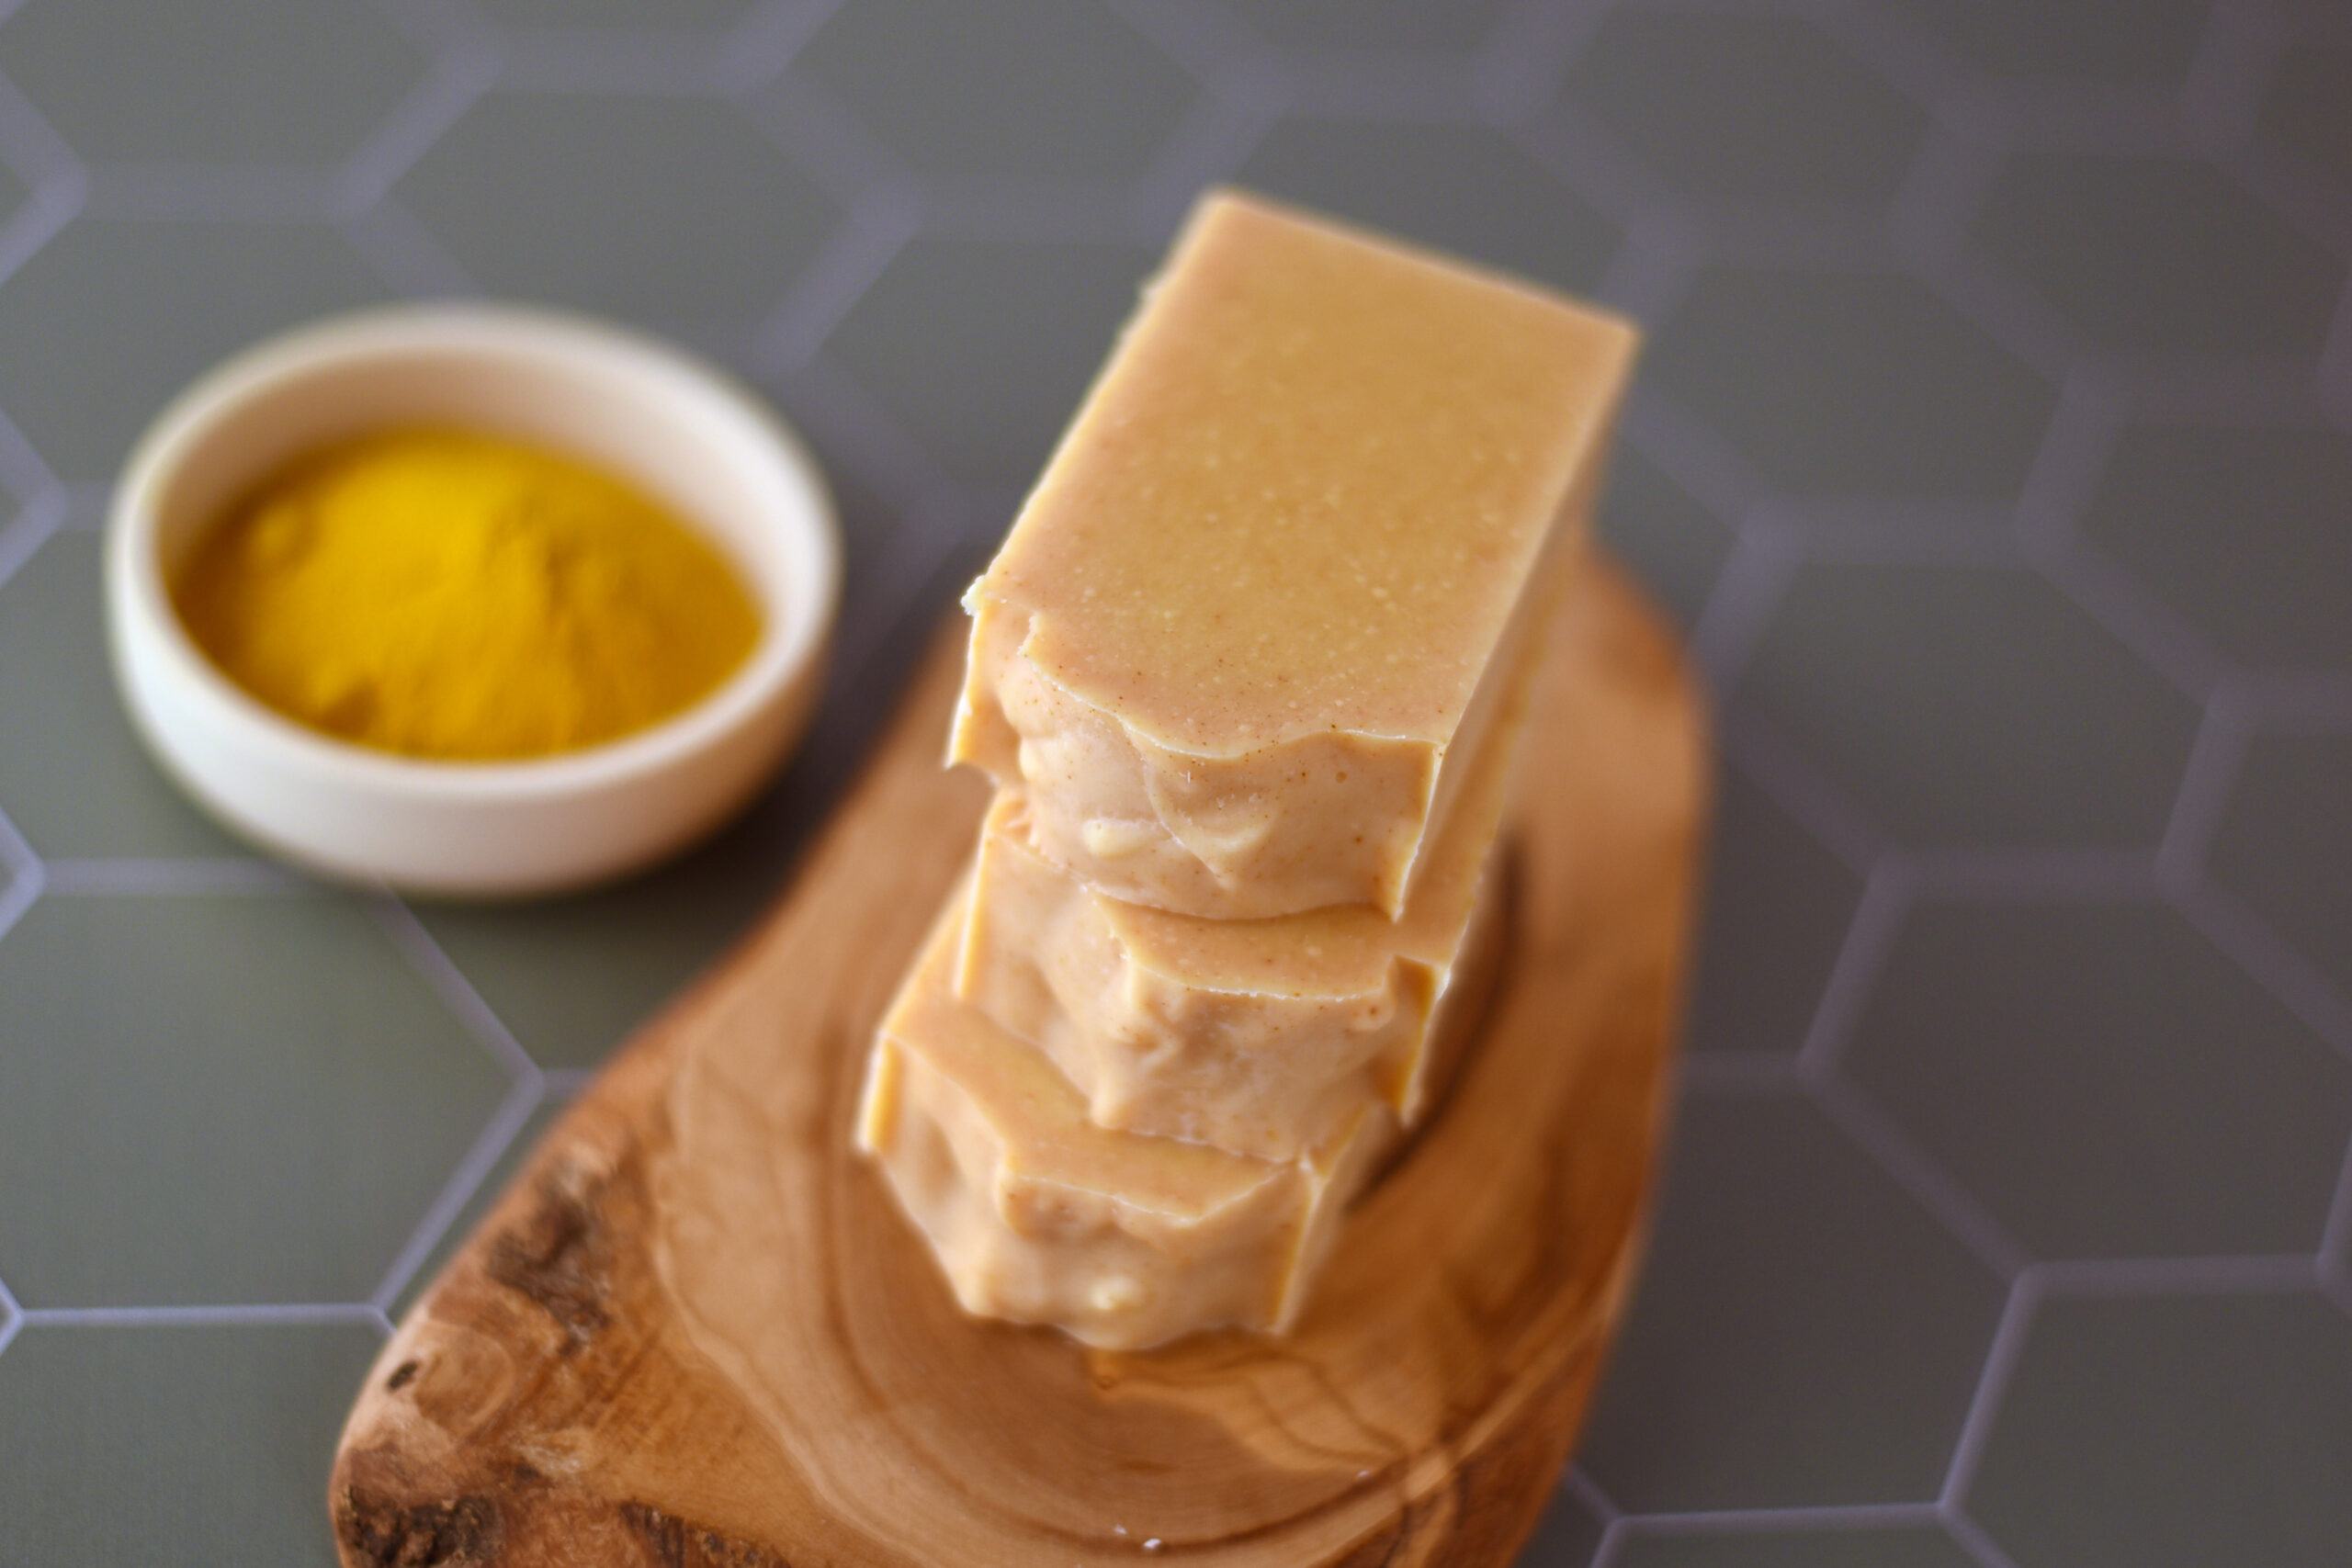
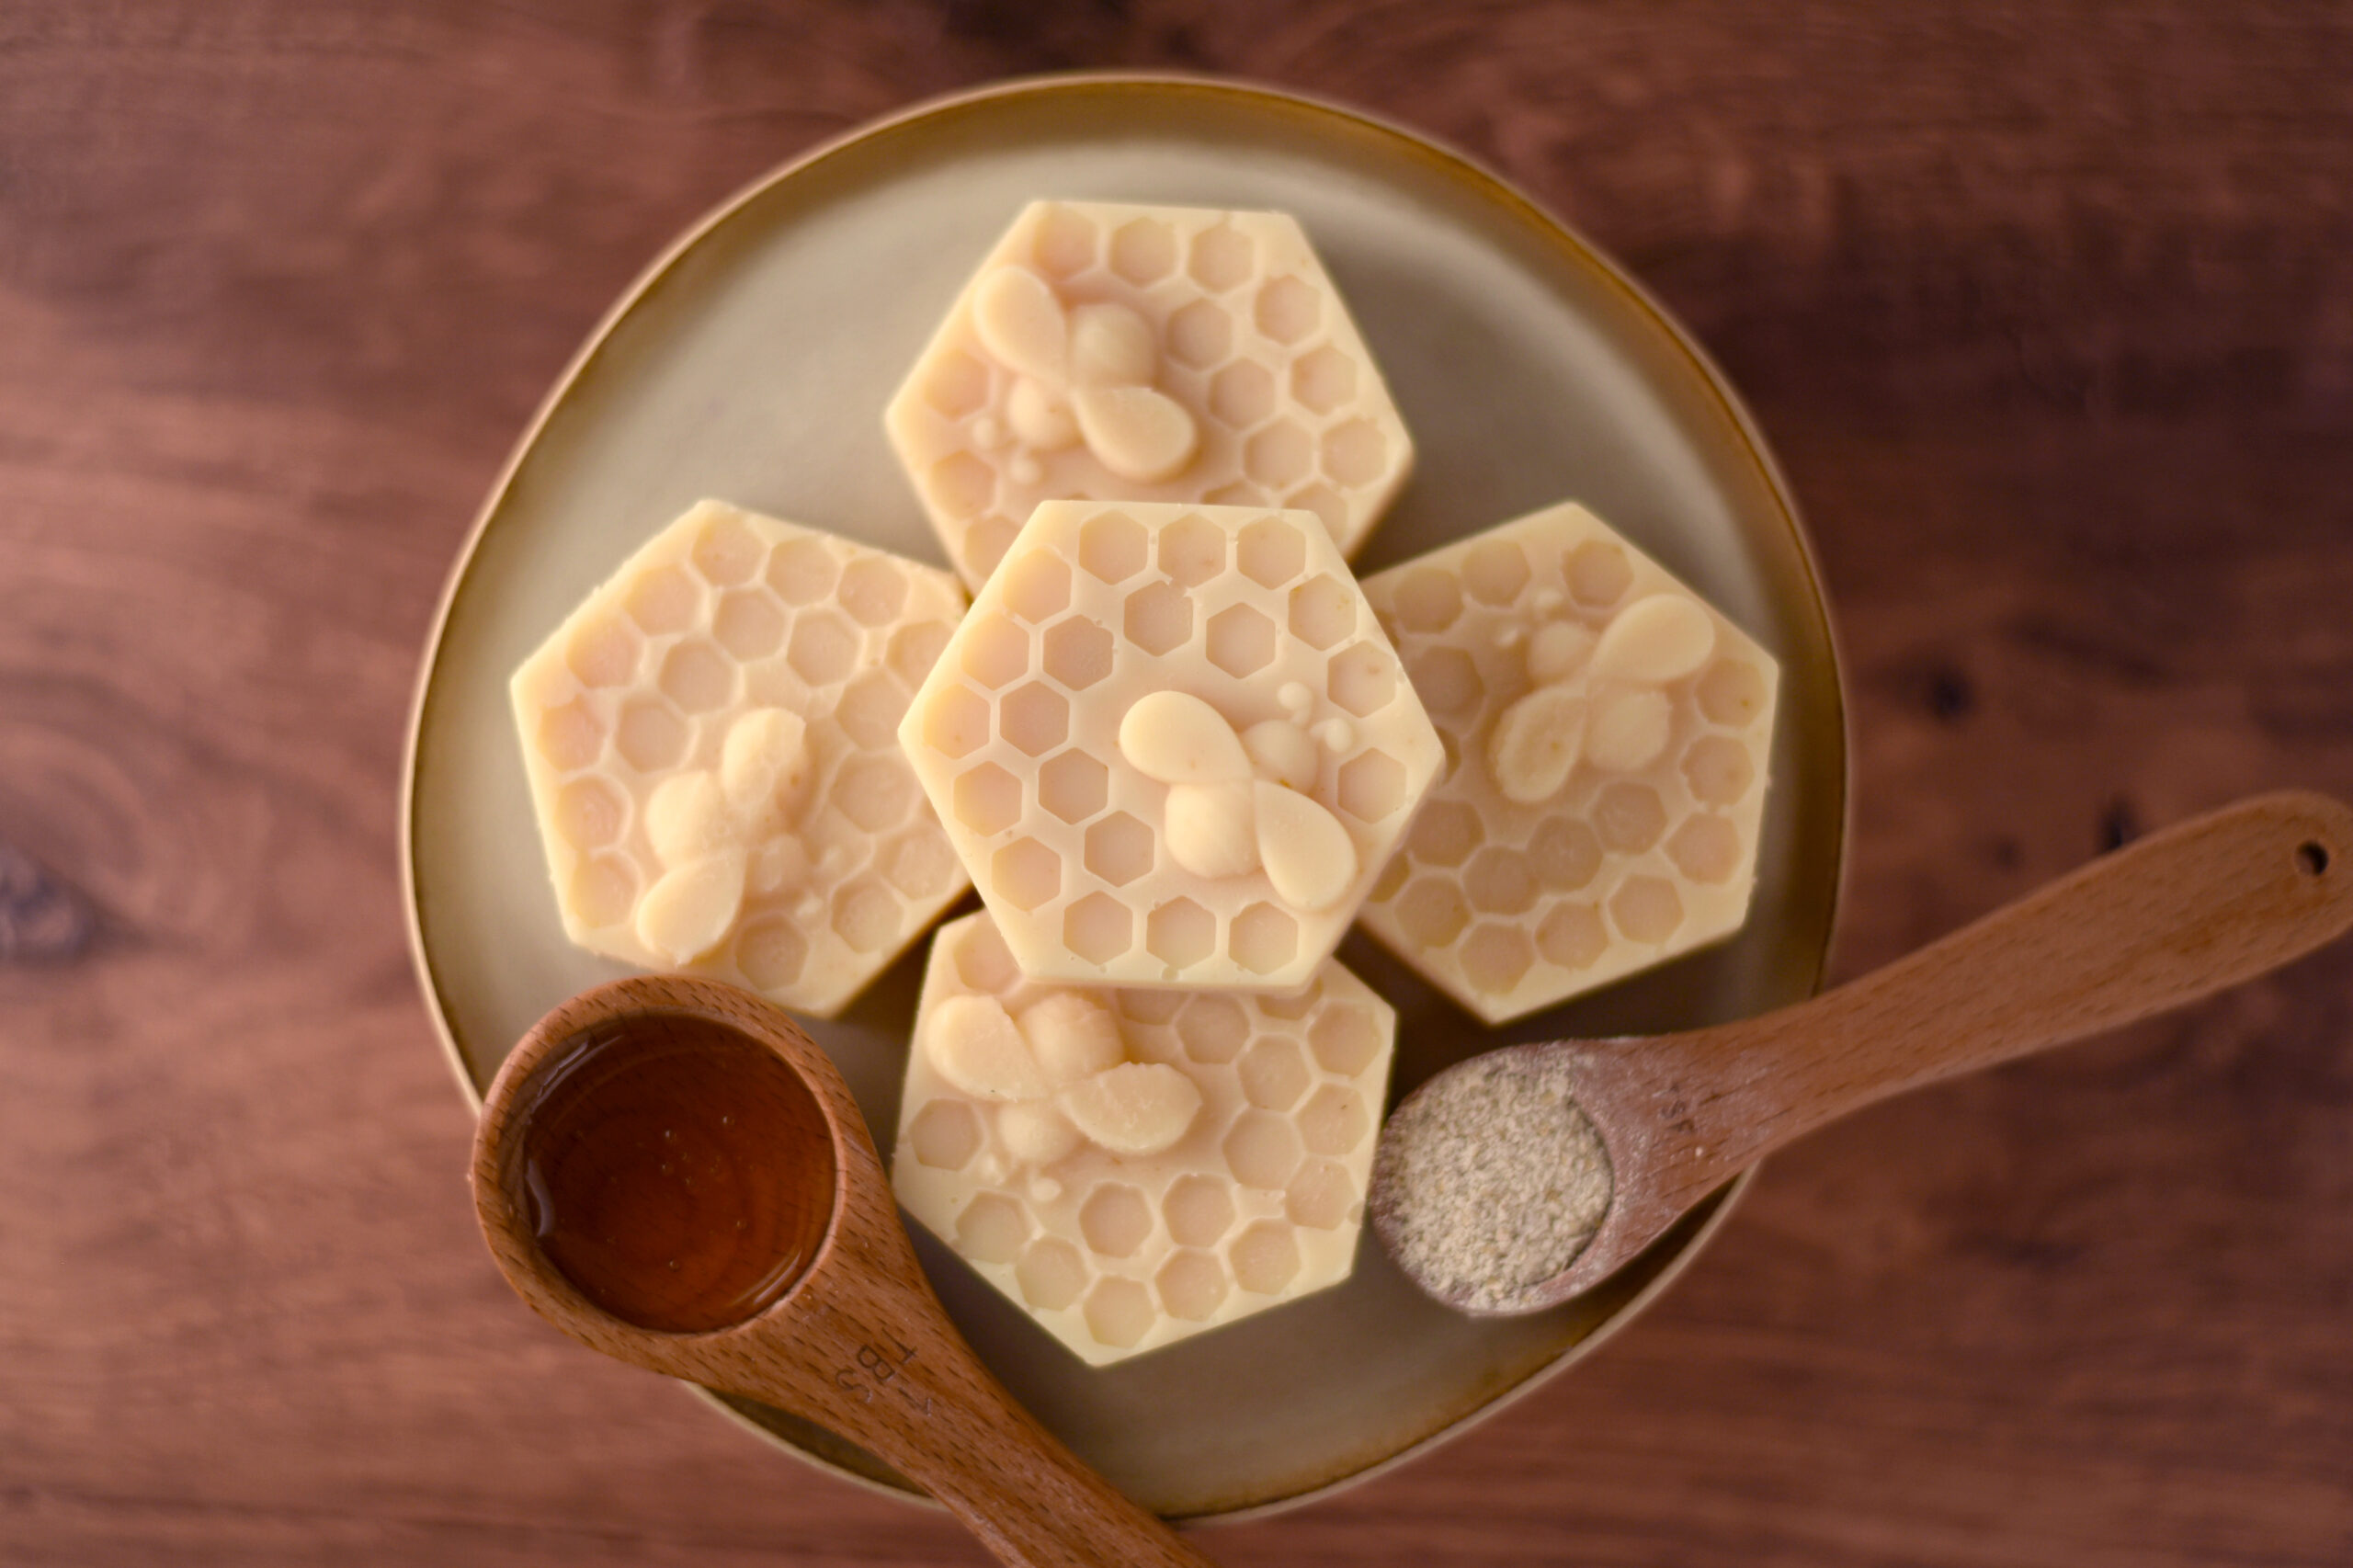
For natural yellow in this recipe I used Yellow Brazilian Clay from Bramble Berry and Calendula petals. I’m a big fan of the Brazilian clays…I love the bold colors that they produce.
This technique also uses charcoal to create a line between the layers.
Let’s make soap!
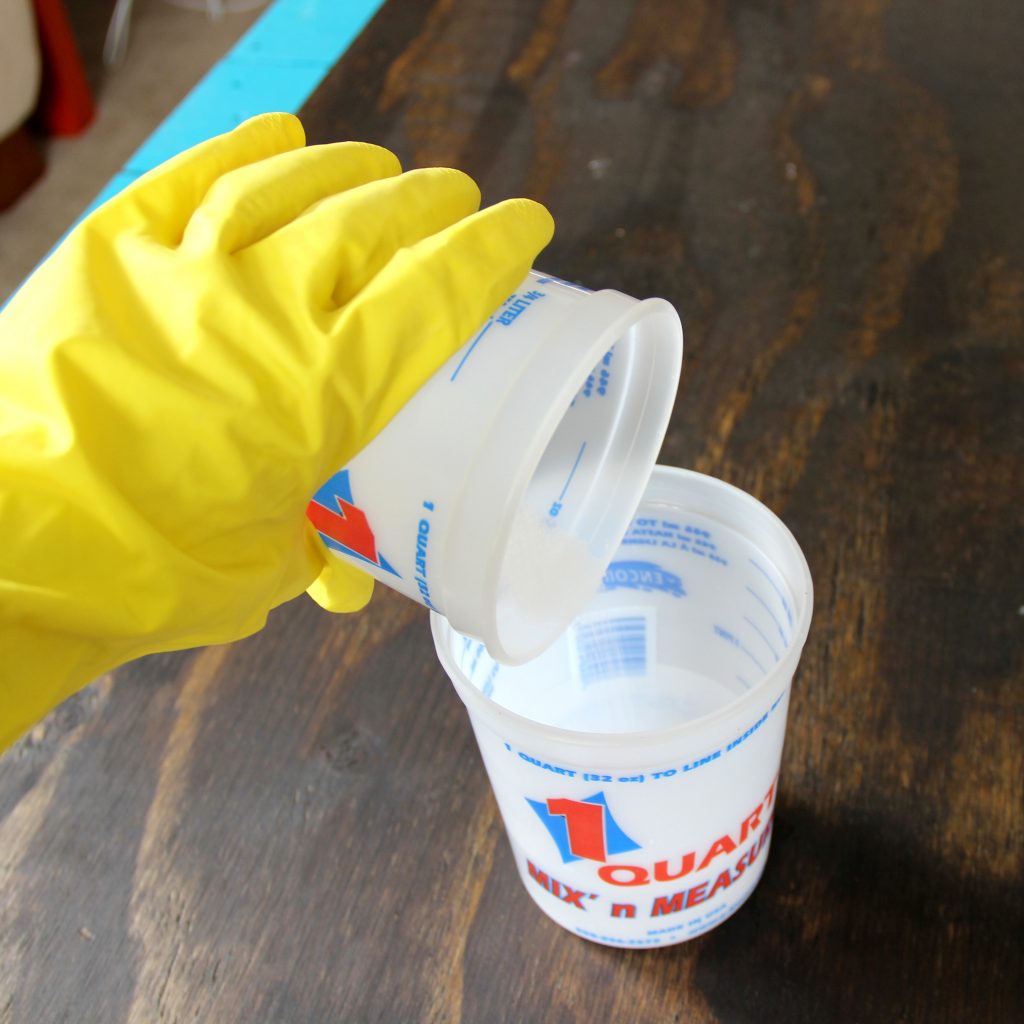
Safety Warning: This recipe is for soapmakers who have a basic knowledge of the soapmaking process and know the correct safety procedures to use when handling lye. If you are new to soapmaking, visit our free soap making guide or check out our Basic Soapmaking eBook. Be sure to wear safety goggles and gloves while soaping.
This recipe fits into a 10″ silicone loaf mold from Bramble Berry.
Natural Calendula and Yellow Brazilian Clay Recipe
Coconut Oil – 10 oz. (31.25%)
Shea Butter – 4 oz. (12.5%)
Olive Oil – 12 oz. (37.5%)
Rice Bran Oil – 4 oz. (12.5%)
Avocado Oil – 2 oz. (6.25%)
Sodium Hydroxide – 4.5 oz.
Water – 9 oz.
Yellow Brazilian Clay – 1/2 teaspoon
Calendula – As shown
Charcoal – 1 teaspoon to dust
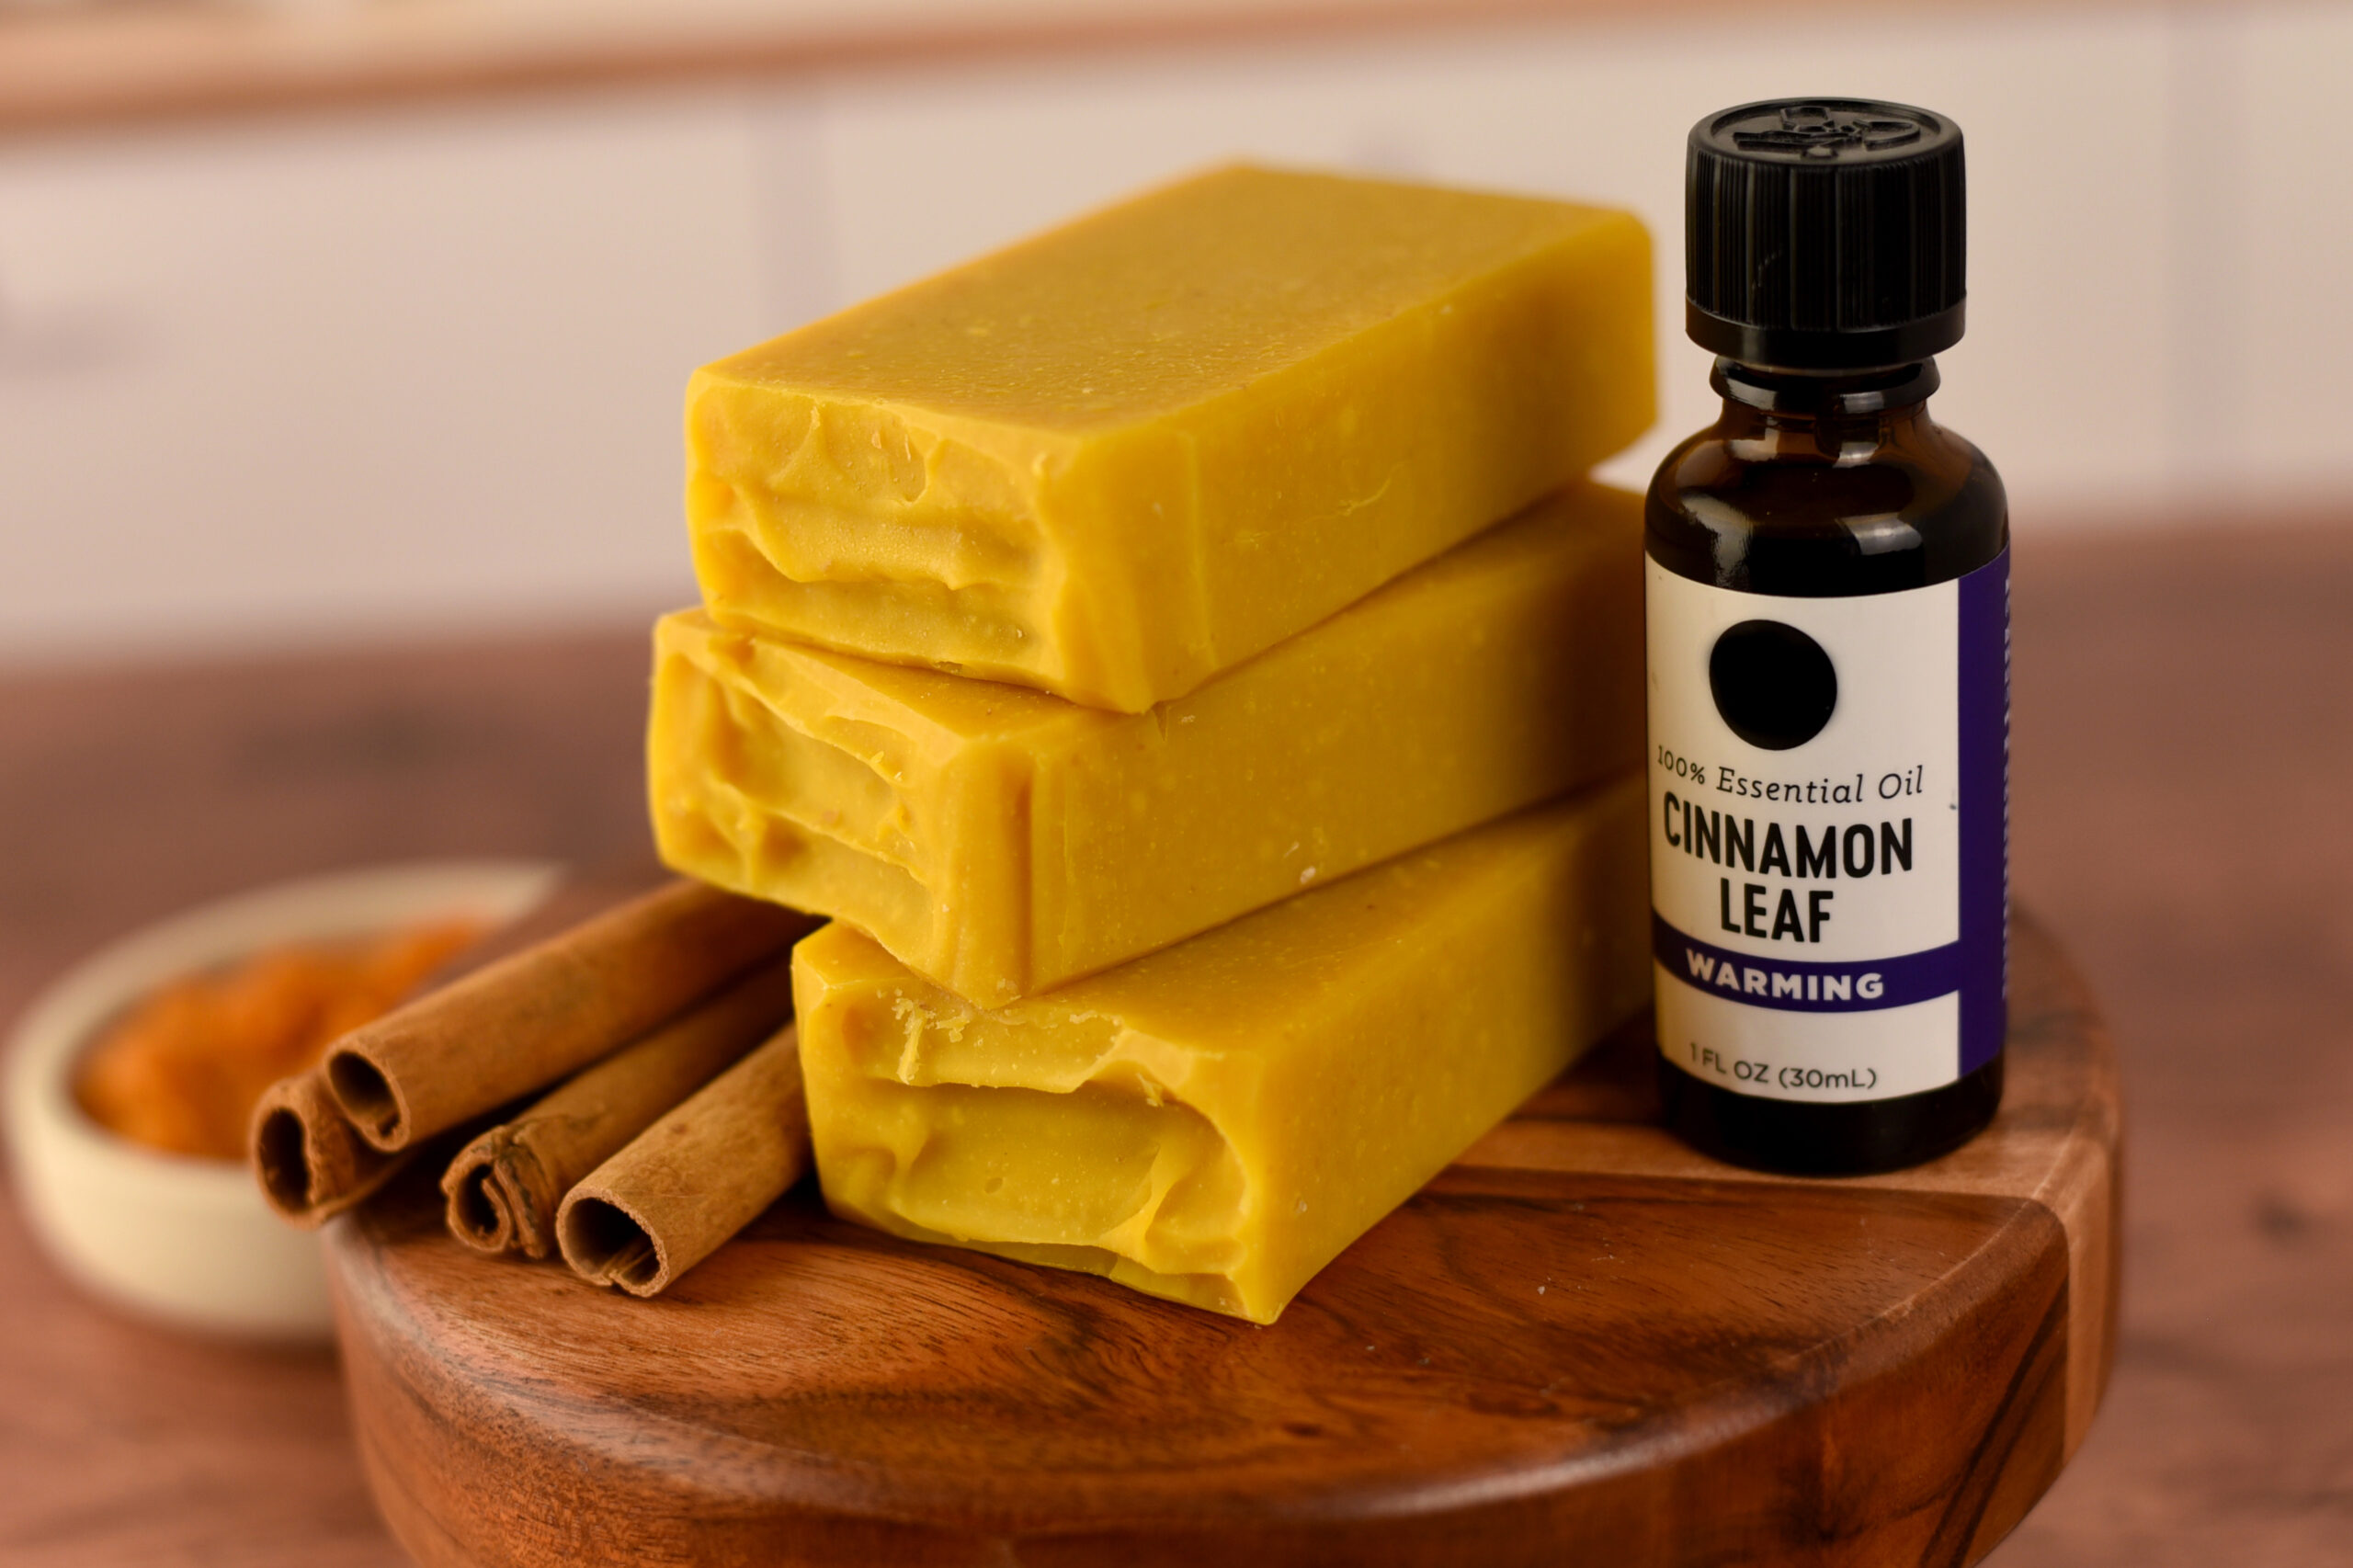
Lemongrass Essential Oil – 1 oz.
Litsea Essential Oil – 1 oz.
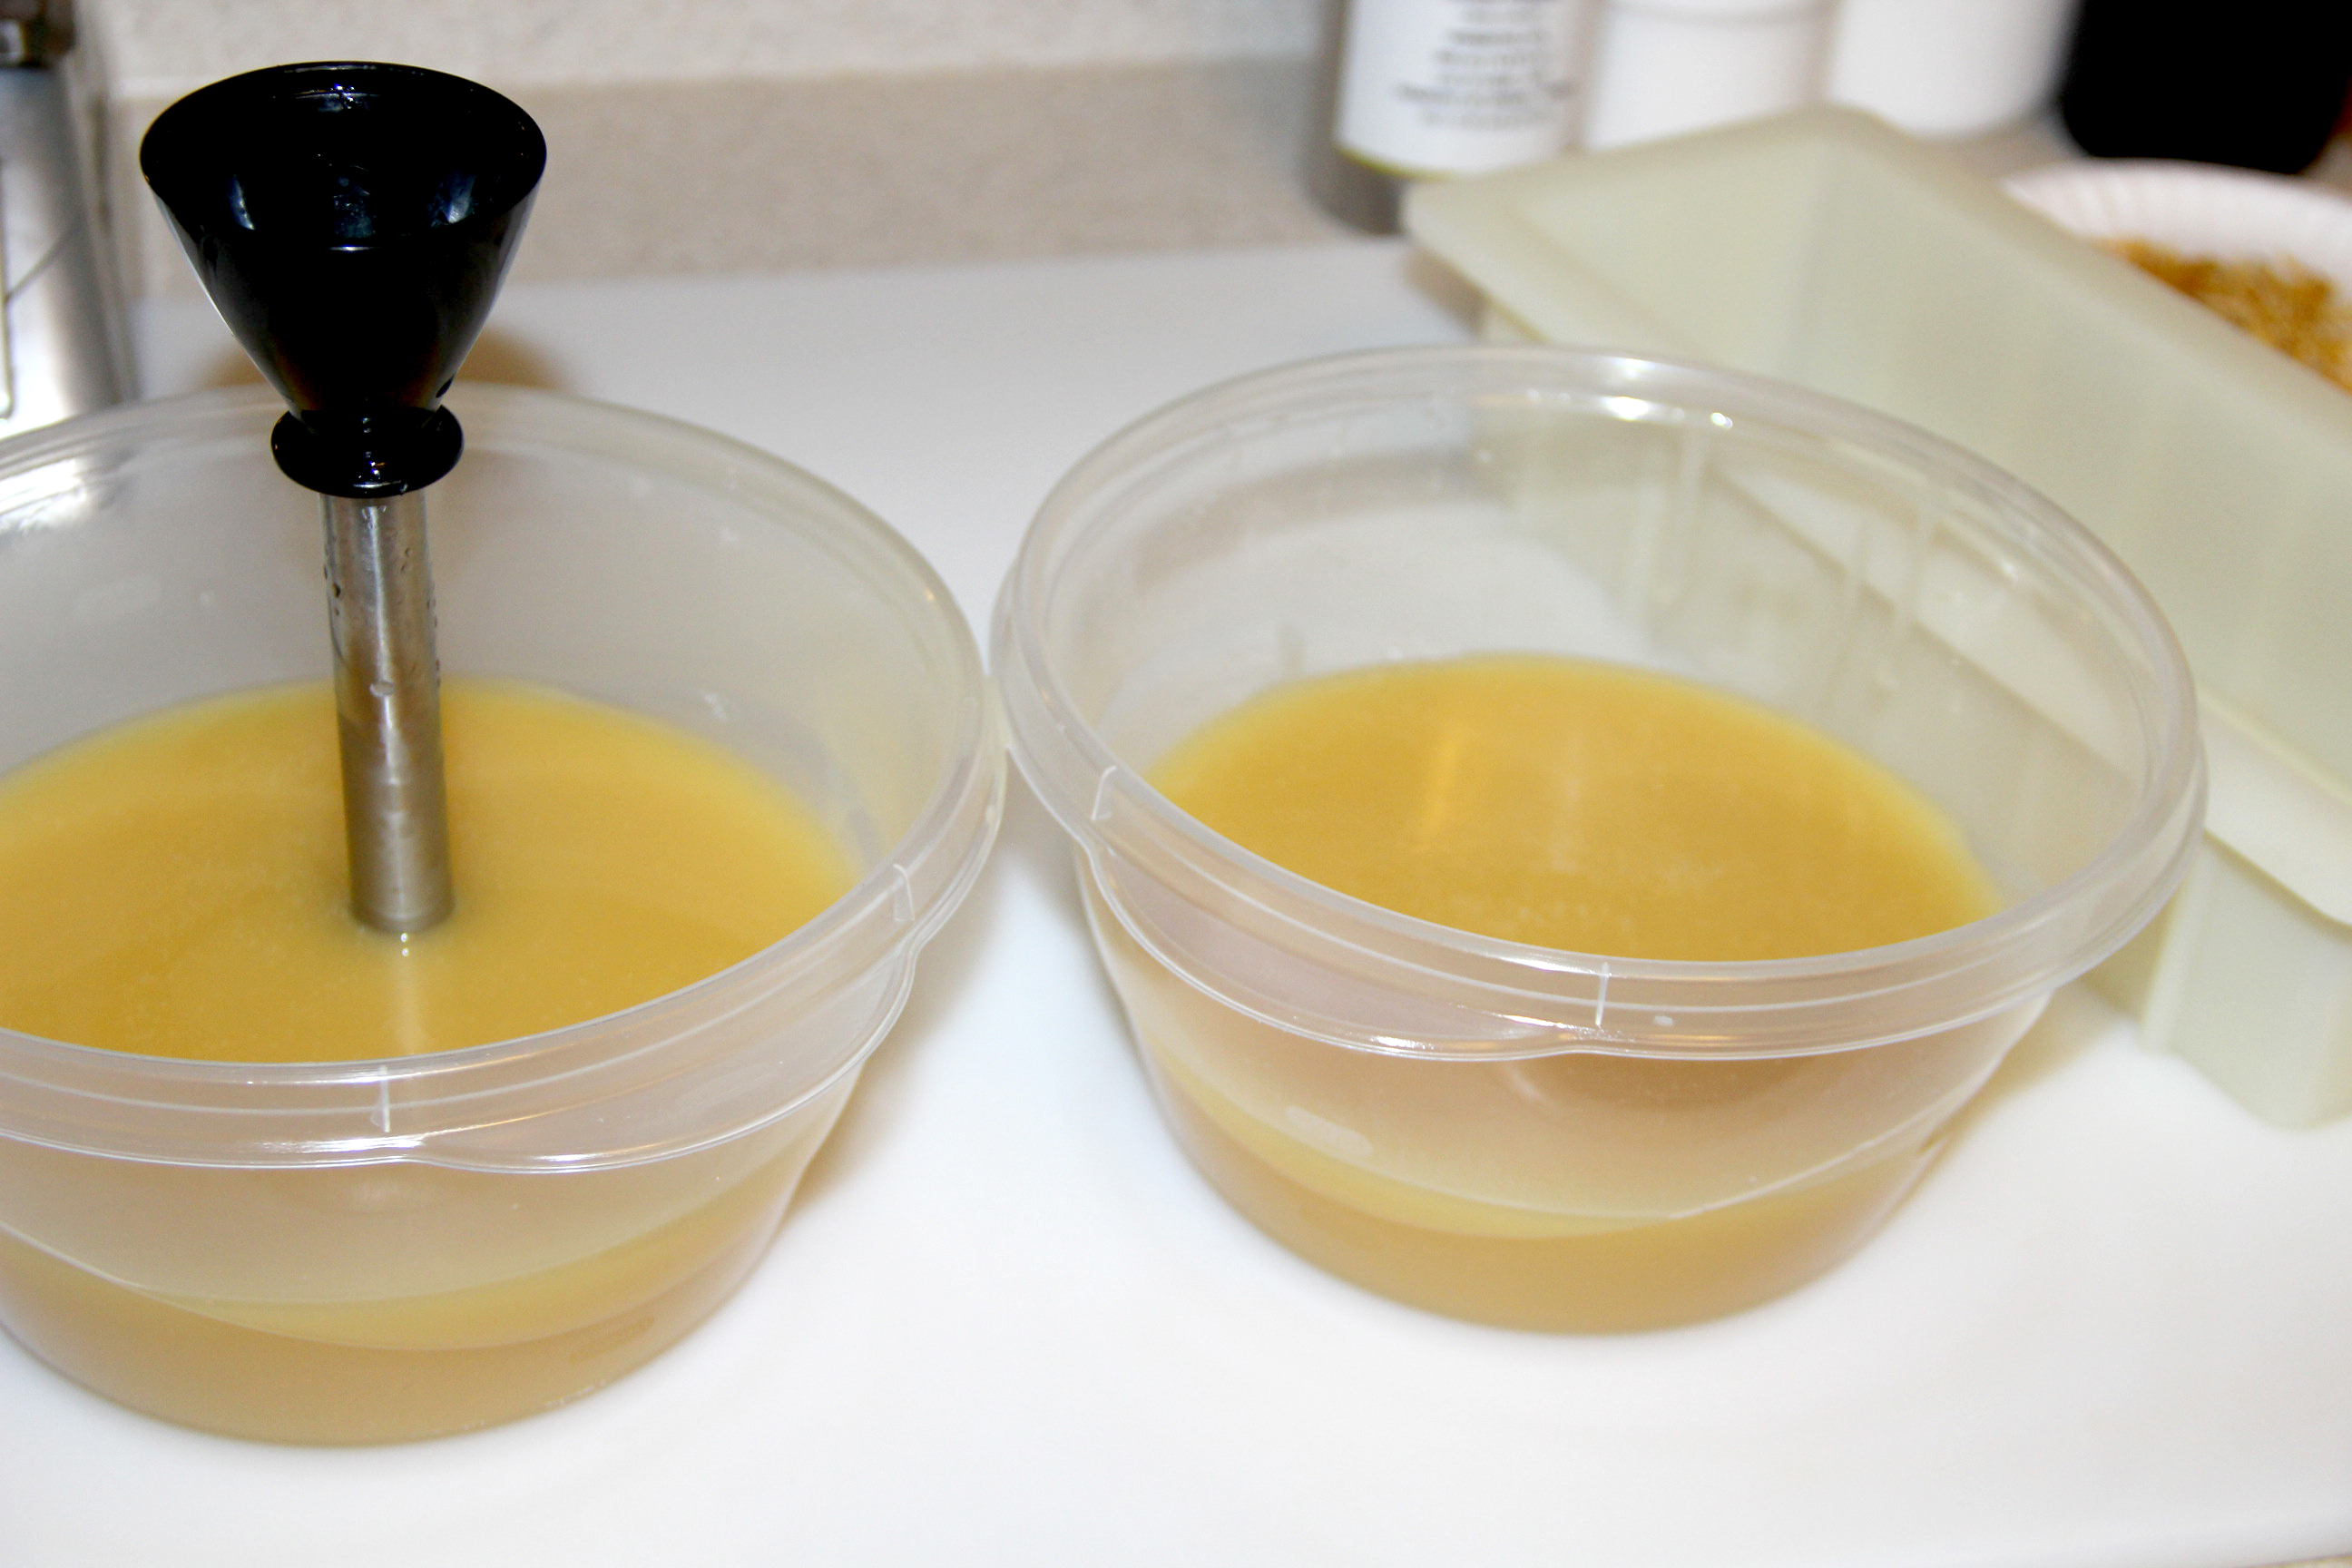
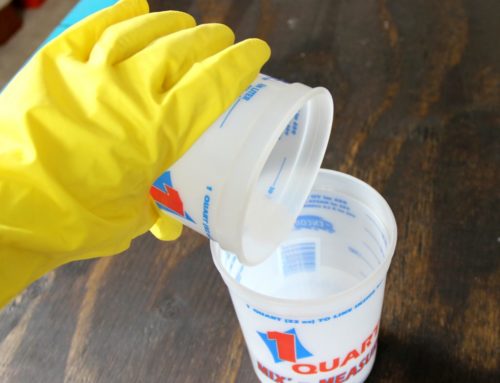
Step 1 – Create your lye solution. Weigh out the water and sodium hydroxide into separate containers.
Step 2 – In a well-ventilated area, sprinkle the sodium hydroxide into your water while stirring slowly. Stir until dissolved and set aside to cool.
Step 3 – Weigh out the coconut oil and Shea butter and melt, just until melted.
Step 4 – Weigh the liquid oils and add to the melted oils. Weigh the essential oils and add to the oil mixture.

Step 6 – Pour the lye solution into oils and bring to light trace.


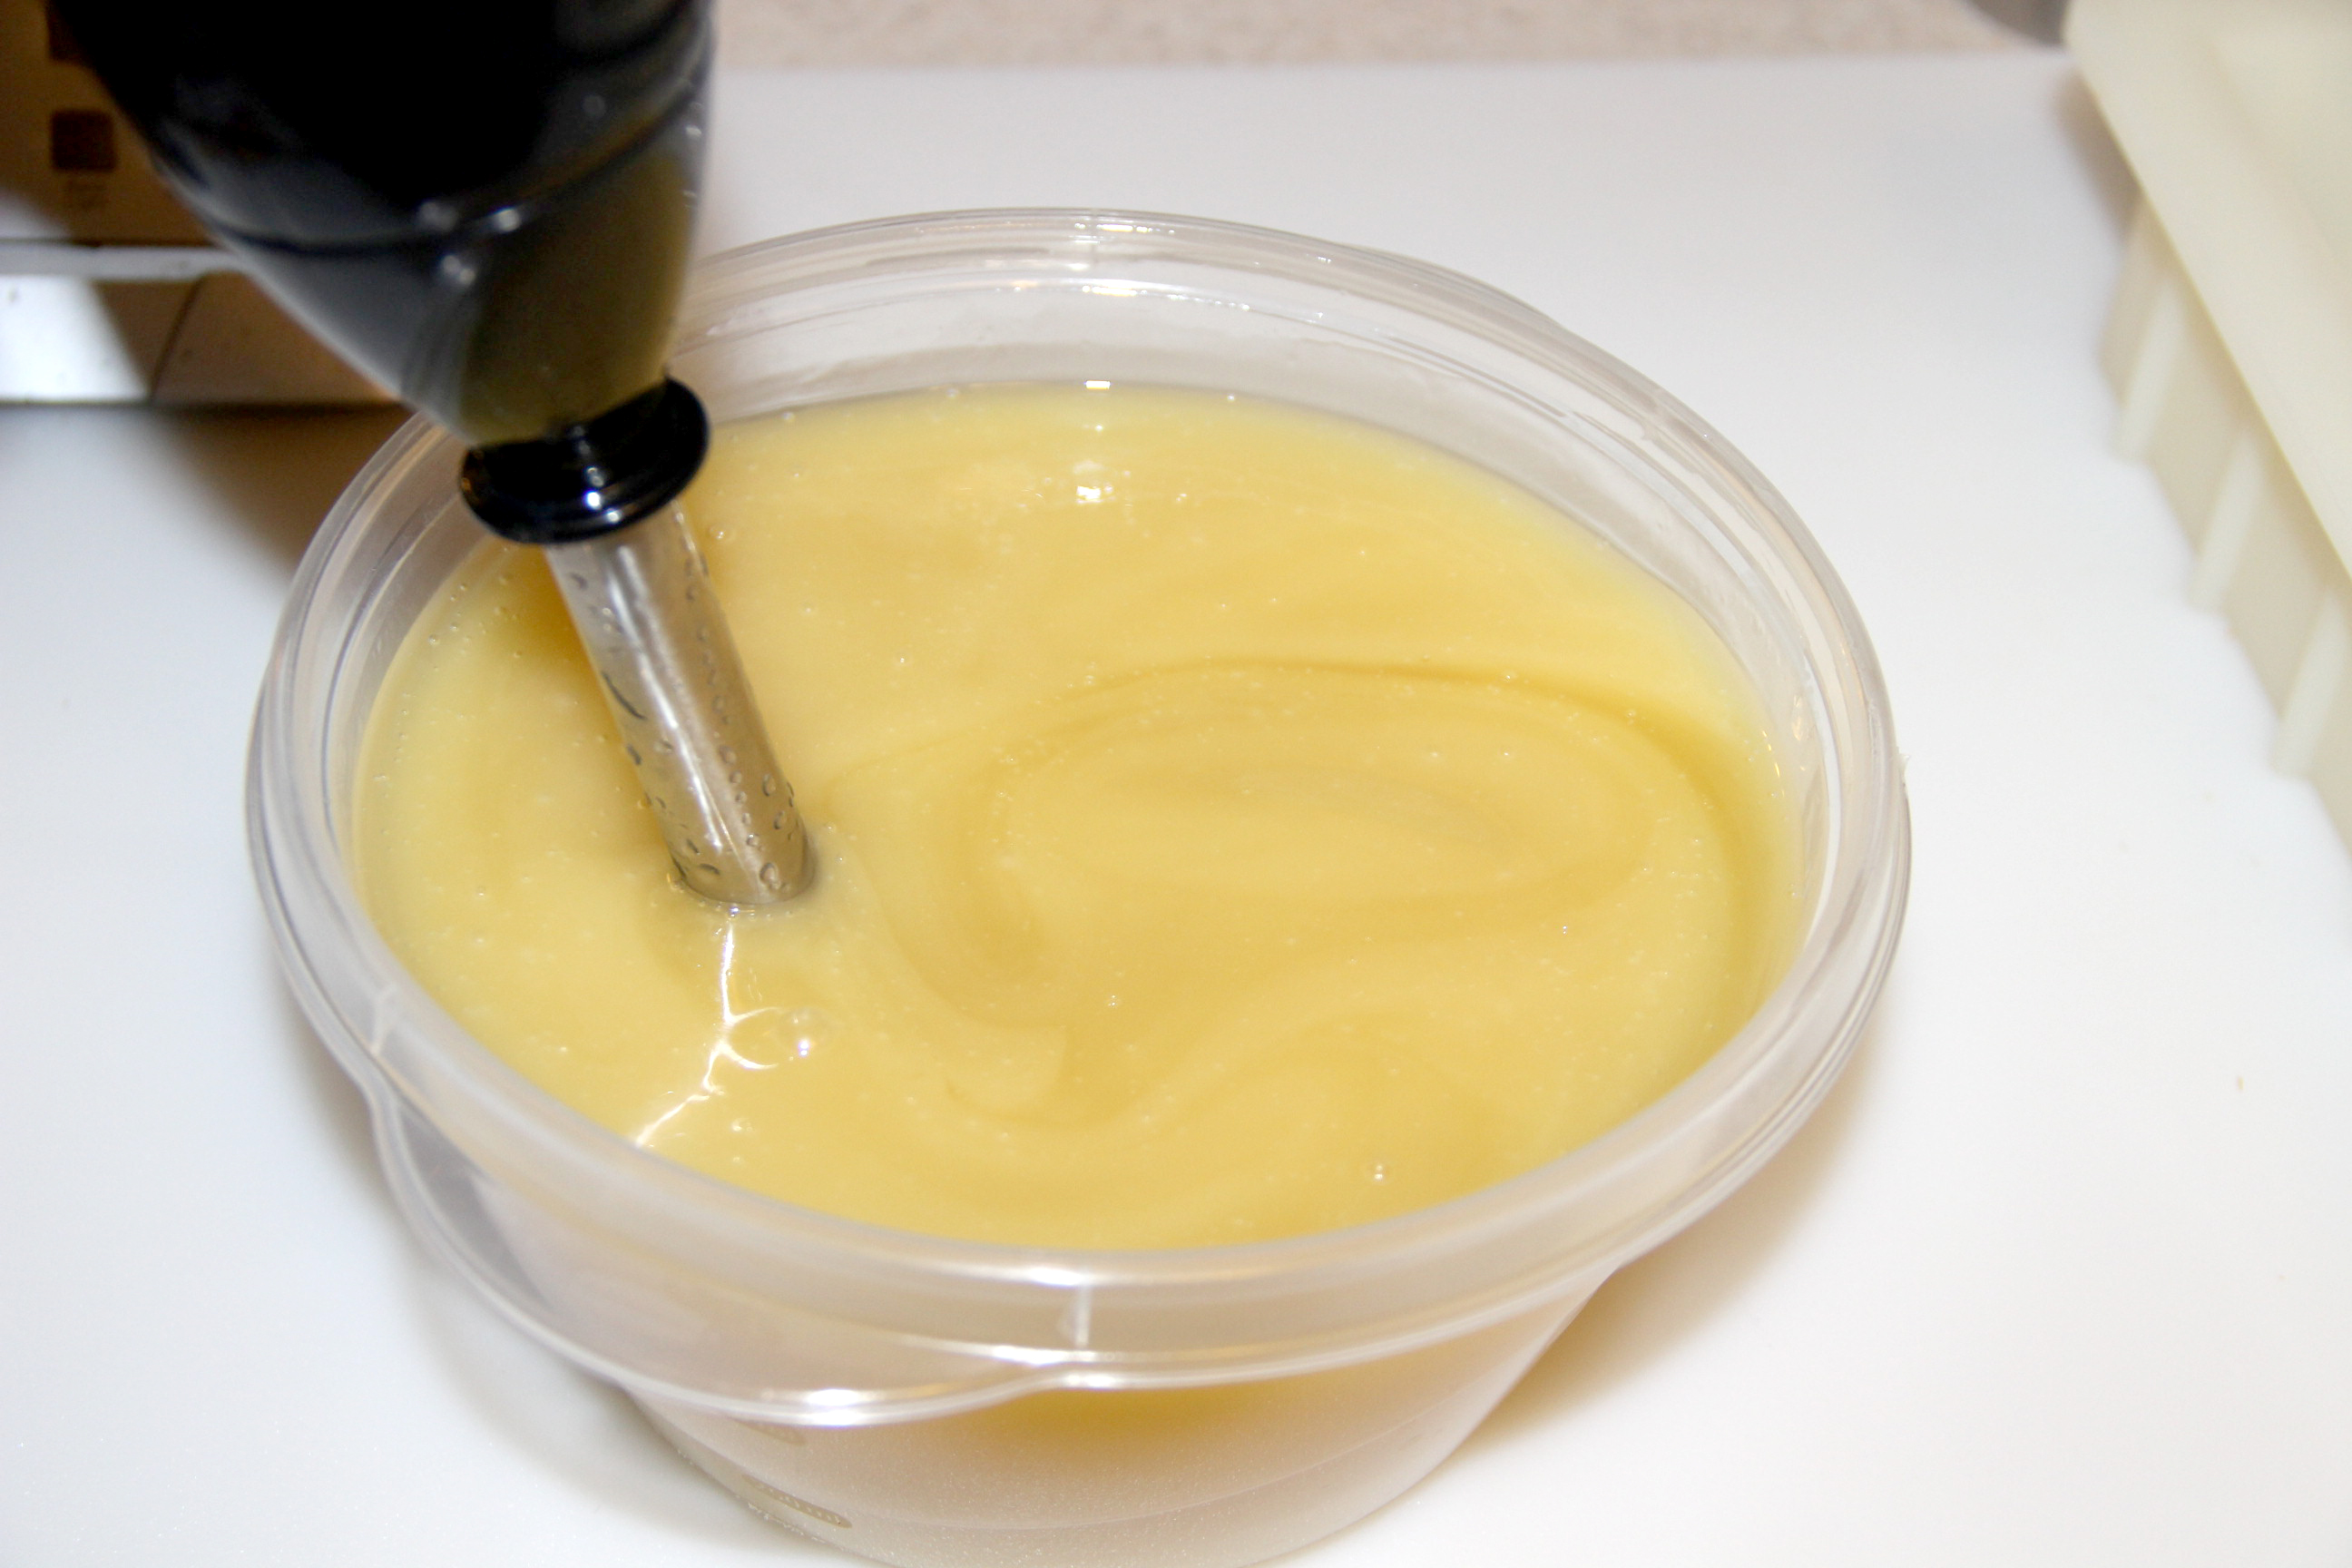
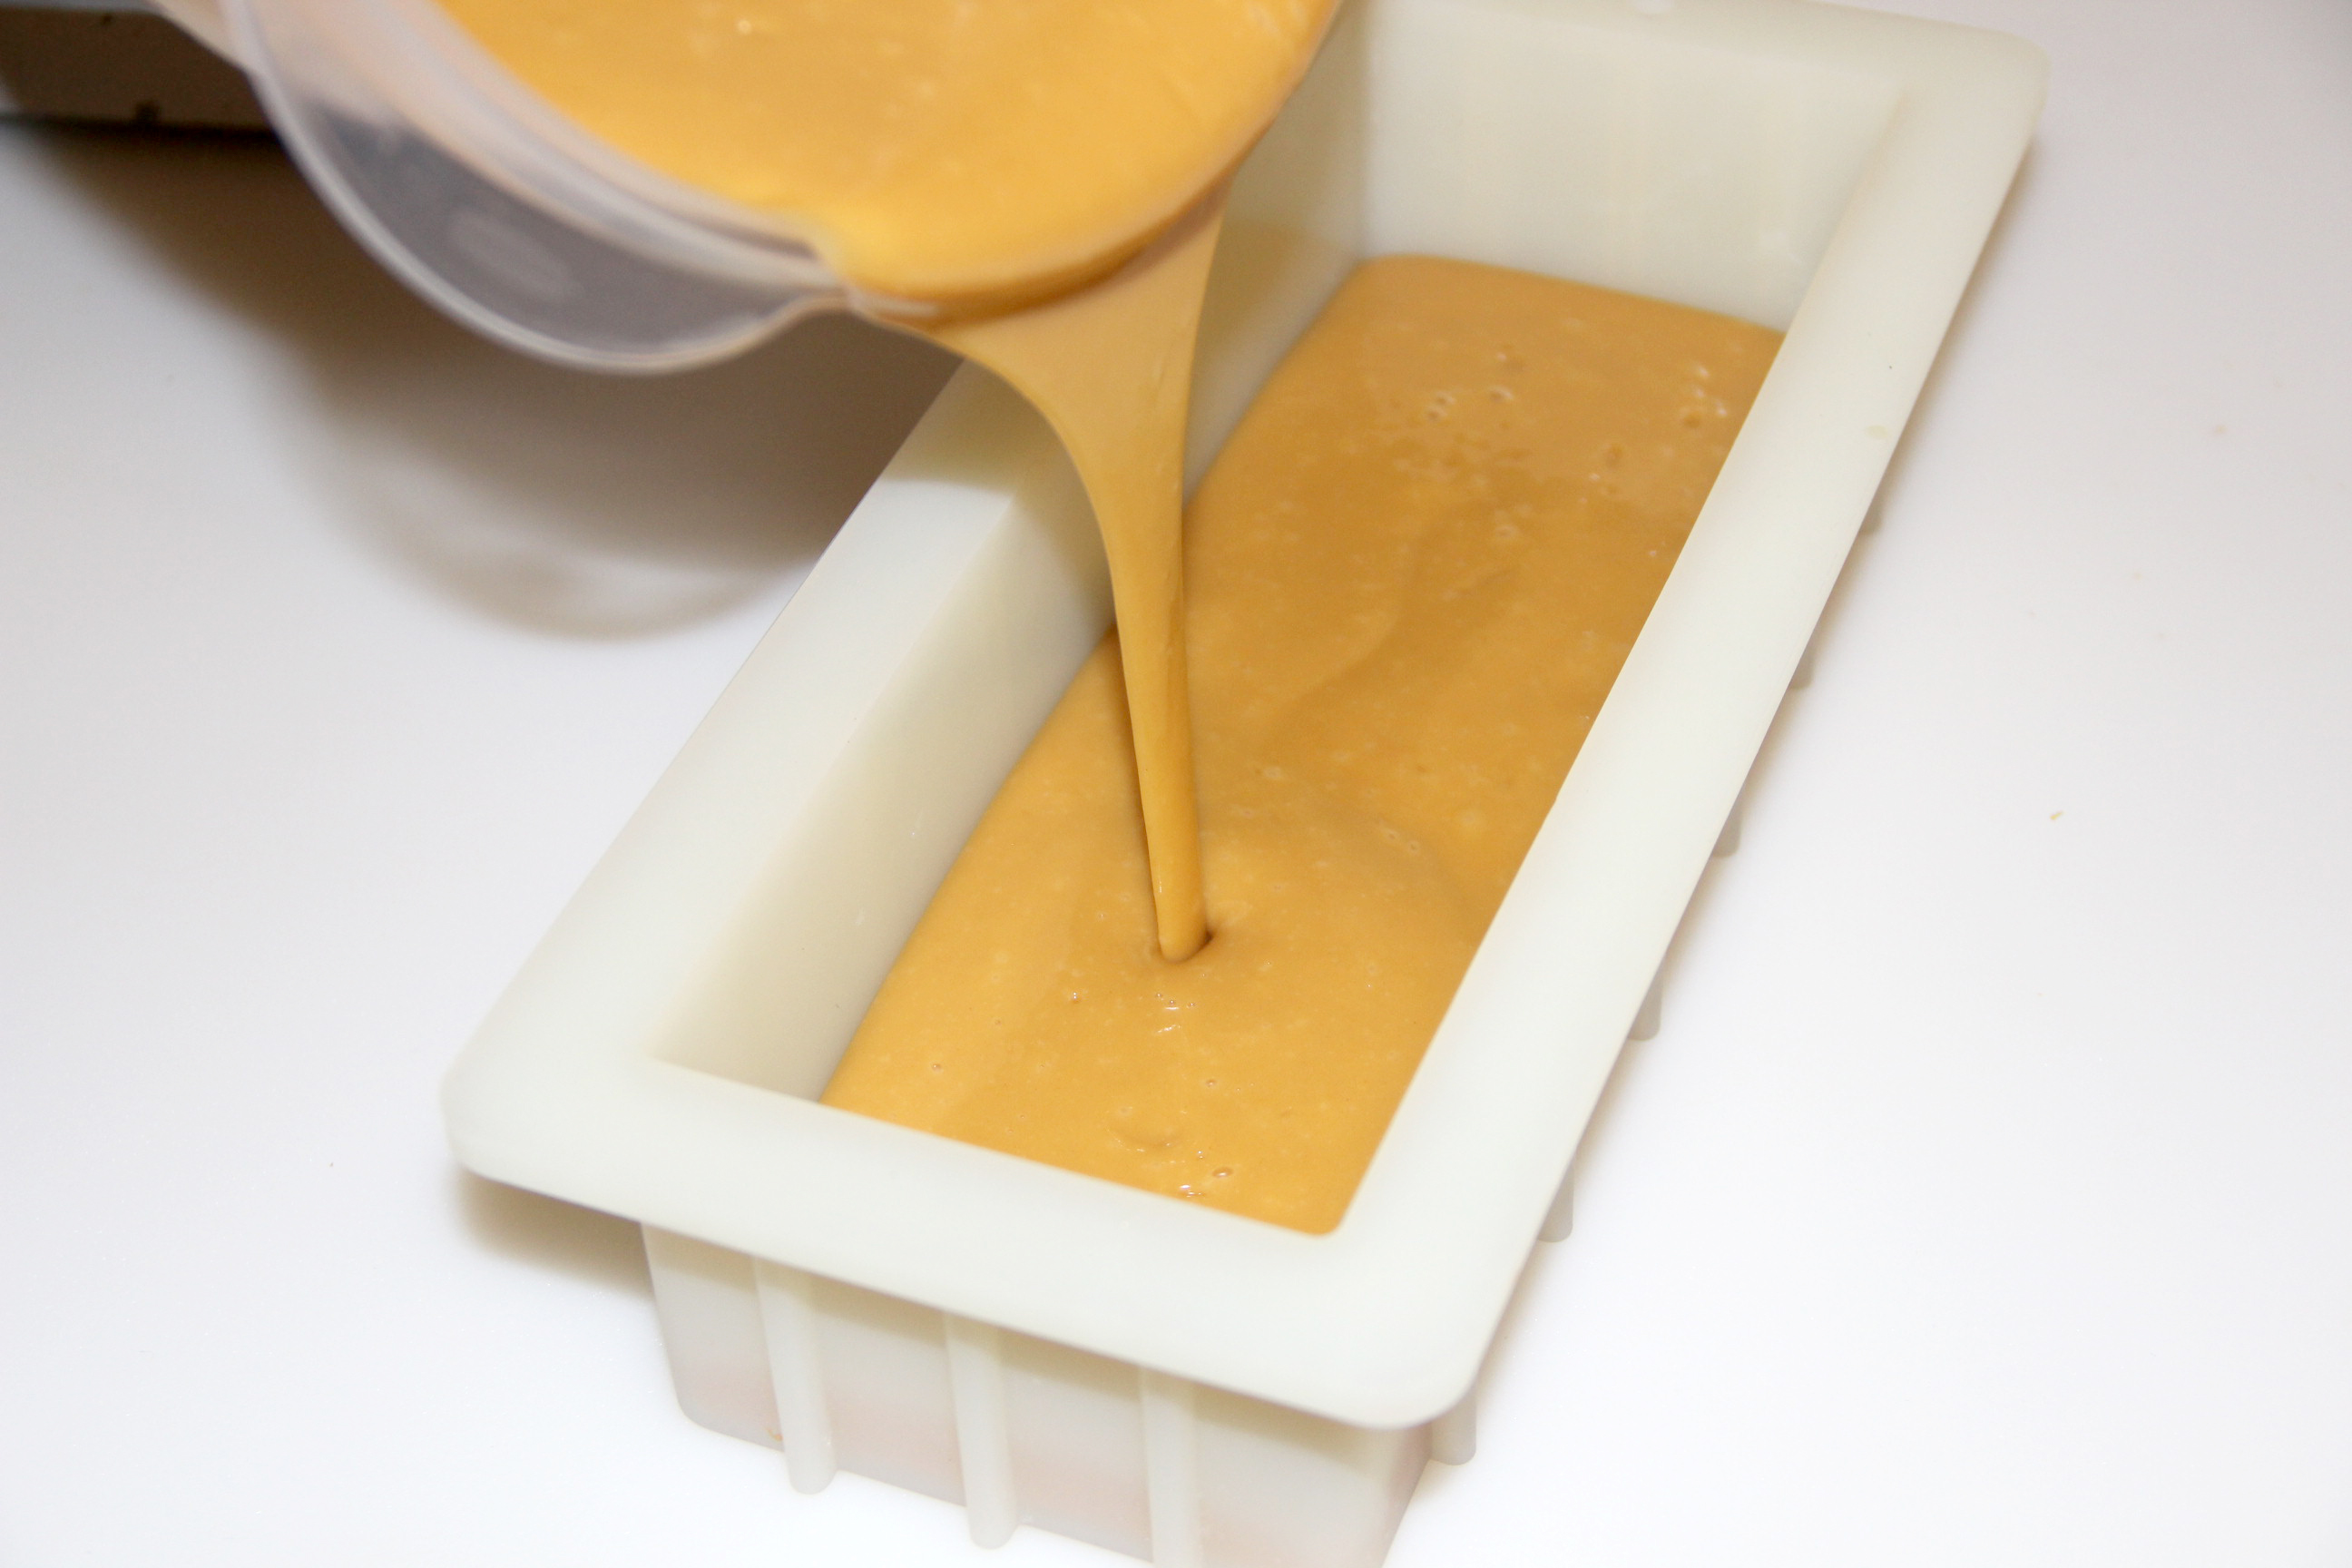
Step 7 – Divide your mixture in half. You can just eyeball it. I ended up with more soap colored with clay. Divide however you want.
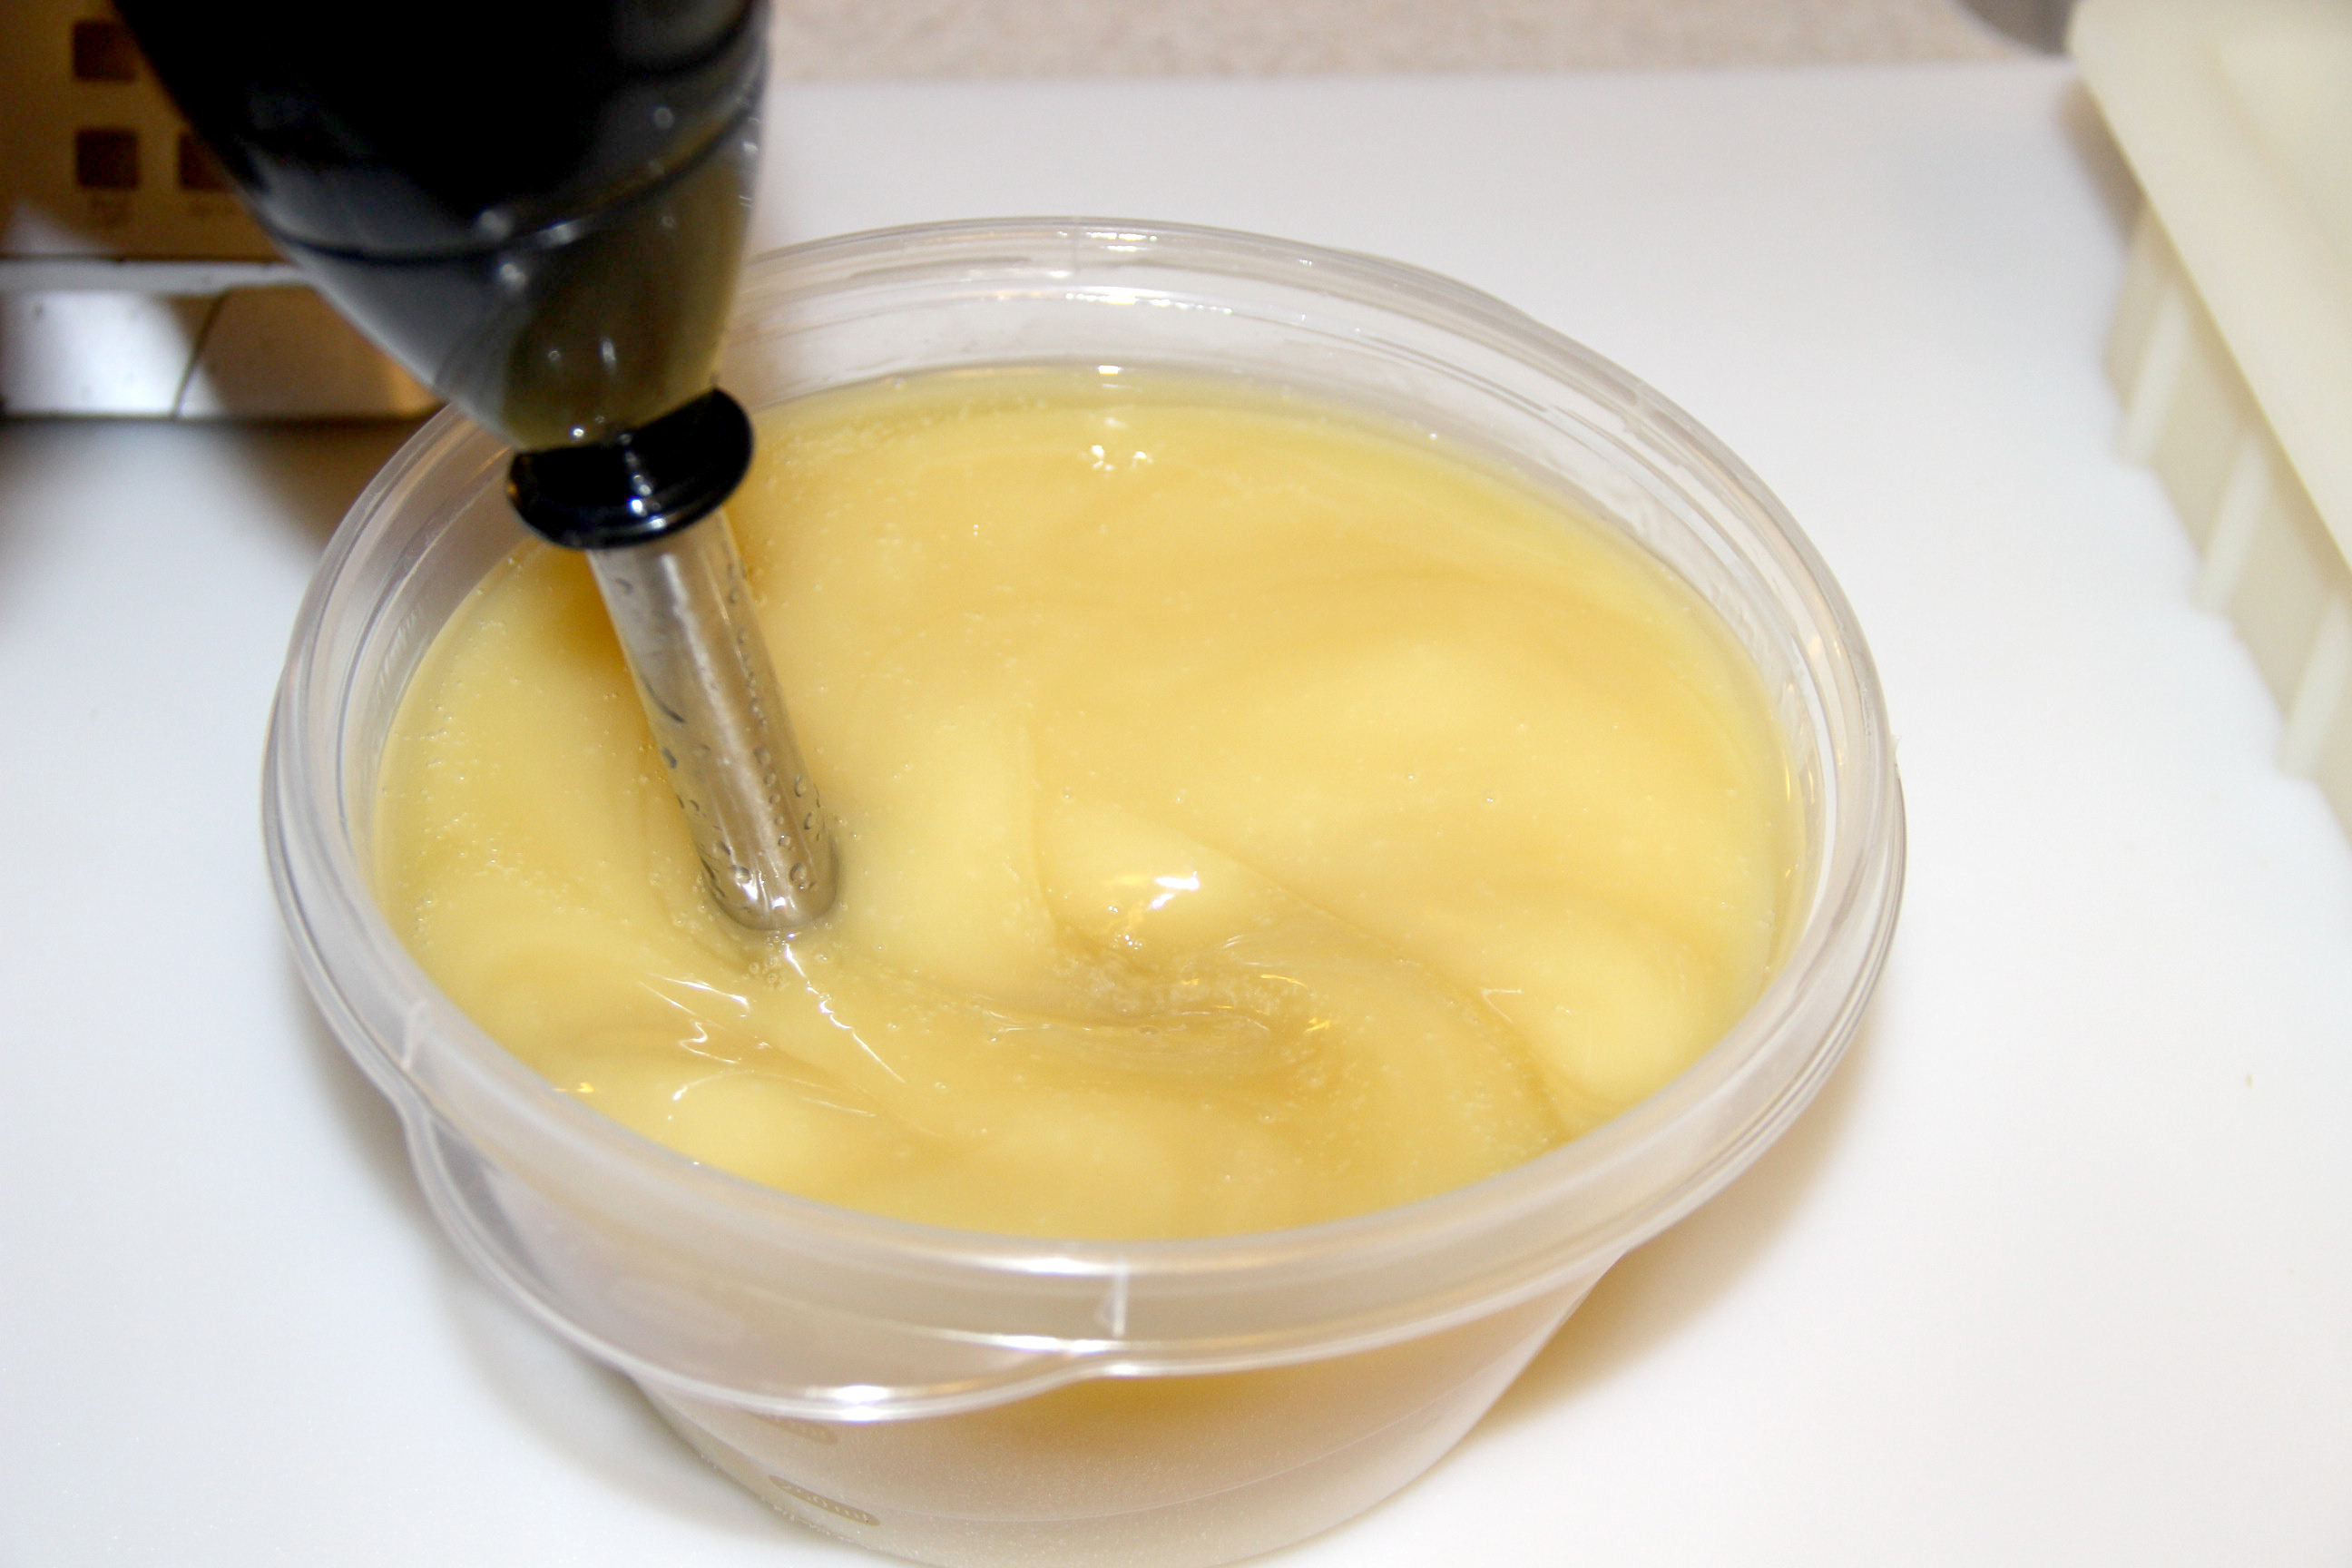
Step 8 – Color one half with yellow Brazilian clay. Mix the clay with a bit of water before adding it to your soap. Here is more info on working with clay. Mix in the clay using your stick blender. Bring to a thick trace.
When layering, it is important to bring your bottom layer to thick trace so it will support the next layer.
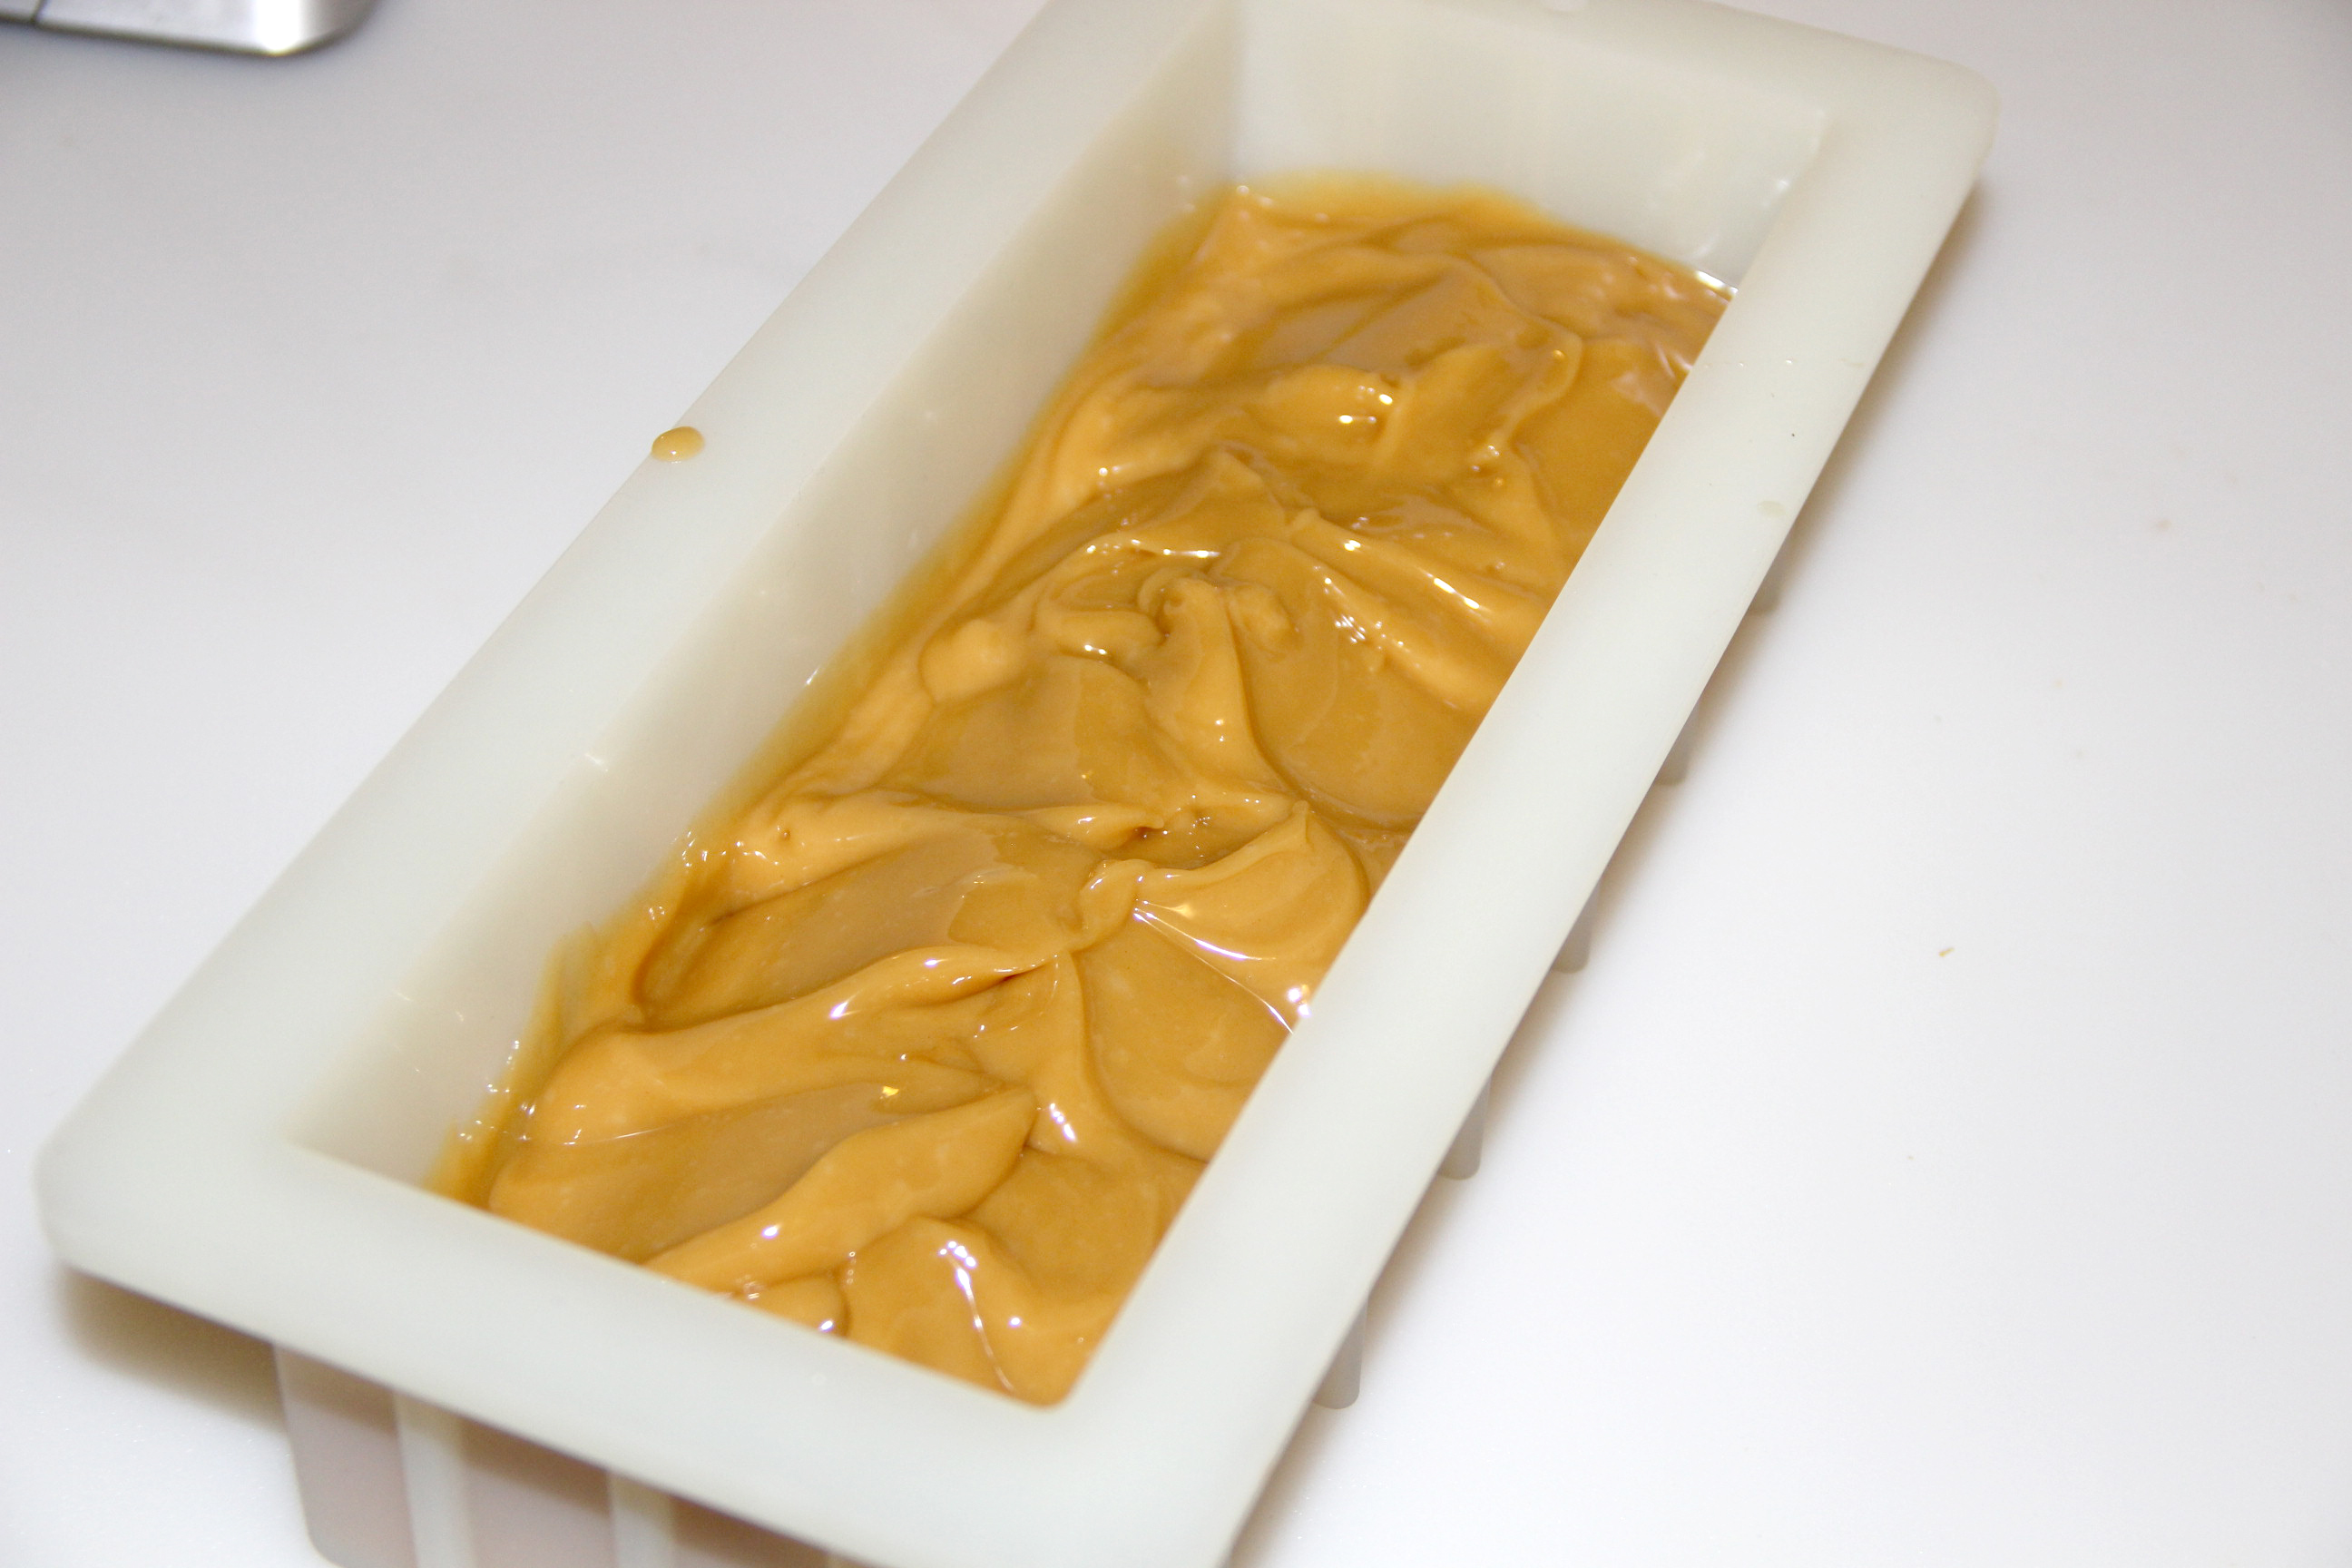
Step 9 – Pour the bottom layer into your mold. You can bang your mold down to make it flat. I wanted peaks so I teased mine up with a spoon.
Step 10 – I used a tea infusion spoon to sprinkle my charcoal on. To see another tutorial using this technique, check out the Tallow Layered Pencil Line.
Sprinkle charcoal over this layer. Do not make it a solid dusting or the next layer will come apart. Leave plenty of soap showing.
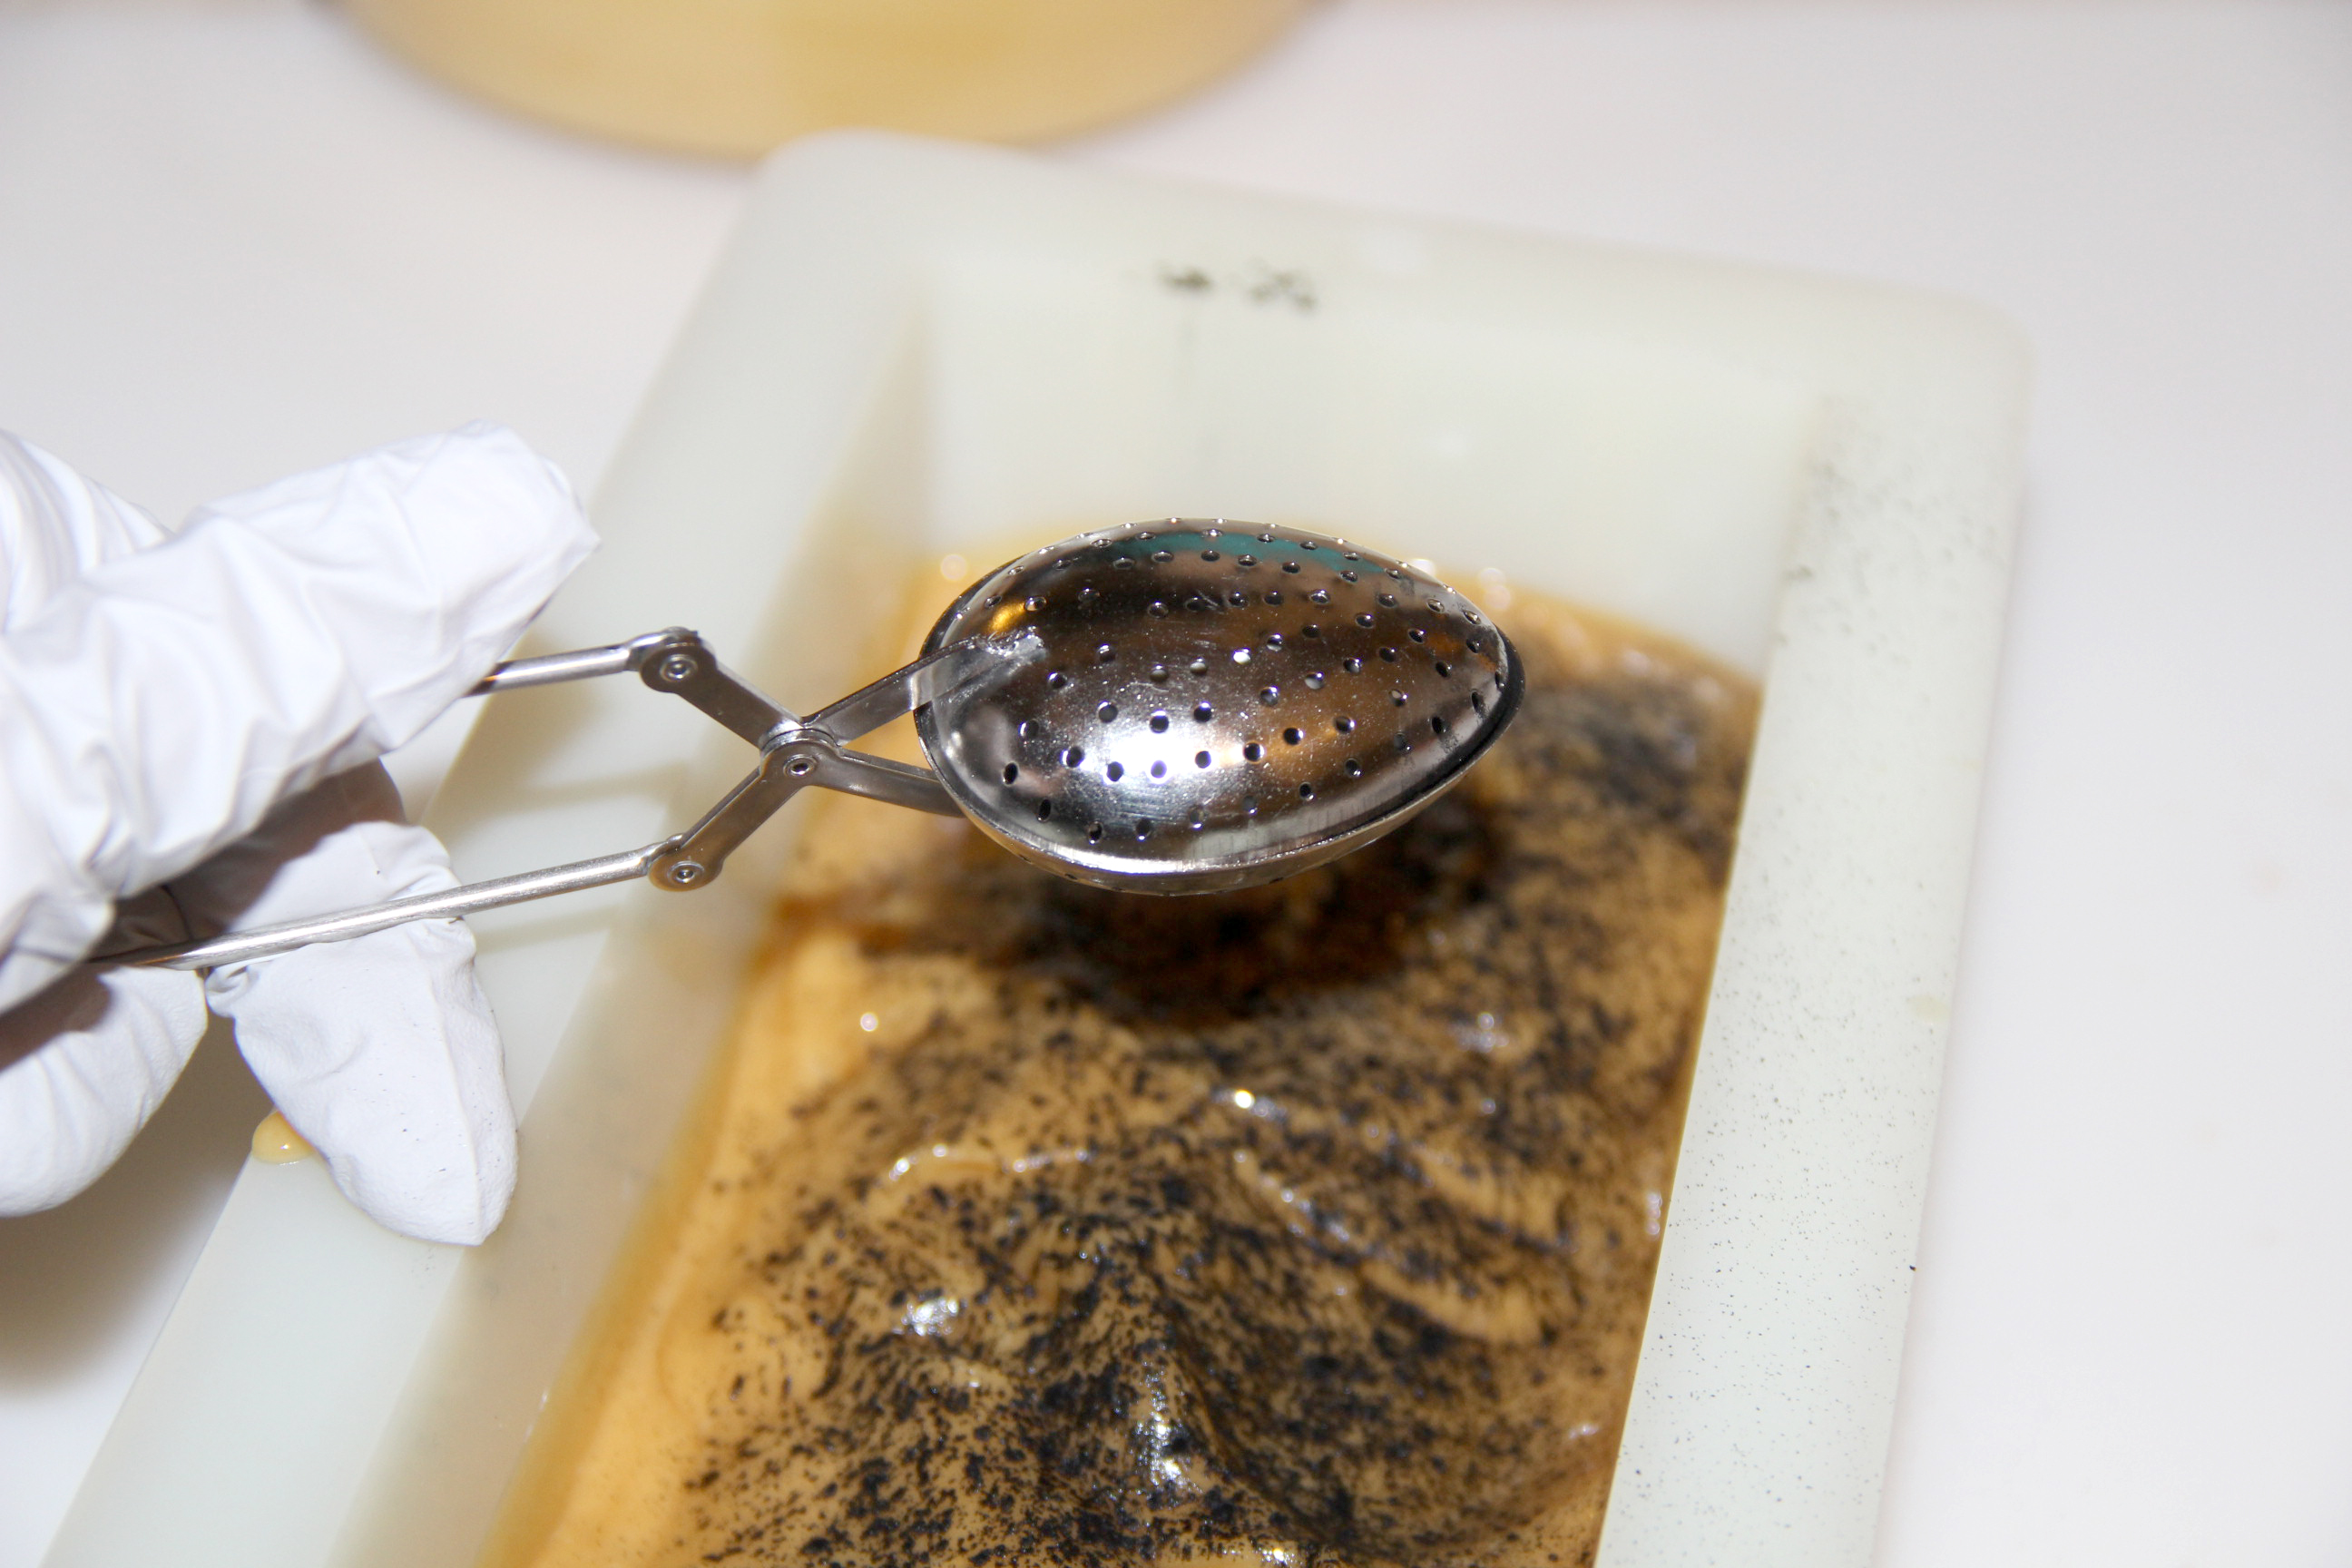
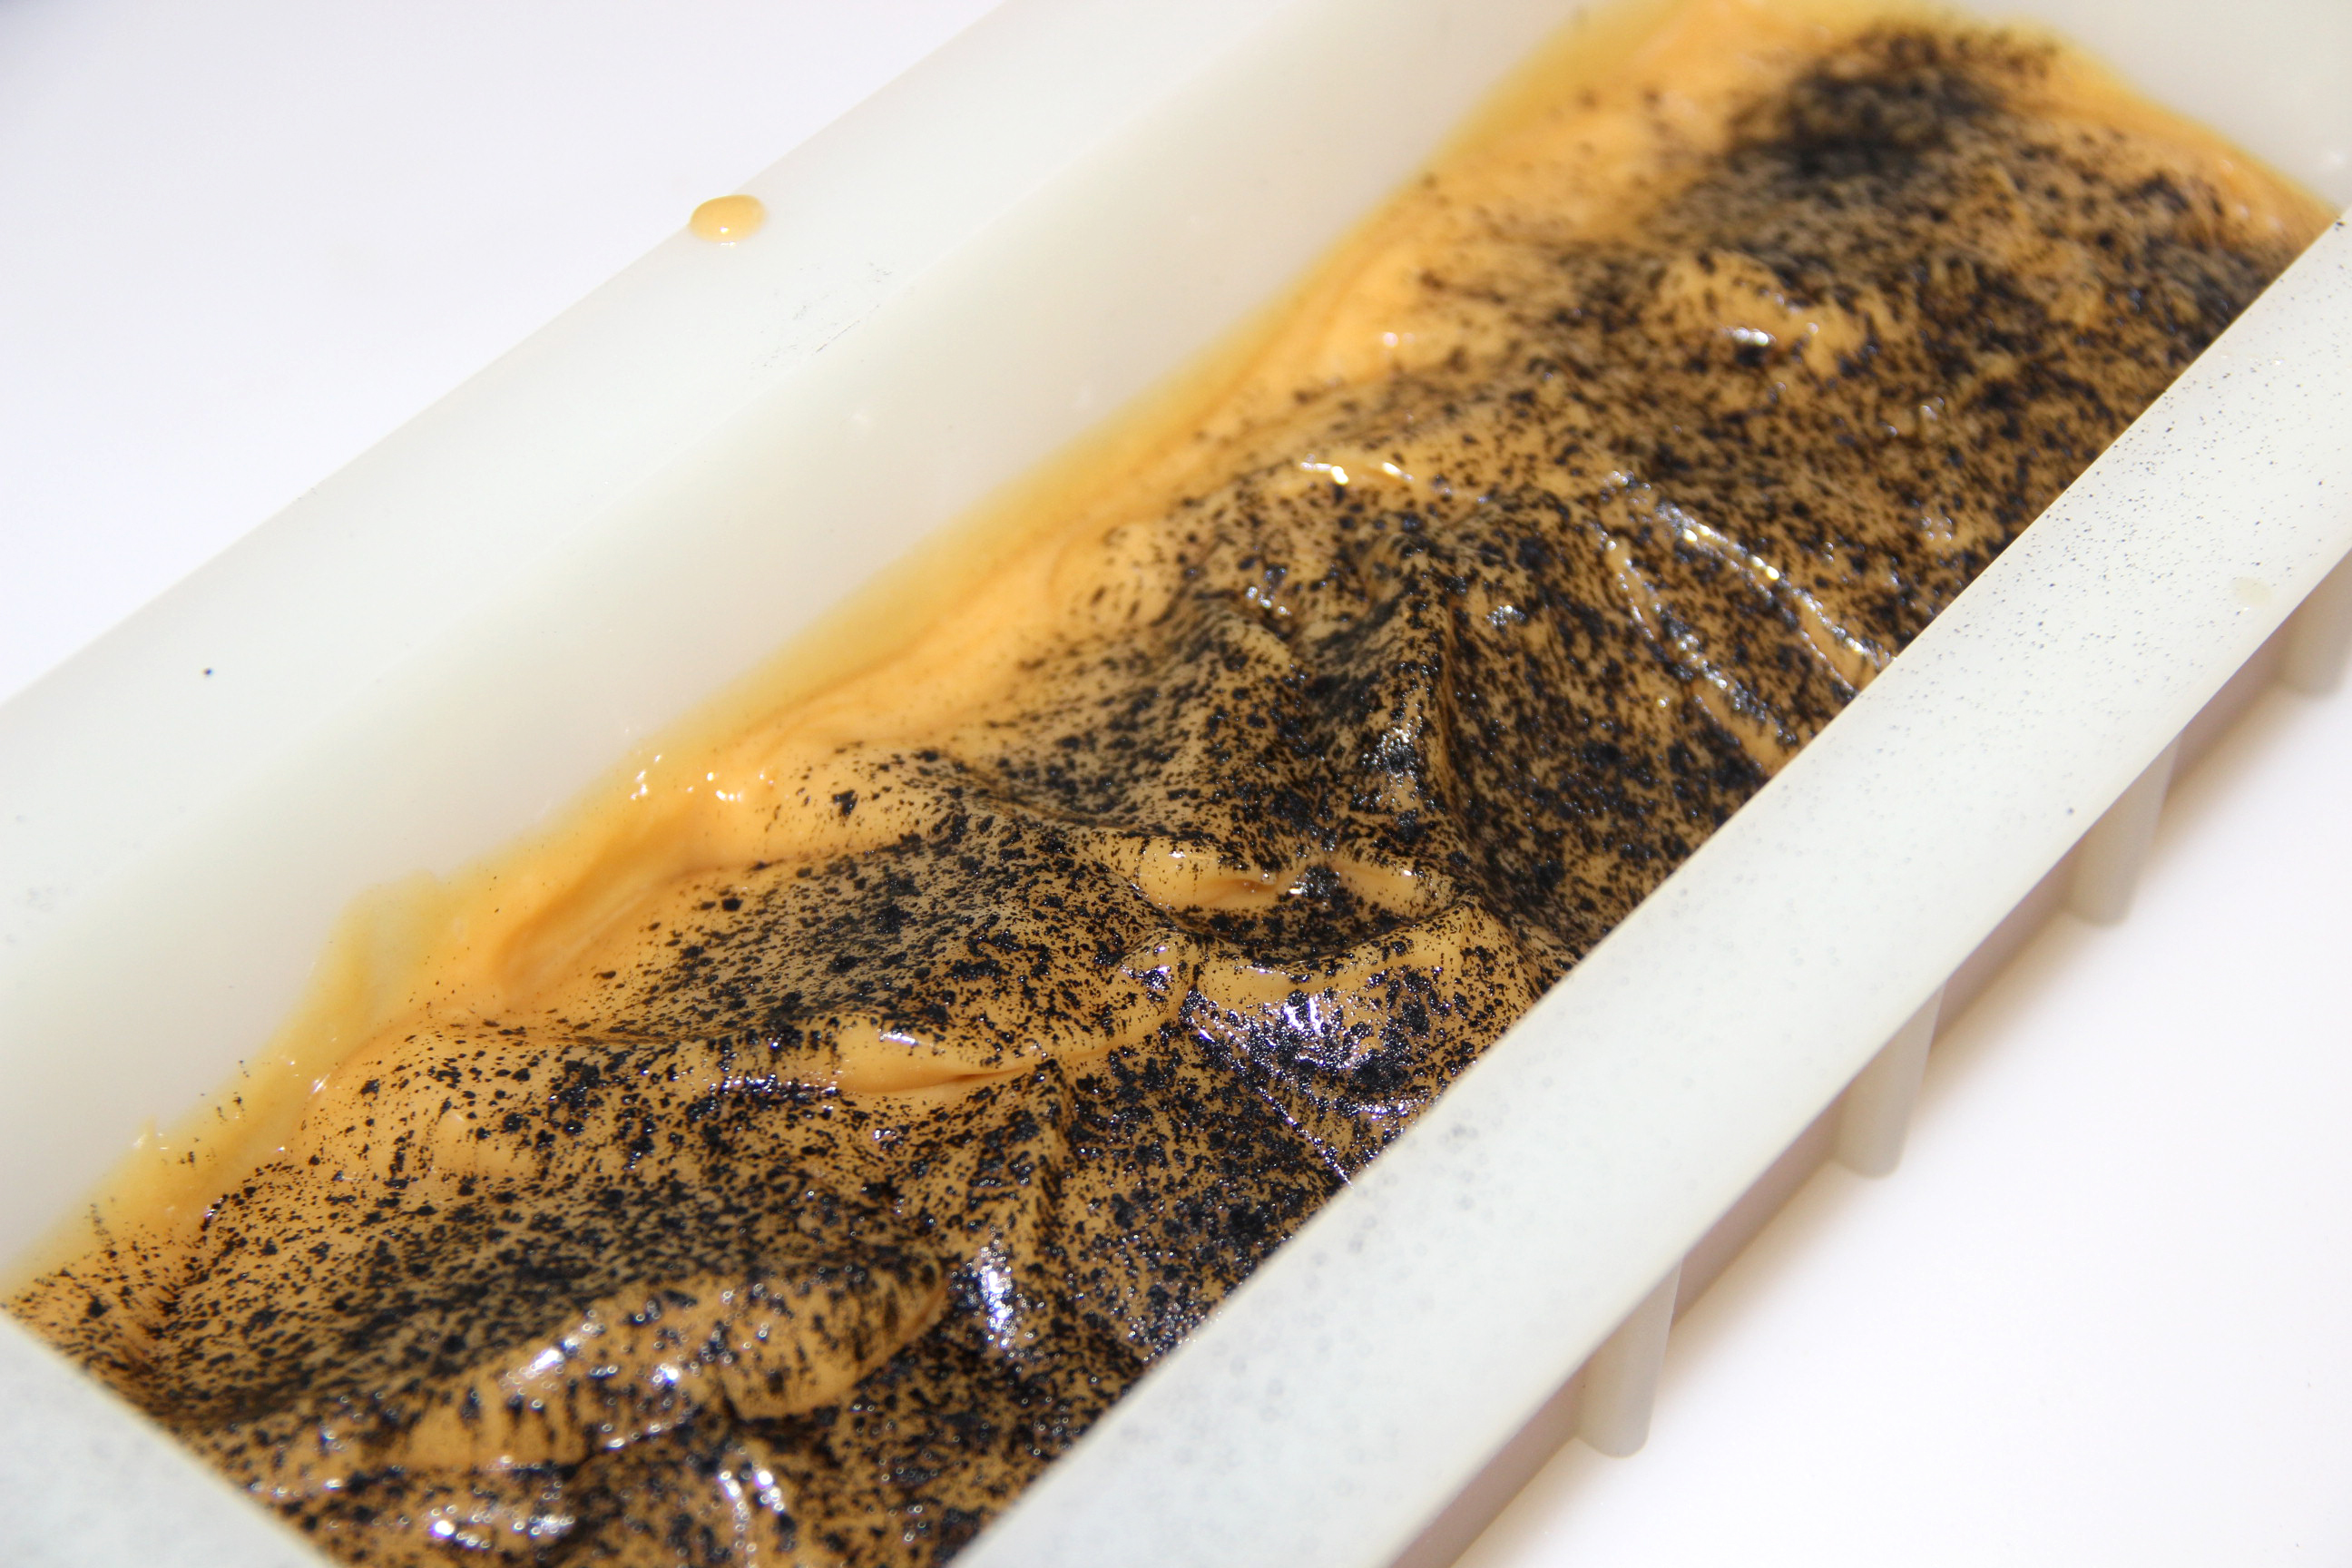
Notice how I have plenty of bottom soap showing through.
Step 11 – Dump the calendula in the left over soap. Mix with your stick blender. This helps to break up the calendula a bit so you don’t have large pieces in your soap.

Step 12 – Bring to a thicker trace and plop this over the charcoal layer. I used the back of a stainless steel spoon to texture the soap.

Beautiful!
Let the soap saponify for 24 hours. Remove the next day, cut and cure your soap for 4 weeks.
Happy Soaping!
-Amanda Gail

The soap is so lovely! What happened to step #5? Also what temperature do you soap at for this recipe? Water temperature/ oil temperature? Thank you!
I’m sorry Amanda…not your error…figured it out…thank you
Hi Amanda
This soap is beautiful. Does the age of the clay/botanicals effect the soap? Or infusions?
Does clay have a shelf life?
Thank you
Hi Amanda
Does the age of the clay and/or botanicals effect the soap and infusions?
Is step 5 missing or is it hiding behind one of the photos. We all know how bashful 5’s can be. I can’t find it. On my screen there’s STEP 4, a picture, then STEP 6. Is this tickle the new guy again? Oh, you guys!!! 🙂
Beautiful! 🙂 Does the charcoal line behave nicely and stay put over time, or will it change the rest of the soap? I’ve never worked with it before, but have tried cinnamon once.
Hi Amanda,
I follow you and Benjamin on Saponification Nation!
I plugged your amounts in to SoapCalc and put in a superfat of 12% since I need a soap with less drying and more conditioning. With 31.25 % Coconut oil would your recipe be suited for oily to normal skin? Do you recall what you used as a superfat %?
Also, you used 9 ounces of water vs SoapCalc’s 12.16 oz. Is that to make the soap firmer?
Thanks!
Margie Bayer
Hi Margie! I believe I used 5% for superfat. You can certainly bump it up. Since I don’t use palm or lard/tallow, all of my recipes have a high amount of coconut oil + olive. The higher coconut oil helps to create a firm bar and the olive oil helps to create a nourishing bar that isn’t drying. I have pretty normal skin and love this soap.
I use 2 times my lye in water for most of my recipes. Again, because of the high olive oil I use a water discount.
Just joined your facebook page “Saponification Nation .” Have been reading everything on the site. It is SO great! I think I am going to try this recipe for my first batch. Have spent three years investigating soap and how to make it. Can’t WAIT to actually DO it 🙂
Brazalian clays constitute ingredients which can be used in many different ways in natural skincare. Making soap with the clay including essential. I love to use natural homemade products and definitely going to give this a try. Hope the outcome will good! 🙂
This soap is beautiful. I love the charcoal pencil line and bits of calendula. Did you add both essential oils to the whole batch of soap before dividing? Or did you add one EO to each layer? Thanks for this recipe!
Thank you, Debbie! I did add both essential oils to the oils before adding the lye and mixing. 🙂
Thanks Amanda!
Hi Amanda..
I see a huge discrepancy in the numbers when I put it through the soap calc…I converted ounces to grams and its way off…for instance you haven’t listed as 9 ozs of water and when I converted its saying 344 grams of water but your recipe says 255 if u converted the 9 ozs to grams
What am I missing??
OMG…what a fabulous recipe! I will definitely try that one…will it work with hot process soaping?
You know…I’ve never done a charcoal line with hot process? You might need to spray it with alcohol to help it adhere. That is a good question!
I love your posts :). I have goat’s and have been making soaps using their milk. Could you substitute goat’s milk for water in this recipe?
Yes for sure! Goat milk in this recipe would be wonderful.
I love that the pencil line isn’t a straight. Gives the soap some character.
That looks beautiful. I always wondered how to make those thin layers. Thanks.