
This soap design is perfect for the holiday season! Be sure to check out the design video below.

(Disclosure: Some of the links below are affiliate links, meaning, at no additional cost to you, I will earn a commission if you click through and make a purchase.)
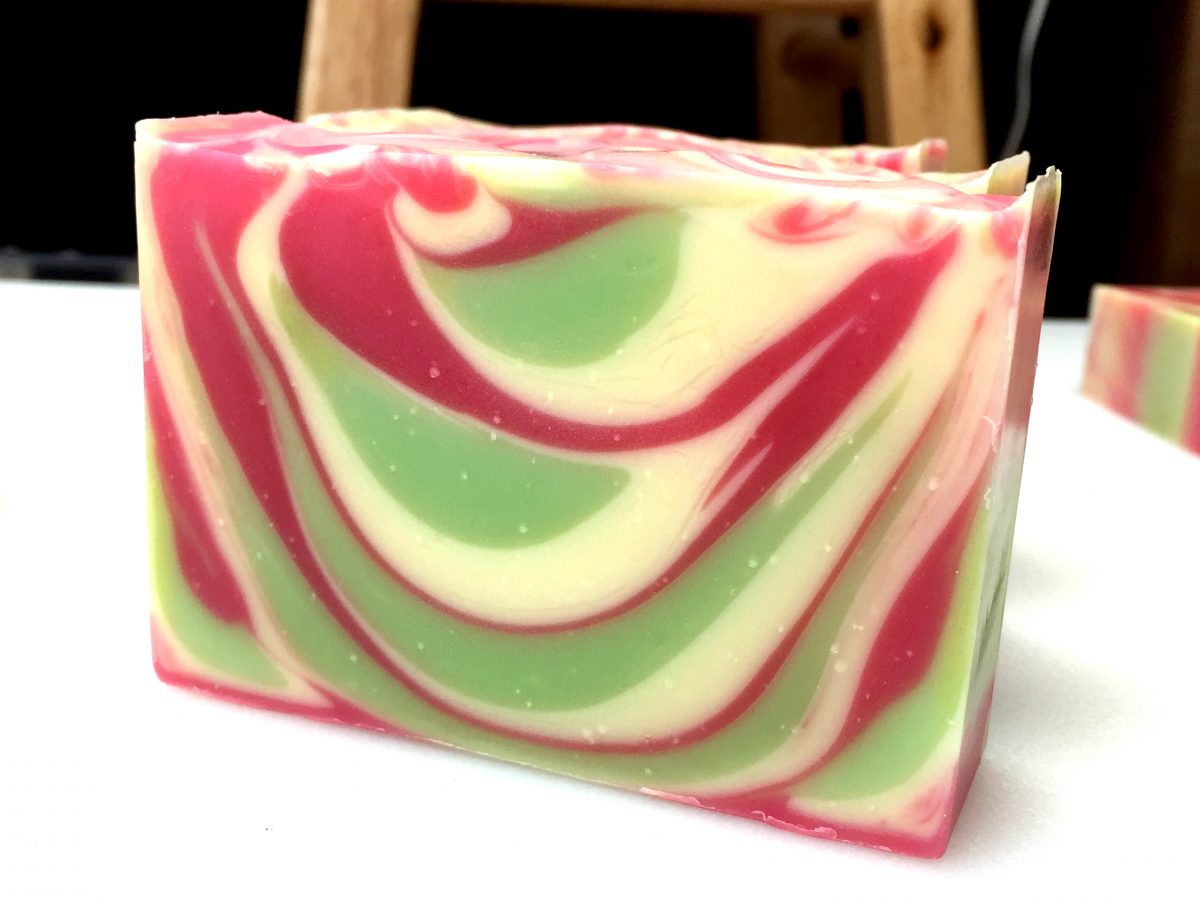
Holly Berry Tiger Stripe Holiday Soap Swirl
Basic Body Bar – More Moisture from Lovin Soap Studio Recipe eBook (Grab your copy for 50 cold process soap recipes + 64 essential oils blends!)
Base Oils
- Coconut Oil (76 degree) – 270 grams (30%)
- Shea Butter – 90 grams (10%)
- Olive Oil – 342 grams (38%)
- Avocado Oil – 72 grams (8%)
- Rice Bran Oil – 126 grams (14%)
Lye Solution
- Sodium Hydroxide – 126 grams (5% superfat)
- Apple Cider – 252 grams (1:2, lye:water ratio)
Scent
Use your favorite slow-moving fragrance or essential oil blend. I simply used a blend of orange and peppermint essential oils. If you’re looking for a good place to get essential oils, I HIGHLY recommend Appalachian Valley Natural Products. I love their products and their shipping is super fast!
- Orange Essential Oil – 20 grams
- Peppermint Essential Oil – 5 grams
Color
- Arctic White Mica (Rustic Escentuals) – 1 teaspoon
- Pistachio Mica (Rustic Escentuals) – 1 teaspoon
- Frosty Rose Petal Mica (Rustic Escentuals) – 1 teaspoon
Nurture 10″ Silicone Loaf Mold
Safety Warning: This recipe is for soapmakers who have a basic knowledge of the soapmaking process and know the correct safety procedures to use when handling lye. If you are new to soapmaking, be sure to download our free guide, How to Make Cold Process Soap! Gear up in your gloves and your safety glasses.
Step 1 – Make your lye solution and set aside to cool down.
Step 2 – Weigh the coconut oil and shea butter into a microwave container. Melt, just until melted.
Step 3 – Add the liquid oils to the melted oils. This helps to cool the temperature down.
Step 4 – Add the fragrance or essential oil.
Step 5 – Once the oils and lye are cooled to under 100 degrees F, pour the lye into the oils and emulsify.
Step 6 – Divide the soap base into three containers.
Step 7 – Add 1 tsp of each colorant to each container and mix to blend.
Step 8 – Bring each color to medium trace.
Step 9 – Pour a single stripe of soap down the center of the mold. Repeat for each color, filling the mold as shown in the video below.
Step 10 – Let sit overnight to saponify.
Step 11 – The next day, unmold and cut your soap.
Step 12 – Cure for a minimum of 4 weeks.
Happy Soaping!
-Amanda Gail
